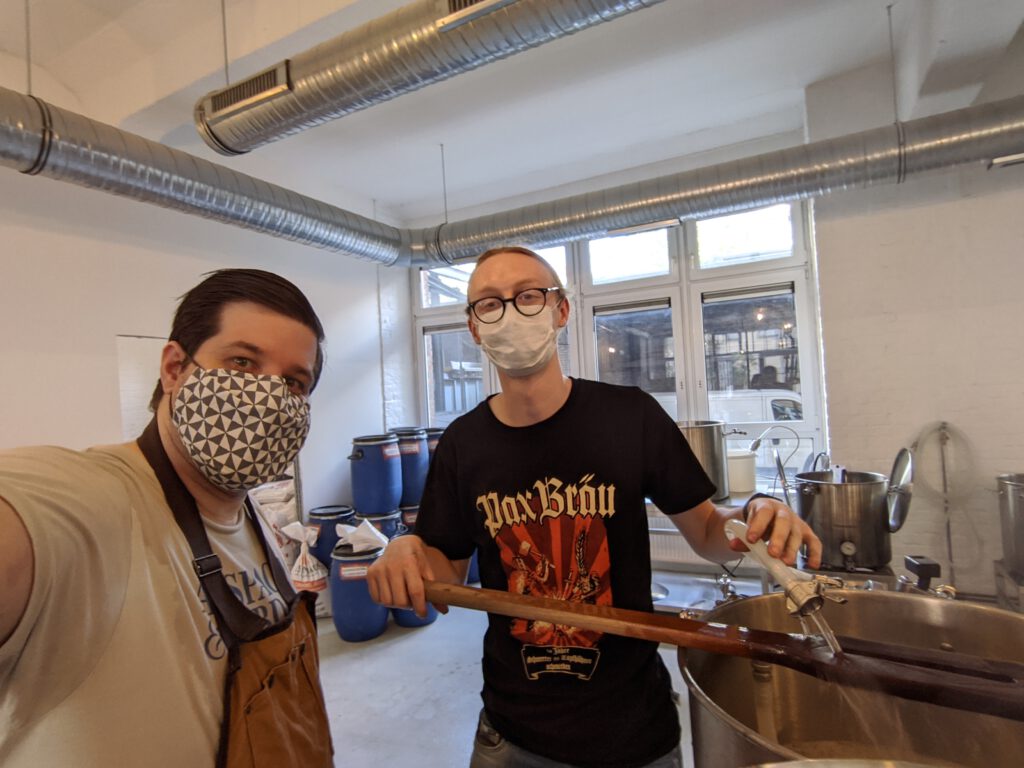
Berliner Weisse Summit 2019

Berlin is one of those places that have a rich brewing history, not just because of literally hundreds of breweries that used to brew beer all around the city, but also because it’s home to one of the few old German beer styles that have survived to this day.

While the style was neglected in the second half of the 20th century, and had a hard time to keep its place in Berlin’s beer landscape, the recent surge in interest through the craft beer movement has helped repopularize it. When a few years there were only a few breweries like Brewbaker and Bogk Bier that restarted brewing the style the traditional way, this has changed: with local breweries like BRLO, Vagabund, and Berliner Berg, the landscape of locally brewed Berliner Weisse has expanded dramatically.

The rise in popularity also shows in the beer festival landscape: 6 years ago, Sylvia Kopp initiated the Berliner Weisse Gipfel (Berliner Weisse Summit in English), a beer festival centered about Berliner Weisse, but it’s also open for other “wild and sour” beers. On June 1, the fifth edition of this beer festival (now organized by Berliner Weisse Kultur e.V.) took place, and the number of breweries visiting and exhibiting their beers has been even greater than in the years before. And not just from Berlin, but breweries from all the over Germany as well as the Netherlands and even the US took part.

There were too many beers to try, but some of my highlights were:

  • Berliner Berg Schiller Weisse, very refreshing and easy drinking, exactly how it should be as a summer beer. Cristal Peck, Berliner Berg’s brewmaster, is incredibly enthusiastic about the style, and seems to be doing plenty of experimentation to get the beer just perfect.
  • Schneeeule Marlene. Less sour than some might expect, but with plenty of funk. A great beer to age.
  • Nevel from the Netherlands brought two golden sour ales, one called Alm seasoned with “forgotten herbs” which they forage themselves, and another one called Minne which was seasoned with Japanese flowering quince. Very complex, very balanced, quite refreshing even at 5+% ABV.
  • Oedipus, also from the Netherlands, brought a few of their sour beer creations, which so far have always been great, and this year was no exception.
  • Felix from Orca Brau brought an unboiled Berliner Weisse of 14 months age as well as Bretted Brokantie, a bretted version of his farmhouse ale. Both beers were good on their own, but what stood out was that Felix also offered pouring blends, and it worked: a shot of his Berliner Weisse added to Bretted Brokantie really brightened it up.
  • August Schell from New Ulm, Minnesota was there with a few versions of their Berliner Weisse. I tried Ulmer Weisse, their version of American Weissbeer, an obscure American version of Berliner Weissbier that is mentioned in the 1901 book American Handy-Book of the Brewing, Malting and Auxilliary Trades. It worked beautifully, and I’m so glad that they revived this historic beer style and also brew traditional Berliner Weisse in a historically pretty authentic way. Jace Marti, August Schell’s assistant brewmaster, also did a presentation on how they brew Berliner Weisse, and he recently also recorded a podcast about the same topic.
  • Joe Stange brought bag-in-box Den Herberg Oude Lambiek, which was a real treat.

There were so many more breweries, but I couldn’t try them all.

Besides just visiting the beer festival, I also had the privilege of serving my own Berliner Weisse. This year, THE MASH PIT together with Berliner Weisse Kultur organized a homebrewing competiton just for Berliner Weisse, SLOSH SOUR. Since I wanted to get more into Weisse brewing, this was a great chance for me to take part. Unfortunately, it was a bit of a short notice period, so apparently one four or so people registered, and my beer was the only one that was actually submitted. The jury sampled the beer, and found it to be good, so I won the competition and could serve the beer to festival visitors. It was well received, and someone even took the time to add the beer on untappd!

All in all, I’m very happy this beer festival exists, and it’s become my favourite one in Berlin. This has been by far the most communicative, enthusiastic, exciting, and totally nerdy beer festival here in Berlin, and I’m especially glad about it because it’s one important part of the effort to keep this historic beer style alive.

My Beer At Slosh 2019

On May 4, Berlin’s homebrewing competition SLOSH happened at BRLO brewery. I took part with a beer myself. I didn’t win anything, but it was nevertheless a good event to serve samples of your own beer, drink beer, and talk homebrew.

In total, 37 or so homebrewers took part, serving 40-something different beers. The competition mode is different what you may know from other competititons: brewers were divided up into 8 different tables of 4 to 5 brewers each, labelled A to H. Every brewer and visitor could vote on the beers of another table, selecting their three favourites, giving them 3, 2, and 1 points respectively. Obviously, brewers were assigned different tables to vote on than their own.

At the end of round one, the points were added up, and the most popular beer of each table was selected for round two. In this second round, professional judges tasted the beers and selected an overall winner.

Of course, this mode makes it relatively hard to choose the “right” beer style to win over other homebrewers as well as visitors, as crowd pleasers would more likely be voted favourite than just technically well-executed beers. My table was a relatively strong one: besides my own beer, a Golden Ale inspired by our last year’s visit of New Zealand, there was a citrusy Pilsner (quite classic, but with a late addition of Pacifica hops), a Saison hopped with (IIRC) Galaxy hops, and a NEIPA. From what I’ve heard, the votes were relatively close, and in the end, the NEIPA won.

As for my NZ Golden Ale, it suffered from my “competition curse”. So far, not a single beer that I submitted to a competition worked out as intended: 4 years ago, a Czech pale lager (essentially a PU clone) got oxidized rather badly when bottling and therefore scored rather poorly. 3 years ago, two beers that I submitted (a Saison and an ESB) got mixed up, and the ESB also caught an infection when bottling. The Franconian-style Kellerbier (inspired by Mahrs aU) didn’t work out because the dry lager yeast I used stalled twice, once at lager temperature, and once at room temperature, and so the beer never finished and was dumped. And this year’s beer, that’s a story on its own…

When we brewed our NZ Golden Ale, everything went fine until we went to boil the wort. That’s when we found out that the immersion heater that we use to boil the wort had broken. I normally boil in an electric cooker, but the cooker’s own heating element is a bit too weak to bring 25+ liters of wort to a full boil. I nevertheless tried that, but even after 3 hours or so, I still couldn’t bring it higher than 90°C. So I had to improvise, and split up the wort between two electric cookers (the second one normally functions as a kettle to boil decoctions, and later on as hot liquor tank).

With pouring the wort back and forth, I think I unnecessarily oxidized the wort, making it darker that what I had planned for. Also, the boil-off rate was quite different, so instead of ending up with a 11°P wort, I instead got a 13.5°P wort.

I was also worried about possible underpitching, so I pitched two sachets of Nottingham Ale dry yeast. Unexpectedly, this caused a very rapid and intense fermentation which finished only 72 hours after pitching. The resulting beer had a slight taste of fusel alcohol, confirming my suspicion that the beer may have heated up too much during fermentation at room temperature. In total, I wasn’t super happy about the result, but nevertheless served it at yesterday’s competition.

The overall feedback was surprisingly positive, and fortunately for me, serving the beer cold masked the unpleasant fusel alcohol notes.

Here’s the recipe:

  • 4.5kg Pale Ale malt (it was kindly provided for free by competition sponsor Weyermann)
  • 20g East Kent Goldings (5% alpha acid) – 60 minutes boil
  • 40g Nelson Sauvin (10.8% alpha acid) – whirlpool
  • 20g Waimea (15.5% alpha acid) – whirlpool
  • 2 sachets of Nottinghame Ale dry yeast, rehydrated

Unlike most of my other brews, the mash was simple: just 60 minutes of mash at 67°C, then lautering, and then boiling for what was planned to be 60 minutes (see above). I used East Kent Goldings hops for bittering. After the end of the boil, I waited until the wort was down to 94°C to reduce the amount of additional bittering contributed by the whirlpool hopping, and then added the whirlpool hops for 20 minutes. I then transferred the wort to the fermenter, chilled it down to 20°C, pitched the yeast, and let it do its thing.

The outcome were 18 liters of Golden Ale with an OG of 13.5°P, and 5.7% ABV (stronger than your typical Golden Ale). The colour of the beer goes very much towards orange rather than gold, and probably due to the large amount of whirlpool hops, it also looks rather hazy and never dropped bright.

Early Evidence for Czech Brewing Categories

One system that is very particular to contemporary Czech beer is its categorization. Beers are mainly categorized in two dimensions, colour and strength.

The three main types of colour are světlé (pale), polotmavé (semi-dark), and tmavé (dark) or černé (black). The four types of strength are lehké (light beer at < 8°P), výčepní (draught beer >= 8°P and <11 °P), ležák (lager beer >= 11°P and <13°P) and speciál (specialty beer >= 13°P). Put in a matrix, you’d theoretically end up with 12 different types of beer.

From what Evan Rail told me, a lot of Czech breweries keep to a particular scheme: whereas the draught and lager beer at 10° and 12° would be typically pale, a 13° would often be semi-dark and a 14° would be dark or black. While there are certainly exceptions to it (Kozel Černý with its 10° comes to mind), it’s apparently something a lot of breweries stick to.

In my research, I have now found evidence that this practice may reach back well into the late 19th century. The book Die Malz- und Bierbereitung by E. Leyser, published in 1900, contains a whole section on Austrian brewing practices. At that time, the Austrian-Hungarian empire was still around, so Austrian brewing practices didn’t just cover what’s modern Austria, the small, mostly German-speaking country in Central Europe, but also those of the other Austrian crown lands, of which the most important one for beer brewing was Bohemia, a part of what’s the Czech Republic nowadays.

About the topic what beers are being brewed there, Leyser writes “In Bohemian and generally Austrian breweries, four types of beer are usually brewed: Abzugbier, Lagerbier, Exportbier und Märzenbier. Lager- and Exportbier are beers of the Pilsner type, Abzugbier is in its properties located between Pilsner and Vienna beer, and Märzenbier can be seen as a specialty beer which in its character turns out to be similar to Bavarian beers.”

Later, he describes which malts are used for these beers: “The kilning temperature of malt for Abzugbier is about 64°R [80°C], for Lager- and Exportbier 48°R [60°C] and for Märzen 72°R [90°C] resp. 77 to 80°R [96-100°C]. For Märzenbier, colouring malt is optionally used.”

To put this in context, we can correlate these temperature ranges with the typical kilning temperatures that the book mentions earlier on: 40 to 55°R for Bohemian malt and 60 to 70°R for Vienna malt. Unfortunately, Leyser mentions no particular kilning temperatures for Bavarian malts. But for that, we can use another source, Julius Thausing’s “Theorie und Praxis der Malzbereitung und Bierfabrikation” from 1888. It contains kilning temperatures for various malts, 45 to 60°R for Bohemian malt, 60-70°R for Vienna malt, and 65 to 80°R for Bavarian malt. This gives us a good impression what the colour of the different beers most likely would have been: Abzugbier had a colour like Vienna lager, but probably on the lighter side of it, while Lager- and Exportbier were golden beers. Märzen though must have been darker, probably a light brown, or even going into very dark or even black, in particular if colouring (roasted malt) was used.

What we now still need is some information on the particular strength of these beers. Leyser gives us quite a bit of information. In an example, it lists Abzugbier at 10.3°B (Balling, the direct predecessor of Plato), Lager at 11.3°B, Export at 12.3°B, and two different Märzen at 13°B and 14°B. With that, we get the impression of portfolio that roughly matches the common portfolio of beers from Czech breweries I described earlier: the lowest strength one, Abzugbier, was a pale-ish beer, somewhere between Pilsner and Vienna lager, while 11 and 12° beers were pale, Pilsner-type beers. The specialty beers, called Märzen, at 13 and 14°, were definitely darker, probably ranging from a pale brown to outright black when brewed with roasted malt.

While not explicitly stated, my interpretation of this is that one of the two Märzen was probably darker than the one. At least this would very much fit the differentiation of 13° polotmavý and 14° tmavý/černý.

This scheme wasn’t necessarily kept by all breweries in Austria. Leyser describes his observations made at “brewery B. in Austria”, which brewed a Viennese-style Schankbier at 11.5°B, a pale lager at 12.5°B, a Viennese-style Export-Lager at 13.5°B, a Märzen at 14.5°B and a Bock at 15.5°B. Unfortunately, we don’t learn anything about the colour of Märzen and Bock.

Nevertheless, it was refreshing to see a very systematic approach at categorizing beer like we know it from Czech brewing to be already used in the year 1900 or before, which is something that got lost in modern Austrian brewing since then, not least due to the fact that Vienna-style beers as well as dark lager beers have been mostly neglected (the modern Austrian equivalent of tmavý is often sickly sweet and almost undrinkable) and only recently have had a comeback of some sorts.

Why a Triple Decoction Mash Can Never Fail

I’m currently working on a new project, so as part of that, I’ve been reading quite a few historic descriptions of decoction mashing, in particular triple decoction which historic literature generally describes as the standard mash schedule in Bavaria, Bohemia and Austria around the 1870’s-1880’s.

When I played a bit with calculating the right mash volumes and the mash temperatures, I stumbled upon an interesting property of standard triple decoction: you can’t get it wrong. You actually have to actively try and sabotage it for it to fail.

This is a really cool thing because triple decoction sounds so ancient and complicated and easy to do wrong, and I think that scares a lot of people who then shy away from trying it out, but if you follow a few simple principles, you can’t go wrong at all.

These principles are:

  • always pull 1/3 of your total mash volume as decoction
  • pull the first and second decoction thick (i.e. mostly malt with little liquid), and the third decoction thin (i.e. mostly liquid)
  • bring each decoction to a boil, boil for a bit, then mix back into main mash
  • make sure you measure your volumes exactly, work quickly when mixing back, but also mix thoroughly
  • when doughing in, give the enzymes some time to get dissolved before starting to pull your first decoction

From a historic point of view, triple decoction was a reliable method to guide your mash through a number of particular ranges of rest temperatures to facilitate the activity of specific enzymes to convert long proteins into shorter protein chains and to convert starch into simple sugar molecules and shorter dextrin chains to both achieve a fermentable wort and a good mouthfeel, without requiring a thermometer.

And when you apply some maths, and draw a pretty graph, it really shows that all you need is the ability to vaguely judge your initial mash temperature to be between somewhere slightly above room temperature and slightly below tepid, and everything falls right into place, provided you follow the principles above.

The general equation to calculate your decoction volume is:

decoction volume = total mash volume * (target temperature – start temperature ) / ( boil temperature – start temperature)

If we assume the total mash volume to be 1, and our decoction volume to be 1/3, we can rewrite this to

target temperature = start temperature + 1/3 * (boil temperature – start temperature )

Based on this, we can easily calculate whole temperature series if all we do is repeatedly pull decoctions that are 1/3 of the whole mash volume, bring them to a boil, and mix them back.

I’ve done this in a spreadsheet, and put this into a nice temperature/time chart to indicate the time schedule your mash steps would follow. In total, I’ve done this with four different initial temperatures: 20, 25, 30 and 35 °C. This is a rather wide temperature range, but it’s also one where most people could easily and correctly judge whether a liquid is within that temperature range just by feeling with their finger or elbow. To keep the chart readable, I’ve only added the main mash temperature, and left out the temperature curves of the decoctions. To account for cooling during mixing back, especially so on a homebrew scale, I assumed a boiling temperature of 95 °C instead of 100 °C.

Triple Decoction Mash Temperatures

In addition, I’ve marked the temperature ranges in which you reasonably want to keep your mash to do a protein rest, as well as to give the alpha and beta amylases good conditions to do their work.

When you now look at the chart, it is very noticeable that at all stages (protein rest, maltose rest, saccharification rest/mash-out), all our target temperatures fall within the desired temperature ranges. The further we go, the more all the temperature curves converge towards a narrower and narrower temperature range, even though we started with a very wide one. This makes it very hard to screw up, even if you e.g. slightly miss your target temperature after your first decoction: you will still be well within the desired temperature range.

In addition to that, when you bring up your decoctions, in particular the first one, to a boil, they go through these temperature ranges as well. Some modern mash schedules recommend doing at least a saccharification rest to optimally use the enzymes that will later get destroyed, so you can have an infusion step mash within your decoction. Even if you don’t do it, unless you heat up very quickly, your decoction will at least partially convert when you heat it up.

And this is why your triple decoction mash can never fail: when bringing your decoctions to a boil, they will partially, if not mostly, convert, and then release more starch during the boil, which will then be fully converted in the main mash. There are two decoctions where the enzymes get into the right temperature range to convert starch into sugar, and there are two rest steps where the enzymes have even more time to convert more starch into sugar. Your whole mash goes through the right temperature so many times, it will eventually be fully converted. And to get into these right temperature ranges, all you need to do is follow a few simple principles. And if you want, you could even do this totally without a thermometer.

For most modern malts, triple decoction is possibly a bit to harsh, in particular when it comes to the extended protein rest which could potentially be very damaging to foam stability. For this, you can also employ an enhanced double decoction, in which you start at the same temperature as a triple decoction, but pull double the volume for the first decoction, and do a step mash of your first decoction before boiling it. That way you keep the intense treatment of your malt, but can keep the time within the protein rest range to an absolute minimum.

A Weekend in Bristol

Last year, my wife and I decided to go for a long weekend to Bristol, with the primary purpose of checking out the local beer scene. We had heard good things about it, not least due to Boak&Bailey blogging and tweeting about their adventures around Bristol pubs.

Our plan was to fly in from Berlin to Bristol on the Thursday, January 31, and return on Monday, February 4. On the day of flying to Bristol, we were slightly worried because of the weather, but in the end, the flight left Berlin-Schönefeld airport on time. On the way to Bristol though the captain announced that Bristol airport had been closed due to the snow (#snowmageddon, i.e. roughly 10cm of snow) – “but don’t worry, we anticipated that, and loaded up more fuel and are currently in waiting position over south Wales”. Great.

We eventually got diverted to Cardiff airport, which apparently still knew how to use a snow plough, but had to stay on the plane until it was decided that we were to get off the plane and be put into busses to bring us to Bristol airport.

Cardiff airport. Plenty of snow but still good enough to land.
The empty airspace over South-West England and Wales. The few planes left over Cornwall and Wales were en route overseas or much further North.

At Bristol airport, we managed to get another bus that drove us almost halfway back, into Bristol. We eventually reached our hotel at around 3am local time (only about 4 hours later than planned). After a short night, we decided to get some light breakfast at Hart’s Bakery near the train station. It’s one of those fancy hipster bakeries. It may seem hyped, but the hype is totally warranted. Fantastic baked goods, great coffee, but at the same time, the place was pretty packed, and we were lucky to get any seats.

The way back to the hotel brought us to the King’s Head. It was one of the pubs that I had earmarked as a must visit, as it serves Harvey’s Sussex Best. And of course that’s what we ordered. While not cheap, it tasted great, so we had a few more. I also tried whatever guest ale they had on, but forgot what it was. The interior of this pub is apparently historic, and it did have a nice enough atmosphere, save for the group of shouty lads blocking the space in front of the bar. Due to the rather long trip and the short night, we eventually needed some rest for our next stop in the evening: the Bridge Inn.

Prior to the trip, I had contacted Jessica & Ray aka Boak&Bailey whether they wanted to meet up for a wee drink, and they agreed. We met them at the Bridge Inn, a pub slightly too small but still feeling nice enough. The beer selection was good (I mostly remember the Dark Star Hophead), and we spent a good few hours there, chatting about all kinds of beer-related stuff. Since Boak&Bailey and I share an interest about Vienna lager, I had brought them a printed copy of my book as well as two samples of my home-brewed historic Vienna lager, the recipe of which is also straight out of my book. We eventually parted, mentioning that we’d be visiting the Drapers Arms, their local, the next day, together with my sister-in-law.

The chase for dinner on the Friday was less than glorious, and ended up being from a well-known golden-arched fast food chain.

The next day, we took an Uber to the Drapers Arms, as we were simply too lazy to use public transport. The Drapers Arms is a micropub, probably the latest trend in the British pub landscape: small freehouses with (usually) well-kept beer, run by people that care deeply about the atmosphere and the beer they serve. The Drapers was no exception: when we arrived, we were greeted by Jessica & Ray and a very long list of beers on a chalk board as well as a large stillage of casks.

As is common in micropubs, the beer was poured straight from the cask. To be honest, I can barely remember which beers were available. I think I basically had one of each, over a very long afternoon of chatting about Vienna lager and other beer stuff and just having great beer. Jessica & Ray mention the Drapers Arms regularly on social media, and it is indeed a fantastic place for people that just like good beer and a relaxed atmosphere. The two beers that I specifically remember were Butcombe Original, which Ray described as a “very classic 1970’s bitter”, and Tiley’s Special Bitter, which I think fell into a very similar category (even though the brewery’s history is much more recent). Both of these beers were sublime, and I’d very much like to have them again. Ray also surprised me with a hazy pale ale, full of tropical hop brightness, but none of that hop bite that I usually dislike about hazy, highly hopped beers. I really should take more notes what beers I’ve been drinking.

We eventually parted, and my wife, my sister-in-law and I went to the Annexe Inn, which was just a short 5 minute walk away from the Drapers Arms. Unfortunately, it was absolutely packed due to the Rugby, with a very loud, vape-scented and almost aggressive seeming atmosphere. Let’s just say there must have been a good reason why they served the beer for some people in plastic cups. We didn’t particularly enjoy that, but we still managed to have at least a pint of Landlord. When I queued for a second beer, as I wanted to try the St. Austell Proper Job, I was unfortunately told that they had run out of it. So the guy next to me suggested I should try the Landlord. “I know, I’ve just had it, but I want to try something different”. I eventually went for the London Pride, which was in equally great condition, and despite the surrounding and the plastic cup, a great joy to drink.

With our poor planning skills, we got a quick snack in the form of a bag of chips from a local fish&chips shop (I thought they were fantastic, crunchy and salted just right on the outside, fluffy in the middle with a great flavour, but my spud connoisseur wife thought they were just alright), and then reserved a table at an Italian not far from our hotel. So pizza and pasta and euro lager it was, and an early-ish night.

For the Sunday, we had planned to go to a market, which turned out to be super lame, so we went on to another pub we had earmarked: the Myrtle Tree. Looking it up online might be a bit confuse, as a lot of people themselves seem to confuse with another pub next to it, the Bag of Nails, the Bristol pub version of a cat café. The Myrtle Tree is not known for its cats, though, but two different things: horse racing and gravity-poured Bass. We went there specifically for the latter, as Bass has become rather a rarity and we’ve never had it before other than from keg. The Myrtle Tree was certainly rather different and unique: quite manky looking, not a lot of space, and most people there for the horse racing shown on the TV. People were very friendly, though, and we felt quite comfortable. And the beer… it was sublime. Like Ray had described Butcombe as a very classic-tasting bitter, the same associations came to my mind when I had the Bass. The maltiness, the hop bitterness, the fruity esters from the yeast, all played together extremely well and just left a fantastic impression.

Bass poured directly from the cask.

At the Myrtle Tree, we also first learned what seems to be thing in Bristol pubs on Sundays: free snacks for people to help themselves. We were asked whether we wanted to have mini scotch eggs, pork pies, or chicken drumsticks. If you don’t expect it, it can be frankly bizarre.

We eventually left this pub, not without a friendly send-off from the locals, and went for a second time to the King’s Head, which my sister-in-law hadn’t seen yet. As before, the Harvey’s was nice. After a quick nap at the hotel, we also made a second stop at the Bridge Inn, only to discover that they had a massive free cheese board. I like my cheese, but we had dinner plans (steak at Chomp), so I couldn’t indulge on it. As on the Friday, the Dark Star Hophead was great.

After dinner, we went for a quick last pint, which was the only real dud on our trip: the Old Fish Market, a Fuller’s pub which not only played live Jazz way too loud, but also served the lamest pint of Fuller’s ESB (it tasted like somebody had sucked all life out of it; not just stale, but outright dull) and, when ordering a glass of Sauvignon Blanc, poured the most expensive open wine from the menu, even though a much cheaper option of the same grape variety would’ve been available.

The Monday, our last day, was uneventful: we had breakfast, did some shopping of all the British things that we can’t easily get here in Germany, and eventually took the bus to the airport. When it comes to beer, Bristol airport was another disappointment, but then you can’t usually expect anything from an airport. They had three cask beers on, Doom Bar, Greene King IPA, and Butcombe, but refused to serve the Butcombe “because it pours funny”. Asking for clarifications, it was apparently hazy and weird-looking. Either dregs, or poor cellarmanship, I would guess. They had even run out of bottled Butcombe, so my wife got me a pint of cider (which I normally never have). The guy sitting next us, very obviously hung over and waiting for his flight to Switzerland, had ordered a pint of Doom Bar, and it also must have been so bad that he asked us whether we wanted to have a dodgy half-pint. We refused. He didn’t finish the pint and just left it.

The flight back was perfectly normal, and after immigration we got the direct train from Schönefeld airport to Berlin main train station.

All in all, my impression of Bristol and its beer was great. Okay, we pretty much only went there for the pubs, so I don’t think I can even claim I have properly seen Bristol, but I think it was very much worth the trip for all the pubs and all the nice beer, and I would totally go back, once we know how things will be post-Brexit.

Decoding the Colour of Historic Vienna Lager

Back in 2015, when I started looking more closely into the historic specifications of Vienna Lager, one question where I started speculating and couldn’t really get a good answer was the question of colour. I based this off historic records that I had found in one of Ron Pattinson’s books, “Decoction!“. The provided value of “6.3” (no units) seemed reasonably close to be SRM, but as Ron commented below my posting, the beer colour is not in SRM, and that he’s not sure what exactly it is.

Well, today I can proudly proclaim that I have finally discovered not only what the “6.3” means but also how the value relates the modern beer colour units like SRM or EBC.

The whole thing started with me finding the original source for the specs Ron had put in his book. In fact, I had found these specs reprinted in several other books, as well, but all of them lacked information what the colour value actually meant. The original source is an article in Dingler’s Polytechnisches Journal, “Untersuchung der Biere, die in Wien getrunken werden” [Examination of the beers that are being drunk in Vienna] by Professor Fr. Schwackhöfer, published in 1876. Underneath the rather long list of analyses (which is great because it gives us other clues; I’ll get back to that), almost at the end of the article, it briefly mentions the system that was used to determine the beer colour: a system called Stammer’sches Farbenmaß.

From what I could find out, the Stammer’sches Farbenmaß [Stammer’s colour measurement] was originally developed to grade the colour of sugars in the sugar industry. It was in use from the 1870’s to as late as the 1930’s. Quite a few similar systems like that existed. In English-speaking literature, it was often called Stammer’s colorimeter. It worked by comparing the solution to be tested(or in the case of beer, just the beer) with a standard glass plate. It consisted of two glass tubes. One tube was filled with the beer (or sugar solution), while the other one was covered with the standard glass plate. Both tubes were illuminated from the bottom, and a prism at the top allowed the user to compare how both the standard solution and the glass plate looked like. You could then lower an glass immersion rod into the solution until the colour and shade most closely matched the glass plate. The measurement of colour was then the number of millimeters you had lowered the immersion rod into your solution.

The tricky thing with Stammer’s colorimeter is that there are two values you can work with. You have the direct reading, i.e. the number of millimeters of immersion, and you have the colour value, which is 100 divided by the reading.

A more detailed description of Stammer’s colorimeter as well as other systems of that time can be found in the Handbook of Sugar Analysis by Charles Albert Browne.

The next thing I then had to find was a way of converting readings from Stammer’s colorimeter to other units. The only source I could find was the brief article “Conversion Curve for Lovibond’s Tintometer and Stammer’s Colorimeter“, published in 1914 by Carl A. Nowak in the Journal of Industrial and Engineering Chemistry. This is great, because Lovibond is a well-known scale that has historically been used to grade the colour of malt and beer, and is apparently still in use to a certain extent to grade malt colour. The article contains a chart that shows the relationship between Stammer’s colorimeter and Lovibond values.

The Y scale contains the value of Stammer’s Colorimeter, while the X scale contains the corresponding Lovibond value.

What is noticeable in the chart though is that there is an inverse relationship between these two: higher Stammer values correspond with lower Lovibond values, and vice versa. But what is the Stammer value exactly? We have two available, the reading, and its inverse, the colour value. That’s where the comprehensive list of analyses comes in handy. Not only does it contain various pale lager beers, it also contains colour values of beers that we know are most definitely dark beers, in particular Salvator with a colour value of 41.5, and a bottled Porter with a colour value of 40. So from that we know that the higher the value was, the darker the beer was.

Since the chart indicates that the lower the Stammer value in the chart, the darker the beer, we can derive that the chart contains the Stammer colour value, while the values in the analysis are the direct readings, i.e. the amount of millimeters the rod was immersed in the tested beer.

To convert the 6.3 reading to the Stammer colour value, we simply calculate 100 / 6.3 = 15.87, and look up the corresponding Lovibond value in the chart, which is about 4.6 to 4.7. In modern units, this is equivalent to 5.5-5.6 SRM, or 10.8-11 EBC.

So there we have it, the colour of historic Vienna Lager. It’s paler than the usual beer style guidelines will say about Vienna Lager, but it fits what I’ve been saying for quite a while, that historic Vienna Lager was most likely paler than its modern versions, and that the usual beer style guidelines don’t capture the historic examples.


The Water Profile for Vienna Lager

The last time I blogged about Vienna lager, I wrote down everything we know about the historic specifications of the beer style and how it was brewed in the last few decades of the 19th century. The only point that was speculation on my side was the water profile. I can now say that this has changed (kinda), because I found a source quantifying the chemical compounds in the brewing water of the Klein-Schwechater brewery.

By pure accident, I stumbled upon an analysis of the brewing water (well water) of the brewery in Klein-Schwechat, in the book “The Theory and Practice of the Preparation of Malt and the Fabrication of Beer, with Especial Reference to the Vienna Process of Brewing” by Julius E. Thausing. It’s actually the English translation of a German book. One problem with the analysis is that it doesn’t specify any units for most of the numbers. It does specify the amount of residue after the water has been evaporated (in grams), but that was it. Unlike the English translation, the German original at least references the original source other than just specifying the author, Lermer. The original source for this analysis is Dingler’s Polytechnisches Journal, volume 187.

This journal apparently has quite a bit of history. It was founded in 1820 by chemist Johann Gottfried Dingler, was published for 111 years, and covered all topics from agriculture, mining and metallurgy to machine construction, chemistry, geology, electrics, and many more subjects. For the history of engineering and technology, it is a great source. Fortunately, all of its volumes have been digitalized by Humboldt University in Berlin, and published online. So of course, we also have the original source of the water analysis available. You can find it here. Even though the original source is more detailed, and not only contains the water analysis of the brewing water of Klein-Schwechat but also water analysis of the old well and the river Schwechat, it is not in any way clearer regarding units than what we had in the English translation of Thausing’s book. At least we do learn that Klein-Schwechat brewery had two wells, an old one and a new one, and at the time of the article’s publishing, all brewing water was taken from the new well, which is the analysis that has been reprinted by Thausing.

So by itself, the analysis is unfortunately not really helpful. If anybody knows how to interpret the numbers, I’m grateful for any help with it.

As for the author of the analysis, Johann Karl (Carl in some sources) Lermer is quite the interesting person himself. He was hired in the 1860’s by Anton Dreher as brewery technician but apparently quickly rose the ranks and became head of Dreher’s Trieste brewery. In the Polytechnisches Journal, he published a number of articles. Given his background as conducting analyses at Dreher’s breweries, it gives an interesting insight into what were technical subjects industrial-scale lager breweries at that time were concerned about: chemical analysis of Lupulin, analysis of barley malt sprout, the issue of beerstone in pipes, the issue of mold in wooden fermenting vessels, the effects of freezing beer, malting experiments, or chemical analysis of hot break. A complete list of his contributions can be found here.

Besides the theoretical side, I’ve also been active on the practical side of Vienna lager brewing. Recently, we brewed a Vienna lager reasonably close to the historic specifications, with an OG of 13.4 °P (historical sources say 13 to 13.25 °P, the difference is due to a slighter greater mash efficiency), and 4.5 °P FG (which is close to the 4 to 4.25 °P you see in some historic sources), from 100% Vienna malt. One modification I made was the use of a double decoction mash instead of the more traditional triple decoction: I dough in at 38 to 40 °C and take a huge first decoction that brings temperature up to 65 °C. That way, the only protein rest is very briefly happening when heating up the first decoction. The second decoction then brings the temperature to 72-75 °C. That way, I skip an extensively long protein rest which wouldn’t exactly be productive with modern malts. I also deviated slightly from the hopping schedule, and only had one hop addition. I also made a slight mistake: my recipe in BeerSmith still had 3% alpha acid set for the Saazer hops, and I forgot to compensate for the 4.2% alpha acid Saazer hops that I had bought. So instead of 30 IBU, the resulting beer now has roughly 40 IBU. Oops.

Nevertheless, the outcome is nice: after 3 weeks of fermentation and many more weeks of cold lager, it’s just finished carbonating in the bottle and ready to drink. The bitterness is nicely counter-balanced with the residual sweetness coming from the low attenuation of the WLP820 lager yeast. Personally, I’m perfectly fine with the higher bitterness, even though it doesn’t 100% hit the original specs of the historic style. Even at 30 IBU, the beer would have enough bitterness to work nicely enough with sweetness. The 100% Vienna malt bring enough own malt flavour without making the beer cloying. All in all, not only a good example for the style, but also a reminder that for some beer styles, process is at least important as the careful choice of ingredients.

The Theory of Brewing Reinheitsgebot-Compliant Brut IPA

Watch out, NEIPA, there’s a new fad in town: Brut IPA. If you haven’t heard of it yet, Brut IPA is a new IPA-inspired beer style with a dry body, low bitterness, high hop flavour and aroma, and high carbonation. One core element of achieving such a dry and hoppy but not bitter beer is to only add hops during flame-out or whirlpool, to dry-hop in the fermenter, and most importantly, to use enzymes during fermentation to convert any remaining complex sugars into simple sugars that the yeast can turn into alcohol and carbon dioxide. This unique combination of dryness, hop aroma, and high carbonation apparently gives the beer a very unique mouthfeel and sensory experience otherwise only found in highly attenuated and carbonated styles like Saison.

Brut IPAs haven’t really arrived in Germany yet (I hear there’s one or two small breweries releasing some), so I haven’t had the chance to try any examples yet. But from everything I’ve read so far, professional brewers who have done the style emphasize the use of enzymes to produce a highly attenuated beer. The problem with brewing such a beer in Germany is that enzymes would be an additional ingredient that’s currently normally not allowed to be used in brewing. So how would a brewer get around it?

Maybe let’s just first talk what the enzymes really are about. Basically, malt contains enzymes, called amylase (alpha amylase and beta amylase, to be more precise) , that break long starch chains into shorter bits. Beta amylase chops off simple sugar on the end of such a starch chain, while alpha amylase chops it up at any point of the chain, producing shorter and shorter chains, eventually ending up with unfermentable dextrins, or given enough time, simple, fermentable sugars. It’s the foundation of mashing, really. These amylase enzymes work at an optimal temperature range, depending on the specific type, between roughly 60 and 75 °C.

The thing with enzymes in Brut IPAs is that they are often added to the wort at the beginning of or during fermentation. A common product for that is glucoamylase, also known as amyloglucosidase or gamma amylase. While its optimum temperature is about 65 °C, it will still work at normal fermentation temperature and help with chopping up the last few remaining dextrins into fermentable sugars.

So, if German pro-brewers aren’t allowed to use enzymes to add to the fermenting beer, how else would they be able to achieve such a highly attenuated beer? Fortunately, there’s a precedent in recent German beer history. In Germany, you used to be able to buy Diätbier (“diet bier”) until the use of the term was prohibited in 2012. Diätbier is essentially a fully attenuated beer with no carbohydrates in it left, and it used to be advertised to be suitable for diabetics. This of course ignored the fact that alcohol changes the way sugar is absorbed by the body, and was one of the reason why Diätbier is not a thing anymore. But how Diätbier was free from carbohydrates is what made it similar to Brut IPA. So if we wanted to brew a Brut IPA that complies with German beer legislation, all we needed to do was to brew it just like German brewers used to brew Diätbier. There are a few approaches, which I’ll describe here:

The crudest and simplest approach is to just add a certain amount of barley malt flour to the chilled wort or freshly fermenting beer. The amylase in the beer will get active and not only convert the starch from the barley malt flour, but also any remaining dextrins, and given enough time, produce a beer with no residual extract. The risk there is that not all the starch will actually get converted, and starches in the final beer can have a negative impact on the overall shelf stability.

A better way and slightly more sophisticated way is to just take some of the mash when it’s at 60 °C to make sure none of the enzymes have been damaged, lauter it, put the wort aside, and continue brewing as normal. When the main wort is chilled and yeast has been pitched, the wort put aside earlier can be added to it, and the enzymes now have time to convert the remaining complex sugars and dextrins.

But wort can easily spoil, so you can go even further and produce a sotrable malt extract that can be used as enzyme source in brewing by mashing in malt at up to 65 °C, lautering, chilling, and then fermenting it. Without a boil, none of the enzymes should get denatured. The resulting unboiled beer can then be filtered to free it from proteins and yeast and kept for a longer period of time. Since it’s beer, it can be blended with other beer and still totally be within the purity law. This method was even patented in the 1980’s to a German company.

Practically, it’s probably the easiest for homebrewers to use the unboiled wort method. I would consider using barley malt flour to be unsafe, not just because of the risk of introducing starches into beer, but also for a slight contamination risk. Fermenting and filtering an enzyme-rich wort is probably also not great for homebrewers as you need to plan ahead and actually have the equipment and facilities to filter and package the beer in an contaminant-free environment. So the easiest is just to take a bit of wort during the mash, set it aside, and then add it to the fermenter a few hours later.

There’s also another way of achieving such high attenuation: super-attenuating yeast. There exist variants of brewers yeast, such as Saccharomyces cerevisiae var. diastaticus, that produce their own glucoamylase to help with converting starches and dextrines. Saison yeast is a well-known example for this type of yeast. Unfortunately, most diastaticus yeasts are also known for producing phenolic off-flavours (they are “phenolic off-flavour positive”, or POF+). In Saisons, these phenols are appropriate, while in other beer styles, such as IPAs, where the hop flavour and aroma should shine, probably not so much. So far, there are only two known diastaticus strains that are POF- (i.e. don’t produce phenolic off-flavours), which are WLP026 (an English ale yeast) and WLP644 (a yeast that had previously been misidentified as Brettanomyces since it is known for producing some funky, Brett-like aromas and flavours). This method is probably most suitable if you want to produce a “Belgian-style” or funky Brut IPA.

So, to summarize, if you want to brew a Brut IPA, and for whatever reason, have to stick to German beer legislation, and can’t or don’t want to add enzymes to your beer, or you can’t buy any glucoamylase in your homebrew shop, here’s a method that has been used in the past to produce very dry, highly attenuated beers. Just be aware that I haven’t actually tried this method in practice. Not only is it slightly too warm to brew beer unless you have good temperature control, I also didn’t really have time recently to brew much. This is just based on theory I read about in German brewing books.

If you want to learn more about Brut IPA, there’s been quite a lot of good stuff out there recently.  The Craft Beer & Brewing Magazine‘s August-September 2018 issue has a focus on IPAs, with a great article specifically about Brut IPAs. The New To Brew blog also posted an article about how to design and brew Brut IPAs back in June. So if you want to brew the latest hyped sub-style of IPA, there’s plenty of material how to do it right.

Vienna Lager: Another Piece of the Puzzle

In several previous postings, I wrote about various details in my effort to reconstruct historic Vienna lager as it was brewed in the 19th century by Viennese breweries, in particular Anton Dreher’s Kleinschwechater Brauerei, and exported all over Europe.

In a posting about a month ago, I discerned various mashing methods as they were described in the 1887 book “Die Dampf-Brauerei. Eine Darstellung des gesammten Brauwesens nach dem neuesten Stande des Gewerbes” by Franz Cassian. Despite all the interesting information that I was able to get out of that book, I missed one particular table much earlier in the book that shows a brief but informative overview over how Munich lager, Vienna lager, and Bohemian lager are brewed.

(click on the image to expand)

While much of this information was already known to me, there are a few more interestings bits and pieces in there: it lists a hopping rate of 1.5 kg per 100 kg of malt (which, after some calculation, should be roughly equivalent to between 3.45 g/L and 3.75 g/L). We get a hop boil time (2 hours), and a more detailed hopping schedule: 1/3 of the hops are added to the first runnings (so-called first wort hopping), while the remaining hops are added 45 minutes before the end of the boil. Unfortunately, the same book describes this just a few pages afterwards in words, and there it says that 2/3 of the hops are added 45 minutes after the beginning of the boil. At a 2 hours boil, that would be 75 minutes before the end of the boil. Personally, I find the latter a bit more convincing.

It also lists 13° as the OG of Vienna lager. Both the OG and the hopping rate corroborate previous findings from other pieces of literature. While not exactly new information, it adds much more confidence to this information.

All in all, we’ve now got the following information about historic Vienna lager:

  • Original gravity: about 13 °P
  • ABV: about 4.6%
  • Final gravity: about 4 °P
  • Hopping rate: 3.3 to 3.6 g/L
  • Boil time 2 hours, with hop schedule as described above
  • Hop variety: Saaz
  • Base malt: Vienna malt
  • Mashing schedule: triple decoction (more details here)

This information is pretty complete, and in fact quite detailed. The only things I would say are not 100% clear are the exact specs of historic Vienna malt such as colour, modification and barley variety (which means we need to trust commercially available modern Vienna malt), and the brewing water that was used. To give you a hint about what the ground water in Schwechat is like, you can find current water analysis data online. This is of course not a guarantee that the water profile is authentic. The water may have changed through 150 years of modern farming, and the brewery could have treated the local water, which would change everything. In any case, the important point about the water is that Viennese water is not necessarily right, as Schwechat’s water source is separate from Vienna’s, and Vienna’s water sources have changed in the last 150 years.

Nevertheless, quite a lot of information about Vienna lager has now been confirmed through historic sources, some of them even through multiple sources, which gives me greater confidence than ever before that Vienna lager brewed based on the specs above is as close to the historic original as possible.

#BeeryLongReads2018: Revisiting Brewing Methods

More than two years ago, I wrote an article discerning accounts from 1834 about various brewing methods as they were practiced in Germany and Austria, in particular Munich, Augsburg, Prague and Vienna, as part of #BeeryLongReads. I even won great prizes for it:

A lot has happened since then, not only did I gain more experience in blogging, I also published a book about historic beer stuff. So this time, I want to follow up on the theme and discuss the specific differences in decoction mashing from a late 19th century point of view.

Franz Cassian published a book named “Die Dampf-Brauerei. Eine Darstellung des gesammten Brauwesens nach dem neuesten Stande des Gewerbes.” in 1887 in which he talks about the state of the art of brewing at that time. I only came across this book recently, and found it particularly interesting because it contains a whole section with nothing but detailed descriptions of various types of decoction mashing and their differences.

Now, if you’ve never heard of decoction mashing before, let me just quickly describe it to you: when brewing a beer, the brewer uses the enzymes in the malt combined with hot water to convert the starches in the malt to sugar. In order for the enzymes to work under optimal conditions, this needs to happen at certain temperatures. Different enzymes do their stuff at different temperatures, so if you wanted to activate the enzymes to do their thing, you’d go through these different temperature steps so that each of them can work under optimal conditions. There are essentially three different ways of doing this:

  1. by adding more hot or boiling water (which can make the mash very thin)
  2. by heating up the mash until the right temperature is reached (which can be tricky if you don’t have exact temperature control)
  3. by taking a part of the mash, boiling it, and mixing it back (which takes a long time and uses up a lot of energy and fuel)

Some brewing traditions even just keep a single temperature, but in some ways, they’re just a simplification of methods (1) and (2), which nowadays are called infusion mashing. Method (3) on the other hand is called decoction mashing and is very traditional in Bavaria, Bohemia and Austria to a certain extent, and only used to be practiced there. At the time, brewers swore by it and exclaimed that decoction mashing was absolutely essential for their local beer style. Even today, decoction mashing is necessary in the Czech Republic if a brewer wants to call their beer a Czech beer.

Modern German breweries have gone off it for various reasons though: energy efficiency is one of them, as infusion mashing doesn’t use up nearly as much energy. Another reason is the perceived lack of impact on quality. This is relatively controversial, but there exist studies that claim that the difference of decoction mashing and infusion mashing cannot be smelled or tasted by your average Joe beer consumer, while some brewers still swear by it. An experiment at Brulosophy that compared whether people could taste a difference between triple-decocted beer and one produced by single infusion mash failed to gain significance. Upon closer analytical examination, differences between worts and beers produced through infusion mashing resp. single, double and triple decoction mashing can be measured.

Decoction mashing nowadays is mostly distinguished by how many decoctions are pulled (1, 2 or 3), the consistency of the decoctions (thick or thin), and which temperature steps you’re going through. With modern brewing science as a helpful tool, we exactly know what’s happening at each temperature step and which enzymes will be the most active, and we know about the destructive force boiling a decoction wields on the diastatic power (the ability to convert starches to sugar) of the partial mash. Even though brewing science in the late 19th century had already made great progress, brewing as such was still a craft and findings of brewing science were not necessarily immediately incorporated into the knowledge and toolset of a brewer.

With this context, let’s look at what Franz Cassian wrote about the specific styles of decoction mashing. He distinguishes three main methods, the Munich method, the Viennese method, and the Bohemian method. He identifies two main differences between those three methods: first, the type of malt that is used in mashing, and second, the way the mash is treated in relation to temperature, the number and consistency of individual decoctions, as well as boiling durations. The rest of the operation, like boiling and chilling the wort as well as fermenting and lagering the beer, he says, are essentially the same.

He then goes on to describe the different malts that are used for each of these methods: for the Munich method, highly kilned malts are being used, while for the Viennese method, the malt used produces a beer with reddish-brown colour that is lighter than Munich beers. The malt itself is very aromatic. The typical malt for Bohemian beers, he writes, is very pale, leading to an almost wine-like colour of the beer. The malt is kilned as such low temperatures that the author describes them more as dried than kilned. He also mentions an interesting detail: some Munich breweries at that time had started kilning their malt to a lower temperature, and then adjusted the colour of the beer with Farbebier.

Farbebier, literally “colouring beer”, is an extremely dark beer made from large amounts of debittered roasted malt that can be used to adjust the colour of beer without imparting the beer with too much roasted aroma and flavour. Since it’s just beer, mixing Farbebier with pale beer was compliant with the Bavarian prohibition on adulterating beer or substituting its ingredients. It was the only legal food colouring for beer at that time, and still is to this day if you want to advertise your beer as being compliant to the Reinheitsgebot.

Kilning at lower temperatures has a good technical reason: it destroys fewer of the enzymes that are required for starch conversion, and makes the malt more convertible, which in turn makes it easier for brewers to work with it. Using Farbebier was really just for matching customer expectations. This is what some Munich breweries allegedly still do nowadays: American beer consumers expect an Oktoberfest beer to be amber-coloured instead of the golden colour of modern Festbier, so Farbebier is used to adjust the colour for the American exports without impacting the flavour.

This description with Bohemian malt being the palest, Munich malt being the darkest and Viennese malt being in-between these two also reflects modern base malts: many maltings in Germany will produce and trade at most three base malts: Munich malt, Vienna malt and Pilsner malt. Only a few specialty malt producers offer a wider range of base malts, from extra-pale malt even paler than Pilsner malt, to Pale Ale malts more suitable for British and American styles, to proprietary malt blends for producing wort with a distinct red hue.

Besides the malt, the even more important distinction in brewing methods was the mashing itself. For Bavarian mashing, the author distinguishes four types: the old Munich or old Bavarian method, the new Munich method, the Augsburg method, and the Franconian method.

Old Bavarian Method

At the time of the publication of this book, this method was barely in use anymore. It used to be common for primitive breweries with not a whole lot of equipment, so most of the work was manual labour: mashing and lautering was done in the same vessel, so mash tuns had a false bottom, stirring was only done by hand, and hot water was added through simple tubes attached on the side of the mash tun going underneath the false bottom. Underneath the mash/lauter tun, another vessel, the “Grand”, was installed, which was large enough to contain all the collected wort.

The brewing process worked like this: for every unit of malt (by weight), 8 times that amount in water was required. One third of the water is added to the mash tun, while the rest is slowly brought to a boil. While the water heats up, the malt is doughed in. Bringing the water to a boil could take 3 to 4 hours, so that’s how long the malt was doughed in at a cool temperature. When the water is boiling, it is added very slowly to the mash, and mixed thoroughly, so that when all the boiling water is mixed in, the mash is at a temperature of about 37 to 38 °C.

Immediately, one third of the volume (as a thick mash) is put back into the copper, and quickly brought to a boil, where it is boiled for half an hour and then slowly mixed back into the main mash while constantly stirring. The resulting temperature of the mash should then be at about 45 to 50 °C, and will be mashed (stirred) for another 15 minutes to liquefy the mash. Then again, a third of the volume (again a thick mash) is put into the copper, and boiled for 45 minutes, and again slowly mixed back to reach a mash temperature of 60 to 63 °C. More stirring happens for 15 minutes, until the the third decoction can happen:

A third of the mash, this time a thin mash, is put into the copper, boiled for 15 minutes, and – you should know the drill by now – slowly mix it back under constant stirring to reach 73 to 75 °C. With that, the mash boiling is concluded, but not the mash itself: it gets stirred until the mash is fully converted. Nowadays, this would be verified with an iodine test (an iodine solution turns from brown to blue if the mash still contains unconverted starches), but back then it was determined by how quickly the hard matter in a sample of the mash sinks down the bottom of the vessel.

When mashing is concluded, it rests so that the grains can sink to the bottom of the vessel, which usually takes 30 minutes. Then the tap of the lauter tun is opened and the first wort is drawn into buckets. The wort is poured back onto the mash until it runs clear, then the wort is collected in the Grand, from where it is transferred to the copper. The grains are then further rinsed by pouring hot water on top: 30 liters per 100 kg of malt. The resulting wort is added to the wort. More hot water is then poured on top of the grains, at 50 to 60 liters per 100 kg of malt, and the resulting wort is used to brew a weak beer called “Schöps”. The final runnings, at 30 to 40 liters per 100 kg of malt, are called the Glattwasser and are used for distilling.

New Munich Method

Unlike the old Bavarian method, the new Munich method employs more sophisticated equipment and a certain degree of automation using steam engines. Mash and lauter tuns are separate, and no full-sized Grand is used anymore. Doughing in happens with a pre-masher, and the initial mash temperature is reached by using water from a hot liquor tank. The Mash tun is set higher than other equipment so that decoctions can be transported using gravity, and mixed back using pumps. Like the old method, the new method still employs three decoctions, two thick ones and a final thin one. But due to the high degree of automation, exact timing, and a hot liquor tank that can be used for quick temperature corrections, the whole process is meant to be quicker and more precise and therefore more reproducible and repeatable.

The temperature steps are slightly different: the first decoction is drawn at 30 °C and boiled for 15 to 45 minutes to bring the mash to 55 °C. The second decoction is boiled for 15 to 45 minutes to bring the mash to 65 °C, and the final thin decoction is boiled for 30 to 45 minutes to bring the mash to 75 °C. The amount of sparge water that is used is two thirds of the initial water volume.

Augsburg Method

The typical method for Augsburg is “auf Satz brauen”, which is pretty unique and quite different from the class Bavarian or Munich decoction. The ratio of malt to water is 1:6 by weight. The mash tun has a false bottom, which gets covered with hop leafs to help prevent the mash from getting sour through lactic acid fermentation. Doughing in is done with so much cold water that the resulting mash is quite thin and easy to stir, and then rested for 4 to 5 hours. Then the cold malt extract (you probably can’t call it wort yet), called “kalter Satz”, is then drawn off and put aside. The rest of the water is brought to a boil, and then a few liters (unfortunately, the author is not very clear here) of the kalter Satz are added to the boiling water which makes the proteins in it coagulate. The proteins are removed, then the hot water is slowly mixed into the drained main mash that has been hacked up before. After all the hot water has been added, the kalter Satz is also mixed back into the main mash, after which it should have a temperature of 60 to 65 °C.

Then the mash is stirred until it has properly liquefied, only to rest 15 minutes before the “warmer Satz” is drawn off. This is just like lautering: first, wort is drawn off and poured back into the mash until it runs clear. Of all the wort, two thirds go into the copper, while one third is put aside. The wort in the copper is brought to a boil as slowly as possible to maximize the amount of hot break for a clearer wort. The boiling wort is poured back into the main mash, which again should have a temperature of about 65 °C. At that point, the mash shall be stirred to continue starch conversion.

Then, the thick portion of the mash is drawn off into the copper and boiled for up to 2 hours, until no more hot break appears on the surface. It is then mixed back into the main mash to get it up to 70 °C. Then, the wort that was set aside is added to the copper, hops are added, and the main mash is lautered and also added to the copper. This wort is then slowly brought to a boil.

In the late 19th century, this method was considered to be completely outdated, and only practiced in Augsburg. It was hard to scale it up to larger amounts, and suffered greatly from issues of the mash getting sour during the whole process. Beer made using it was described to be very full-bodied and less perishable than other Bavarian beers.

Franconian Method

The Franconian method, as described by Franz Cassian, is a single step decoction mash. The malt to wort ratio (by weight) is 1:6 to 1:7. Hot water of 80 to 85 °C is thoroughly mixed with the malt to reach about 60 to 65 °C and then rested until all hard matter has sunk to the bottom of the mash tun. Then, all the wort is drawn off and brought to a boil. All hot break is thoroughly removed, and the wort is boiled for 45 minutes. After that, it is mixed back into the mash to bring it up to 75 °C, and then thoroughly stirred and rested for an hour to continue conversion. Then a small amount of wort, about one tenth of the whole volume, is drawn off and used to boil the hops for about 30 minutes, then the rest of the wort is drawn off, added to the wort and hops, and boiled even longer (the author doesn’t specify how long, though).

Both beers brewed after the Augsburg and the Franconian method are sparged, but the resulting second runnings aren’t added to the first runnings, but rather made into a small beer called “Hansle” (if you’ve read my book, other sources also call this “Heinzele”).

Viennese Method

According to the author, this method may actually be used to produce more beer than with the Munich method, as it has been in use not only in Austria and Germany, but also in France, Norway, Russia, as well as breweries in North and South America. The method is described in very specific numbers:

To produce 100 liters of beer, 20 to 22 kg of malt are used. The total water amount is 200 liters, split up into the mash water (125 to 166 liters) and the sparge water (34 to 75 liters).

To malt is doughed in with 2/3 of the cold mash water, while 1/3 of the mash water is brought to a boil. It is stirred until it is completely smooth, and only then the boiling water is added to bring the mash to a temperature of 36 to 38 °C. The rest of the mash is done in a triple decoction fashion, with two thick decoctions and a thin decoction.

The first decoction is heated up, but not immediately brought to a boil: instead, it is rested at 70 to 75 °C for 10 to 35 minutes. After that, it is quickly brought to a boil, and boiled for 5 to 15 minutes. The boiling mash is then mixed back while thoroughly stirring to bring it to a temperature of 45 to 50 °C. After a rest of a few minutes, another third of the mash, again a thick mash, is drawn off and boiled for 20 to 50 minutes. It is then again mixed back. Unfortunately, the author doesn’t mention the expected temperature, but we can guess it to be in the range of 60 to 65 °C. For the final decoction, a larger amount of the whole mash, 40 to 50 %, is drawn off and brought to a boil so that the protein coagulates and the hot break settles. It is then mixed back into the main mash which should then have a temperature of about 75 °C. After some more stirring, the mash process is considered finished.

The mash is then lautered and sparged, and the wort is boiled with the hops. The stronger the beer, the more hops are used. Unfortunately, it doesn’t provide any specific hopping rates. Original gravities are mentioned, though: lager beers are generally at around 13 °P, while low-gravity draught beers are at 10 °P.

Bohemian Method

The Bohemian beers at that time are characterized as less malty, but rather more hop-aromatic. With every 100 kg of malt, 700 liters of water were used: 562 liters in the mash, 188 for sparging. 435 liters of water are used for doughing in at a temperature of 40 °C in winter, or 30 °C in summer. After doughing in is completed, 108 liters of boiling water are added to raise temperature. After a few minutes of rest, about one quarter of the thick mash are removed and very slowly heated up to 55 to 60 °C so that the enzymes can convert starches into sugar. After that, the decoction is brought to a boil, while the hot break gets skimmed. After 30 minutes of mashing, it is mixed back into the main mash, and stirred thoroughly to ensure a consistent temperature throughout the mash. After that, a second and third decoction are drawn and conducted exactly like the first thick decoction. After the third decoction has been mixed back, the overall temperature of the mash should be at 70 to 75 °C, and the mash is rested.

Wort is then drawn off until it is clear. The turbid part of the wort is boiled together with about 19 liters of water for a few minutes, and poured back into the mash. The mash is then moved to the lauter tan, and lautered and sparged with the sparge water that was set aside. The resulting wort is boiled with relatively large amounts of hops. Some of the hops are kept back and only added at the end of the boil to increase the amount of volatile hop aromas. This is what the author considered to be very specific for Bohemian beers and what gives them their typical hoppy aroma and flavour.

Discussion

While I’ve been working with lots of different sources when I was writing my book about historic German and Austrian beers, finding such a detailed description and comparison of various types of decoction mashing was quite refreshing. The Old Bavarian method is closest to what I’ve seen in plenty of other sources. I would describe it as the most classic method, pretty much fully based on manual labour, and done with an approach that employs volume measurements so that when done properly, no temperature measurements would be necessary. The ratio of malt to water is crazy high, though. For decoction brewing, today’s literature recommends ratios of 1:4 to 1:5. The text is not totally clear in all details, and might mean the total amount of water needed for the brew, i.e. including sparge water.

The Augsburg method, “Satz brauen” is truly odd. I’ve actually seen several different ways of how this is done, and the description as summarized above is actually the clearest one I’ve seen so far. It is possible to see why this method works and how it gets all starch converted, but it seems horribly inefficient, even in comparison to classic decoction mashing.

The Franconian method is closest to modern brewing. Any lower temperatures are skipped, and the main temperature is right at saccharification temperature. Other descriptions of the method that I’ve read don’t even employ a final thin decoction, but this might probably just be a local historic Bamberg variation.

The Viennese method on the other hand can be considered to be very modern: the specific method of resting the first decoction at about 70 °C for a while to let starches convert before the diastatic power is destroyed in the boil is a technique that even modern literature recommends, e.g. Narziß, though his recommended temperature is closer to 65 °C. And that’s what differentiates it from the classic Bavarian method: while it follows the same general pattern, it is more intricate, more detailed, more informed. It is built on top of the information that enzymes (though the book only says “diastase” without knowing what exactly enzymes are) break down starches to sugars at certain temperatures, and in the Viennese method, this is used to maximize fermentability of the wort. It is what I would call a modern method, this modernity would also be a good explanation for its success that is indicated by the author’s comment how internationally widespread the Viennese method has become.

The Bohemian method does seem a little bit more rustic, and differentiates itself by only using thick decoctions. It already builds upon the knowledge that starch conversion happens at certain temperatures, and leverages this knowledge to facilitate conversion when heating up individual decoctions. The specific mention of certain amounts of water does show that this has been thought through more and indicates that it closely follows a tried and tested recipe.

While not strictly related to the mash, the author discusses what distinguished Bohemian beers from other lager beers: the pale colour as well as the unique hopping method. I am not surprised that the author points out the use of late hopping techniques to introduce a brighter and more intense hop aroma. While we nowadays know that it’s the way of producing hop-aromatic beers, it is not a technique commonly seen in old brewing literature, where hops were only added for their preservative qualities as well as their bitterness.

All in all, this historic comparison of various mashing techniques from Bavaria, Bohemia and Austria was a great find. It gives a good insight into the shift from brewing as a craft involving manual labour (Old Bavarian method) to the industrialization of beer production supported by automation (New Munich method) and scientific methods (Viennese method). It also gives a good explanation what made Bohemian beer so unique and special in the late 19th century, which was also a reason why pale lager beers became the most widespread and successful type of beer in the world. And last but not least, it is also a good lesson for homebrewers how the decoction mashing process can be varied, in a form that’s even usable on a relatively small scale.

If you’re a homebrewer and you’ve never done a decoction: try it out. It may seem scary, but after brewing several beers with decoction mashing, I can safely say that it’s really hard to screw things up if you just follow the principle of doughing in, heating it up to about 40 °C, and then repeatedly taking out roughly a third of the mash, boiling it, and mixing it back. The mash goes through saccharification temperatures multiple times, and especially with enzyme-rich, “hot” malt that we have available nowadays, most of the conversion happens fast. I am a proponent of decoction mashing, because conceptually, it is really hard to screw up.