Tag Archives: decoction

How to brew Dortmunder Adambier

Okay, this is slightly random. Dortmunder Adambier is a beer style I never really looked into, and when I wrote my book Historic German and Austrian Beers for the Home Brewer, I didn’t really come across anything useful that resembled a recipe.

Earlier this week, I was contacted by homebrewer Jesper Hjortshøj who asked me whether I had any more information about how to brew this beer style. I admitted that I didn’t know anything, but it got me started to look into it how much I could find out. And quite quickly, I actually came across a description that was sufficient enough to derive a recipe from it.

The August 1869 issue of the Der Bierbrauer contains a whole article about the beer style with lots of information and details.

Dortmunder Adambier, apparently often also just called “Adam”, was a very strong dark wheat beer, often aged for years, and thus very clear, with a dark-red-brown colour. The malt made to brew it was kilned to only a pale colour, and no additional dark malts were used, so any colour of the beer came from “browned proteins”, as the article says it, basically from the long, intense boil the wort undergoes.

When Adambier was poured, it poured like oil, but without any foam, and had a sweet taste and vinous taste to it. It was brewed from either wheat or barley or a mix of both, but Adambier brewed from wheat was more full-bodied and tartaric, and thus preferred.

A very basic chemical analysis indicates that it was a very strong beer with 8.54% alcohol by weight (or 10.73% alcohol by volume), 21% residual extract by weight, 16.7°P apparent extract as measured on the saccharometer, and an attenuation of just 52.1%.

We also get more hints about the strength: one example that was analysed had an original gravity of 34.9°P. But there’s another hint: it says that in order to brew 20 Ohm (a local pre-metric volume measurement, I assumed the Brunswick Ohm of 144.8 liters) of Adambier, the same amount of malt is needed as for brewing 50 Ohm Bavarian beer. Assuming an OG of 12 to 13°P for Bavarian beer at the time, that means that Adambier brewed that way would have roughly have an OG of 30 to 32.5°P. Slightly lower than the analysed beer, but still roughly a similar strength.

We also learn about the hopping: for every Ohm of beer, 1 Pfund (500g) of “fine Bavarian” hops were used (later in the text, it even talks about 2 Pfund per Ohm). That converts to 3.45 g/l of hops, or if you use double the amount of hops, 6.9 g/l.

In 1869, the brewing this beer style was apparently already partially modernised, and it is implied that Bavarian triple decoction mashing was employed. But the old way of mashing it is already described, and it is wonky: the grist was doughed in in a kettle (the amount of liquor or the temperature of it isn’t documented), then left to rest, until it was brought to a boil. It takes 5 hours to bring the whole mash to a boil, during which probably the mash fully converted.

After the boil, the mash was moved to the mash tun, left to rest for 2 hours, and then wort was drawn off. At the same time, water was heated up for a second mash to draw off even more wort. Both worts were added to the kettle, hops were added, and the wort was boiled vigorously enough to effect good evaporation up to the desired strength.

The wort was then chilled to 10°C, and yeast was added at a pitch rate of 345 ml of yeast slurry per hectoliter. Primary fermentation took about 4 to 5 weeks. It was then filled into 10 Ohm casks, and the bunghole was kept open until the beer stopped ejecting yeast. It was then loosely bunged and aged for 2.5 to 3 years.

If I was to brew such a beer at home, I would approach it like this: since this requires producing such a strong wort, I would only brew half the amount of what I’d brew normally, let’s say 10 liters. I’d dough in my ingredients, Pilsner malt and pale wheat malt (the text says that pale malt was used, after all) with the same amount of liquor that I’d normally use for a 20 liter brew.

To make life slightly easier, I would probably just do a single-step infusion mash at 68°C or similar, or at most go for a double decoction, because I think most of the character of the beer will come from the long boil anyway, lauter, and then just go for a very long boil with 69 g of Hallertauer hops added to the first wort until I got the volume down to about 10 liters or the desired OG of somewhere between 30 and 35°P.

I would then chill down the wort, pitch whatever top-fermenting yeast I have on hand, and then just let it go. For sour beers, I have a dedicated fermenter that is contaminated, so any wort going into it probably gets infected with lacto and/or brett. Jesper said that when he brews his Adambier, he intends to pitch the dregs of a Schneeeule Berliner Weisse for just a small amount of lacto and brett, which is actually similar to my approach for the Old Ale that has been maturing for almost a year, where I simply pitched the dregs of two Gueuze bottles for secondary fermentation.

I hope that should give everyone who wants to brew a historically fairly accurate Adambier a good idea how to approach it and how to formulate a recipe for it. And thanks to Jesper for making me look more closely into the beer style!

My Kellerbier Experiment 2024

I don’t homebrew that much anymore these days, at most 4 to 5 times a year, and really only the beers that I absolutely want to brew and drink, which includes fixtures like an 8° Czech-style pale lager for summer and a Czech-style dark lager (which I brew with Ben) for winter. So there is really not that much room for experimentation, simply because I don’t have the time, the drinking capacity (I’m 40, it’s all about quality over quantity now) or the resources like free fridge space for fermentation and lagering.

But there have been a few things that I kept wanting to try out, all in the context of Franconian Kellerbier that I had learned about in the last year or so.

The first thing was when my friend Joe Stange visited Brauerei Knoblach just outside of Bamberg end of last year, and came back with the information that Knoblach generally uses a 1:1 blend of Pilsner and Vienna malt as a grist, that their water is fairly hard parts of the year, and that they rely on that hardness (though he couldn’t provide any concrete numbers, nor was I able to find any analytical data about the water of Schammelsdorf, where the brewery is located). I really like Knoblach’s beers, and I know its peculiar taste, so I was wondering whether these were two factors that played into it (Joe also published an excellent article about Kellerbier in the latest issue of Craft Beer & Brewing magazine which does not seem to be online yet, but as a subscriber myself, I highly recommend getting an online subscription).

The second thing was what I learned at HBCon earlier this year about how Mönchsambacher brewed their Weihnachts-Bock. The two things I wanted to incorporate were their mash profile (which I wrote about in July) and the water profile, which has roughly equivalent hardness of calcium and magnesium, and plenty of it as sulphates. Luckily, my local Berlin tap water has about the right calcium hardness, so all I needed to do was to add the right of magnesium to get my tap water roughly where the Mönchsambacher water is in terms of hardness and mineral composition.

The third point on my agenda of things to try out were Aurum hops, a relatively new German hop variety that was launched as more disease- and climate-resistant with a “highly fine” aroma. As a daughter of Tettnanger, it is meant to replace Tettnanger and similar varieties, and German hop growers as well as hop merchants have been promoting it because they see it as a variety better suited to climate change than others, including German landrace varieties. What I wanted to know was well the hops fared in a traditional style.

I know, integrating all three elements in a single experiment is not exactly scientific, as I don’t have a baseline to compare it to, nor do I isolate any of the multiple variables. I’ll still call it an experiment simply because I want to know what a beer brewed that way would taste like.

And that’s how I formulated the recipe:

The grist was simple: 50% Pilsner malt, and 50% Vienna malt. As hops, I used Aurum hops, with additions at 60 minutes for bittering, 25 minutes for flavour, and to the whirlpool for aroma, which should end up at 41 IBU (calculated):

  • 2.3 kg Pilsner malt
  • 2.3 kg Vienna malt
  • 30 g Aurum hops (5.8% alpha acid) @ 60 min
  • 30 g Aurum hops (5.8% alpha acid) @ 25 min
  • 40 g Aurum hops (5.8% alpha acid) @ whirlpool for 20 min

My tap water needed to be enriched with magnesium, so I simply spiked the mash with food-grade epsom salts (MgSO4). According to my calculations, 18g should get me the right amount of magnesium hardness for 22 liters of beer.

As yeast, I used the Fermentis S-23 dry yeast strain. It’s not my absolute favourite, but it’s all I had at hand, also because I had forgotten to order anything else, which is all my bloody fault.

When it came to mashing, I just stuck to the Mönchsambacher mash profile, a single decoction mash. I boiled the wort for 60 minutes, then cooled it down to 6°C, pitched the yeast, and let it ferment at 10°C until it was finished fermenting. I then ramped down the temperature to 1°C for a week, and bottled it with wort I had held back for bottle conditioning.

The resulting beer has an OG of 11.6°P (slightly lower than a typical Kellerbier, but that’s mainly from me buying the ingredients and only afterwards deciding on a mash profile with a slightly lower efficiency than my regular double decoction mash), and fermented down only to 3.5°P FG, resulting in just 4.3% ABV.

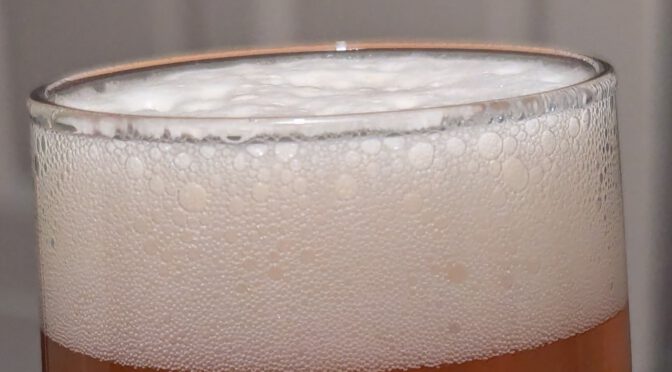
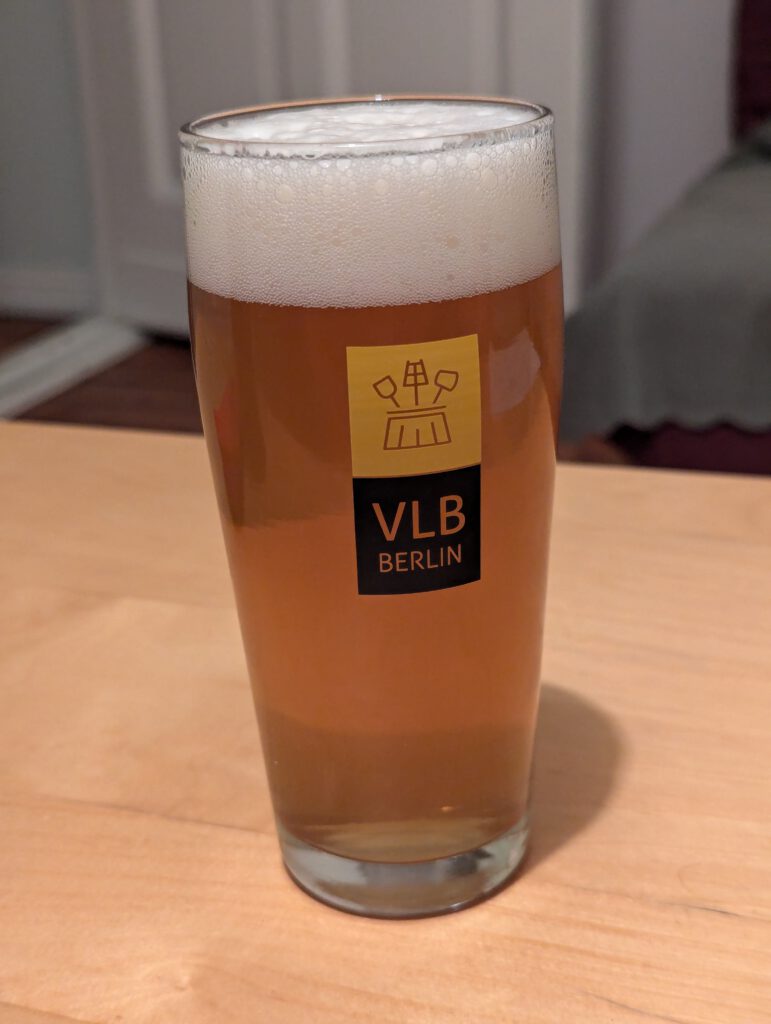
A Willibecher of the Kellerbier. The colour is golden with a tiny bit of haze, with a moderately dense head of foam on top.

A first taste test showed that the experiment, in my opinion, was successful: the beer has a minerality and a maltiness very much reminiscent of Knoblach and Mönchsambacher. The same goes for the bitterness: while it’s not quite as pronounced as I hoped it would be (I blame the low attenuation which probably leaves just enough residual sweetness to slightly mute it), as it is very lingering: even minutes after, that hop bitterness just stays on your tongue. Which is exactly what I appreciate so much about these beers.

As for the hop aroma of Aurum itself: there’s not that much there. Even though I kept the hops in the fridge and sealed at all times, it was not the freshest batch (2021 harvest), so that may have had an influence. Still, the bitterness the hops provide was quite on point.

Still, I’m very happy with the end result. I think it shows that the local water profile of Bamberg’s surrounding area has a large impact on the flavour of the beer, as long as breweries don’t soften or otherwise treat the water and embrace their very local water profile instead (which is one of the points that Joe makes in his article).

Even the yeast played out alright: I didn’t like S-23 in the past because it can produce rather fruity fermentation byproducts. In this case, the beer came out fairly clean, just with a high final gravity. In retrospect, that actually wasn’t too surprising, as S-23 is the closest known relative of the Wyeast 2001 strain, which is purported to be the Pilsner Urquell “H” strain, and is also known for relatively low attenuation.

My take-aways of this brew are the following:

Hard water, especially similar to the Mönchsambacher water profile, can get you a flavour profile in beer that is similar to the slightly rustic flavour profiles of beers like Mönchsambacher, Knoblach and others in the region.

The combination of Pilsner and Vienna malt probably adds to that rustic character.

A lower attenuation seems to help with the style, but another experiment to try out a more highly attenuating yeast should bring more clarity.

Aurum hops are probably okay for standard German styles, but also require more experimentation to understand their exact aroma potential and how to use them. A more recent harvest would be great to try next time. I generally support the idea of hop varieties that are better suited to climate change (which is an inevitability that will hit the brewing industry hard in the decades to come, so good on German hop breeders to be as forward-thinking as that), as long as we understand well enough how to apply the hops to get the same aromas and flavours as with more traditional varieties.

The Brilliance of Mönchsambacher’s Mash Profile

Yesterday, I brewed a Kellerbier, a recipe that I had developed myself but was based on a number of inspirations that I picked up over the last year, such as water profile, mash profile and ingredients.

The grist I chose was based on what I had heard about Knoblach, as they apparently use 50% Pilsner and 50% Vienna malt in their pale lagers. I just liked the idea of adding that bit more malt complexity to a pale beer.

The water profile was based on what Stefan Zehendner talked about at HBCon 2024. Fortunately, my Berlin tap water is already as hard as it should be on the calcium side, all I had to do was to add magnesium. Epsom salts are the way to do that.

The hops I chose were Aurum, a relatively new variety (first approved in 2020 and probably a bit lost in the whole COVID troubles) that is a daughter of Tettnanger with a “highly fine” hop aroma. It apparently has a high disease resistance and better agronomic properties in hotter, drier climates. From what I remember reading, it is expected to take over other varieties like Tradition and Perle, so I thought I’d better try it out now.

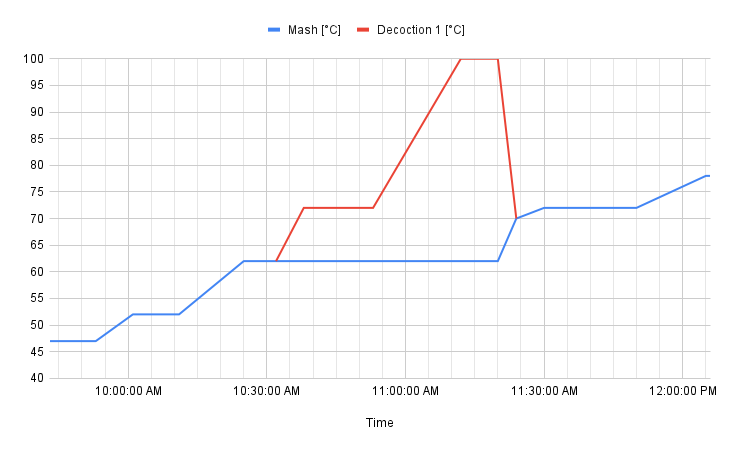
And finally, the mash profile: instead of doing my typical double decoction, I thought I’d try out the Mönchsambacher mash profile Stefan Zehendner described at HBCon 2024. Only when I actually used it, I realised how low-key brilliant it is. It basically goes like a normal multi-step mash: start with a protein rest, then heat up to 62°C for the beta amylase to do much of the conversion, followed by a rest at 72°C for the alpha amylase. This forms dextrins for body and also gets glycoproteins into solution for better head retention. Finish by heating up the mash to denature most of the enzymes.

If this is done as a multi-step infusion mash, the temperature steps are simple done by heating up the mash and stirring. The difference at Mönchsambacher is that the step from 62°C to 72°C is done as a decoction instead: about a third of the volume is drawn off and heated up, briefly rested at 72°C for 15 minutes, then brought to a boil and boiled for 5 minutes until it is mixed back into the main mash. The main mash still remains at 62°C until mixing back.

A time/temperature diagram that illustrates the single decoction mash profile that I used.

So what’s so brilliant about it? Well, the whole mash overall takes about the same time, no matter whether done as multi-step infusion mash or as single decoction mash. But most importantly, a part of the mash is boiled, causing Maillard reaction products to be formed. It’s really the best of both worlds: more Maillard products while not spending most of the brew day on extensively boiling decoctions.

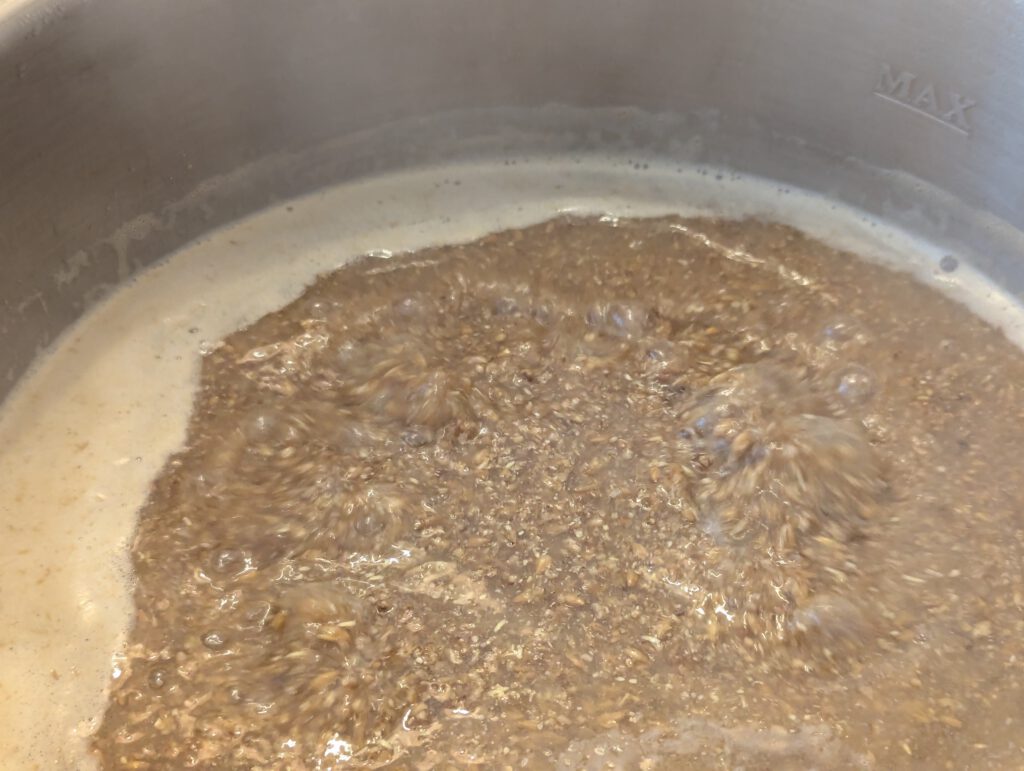
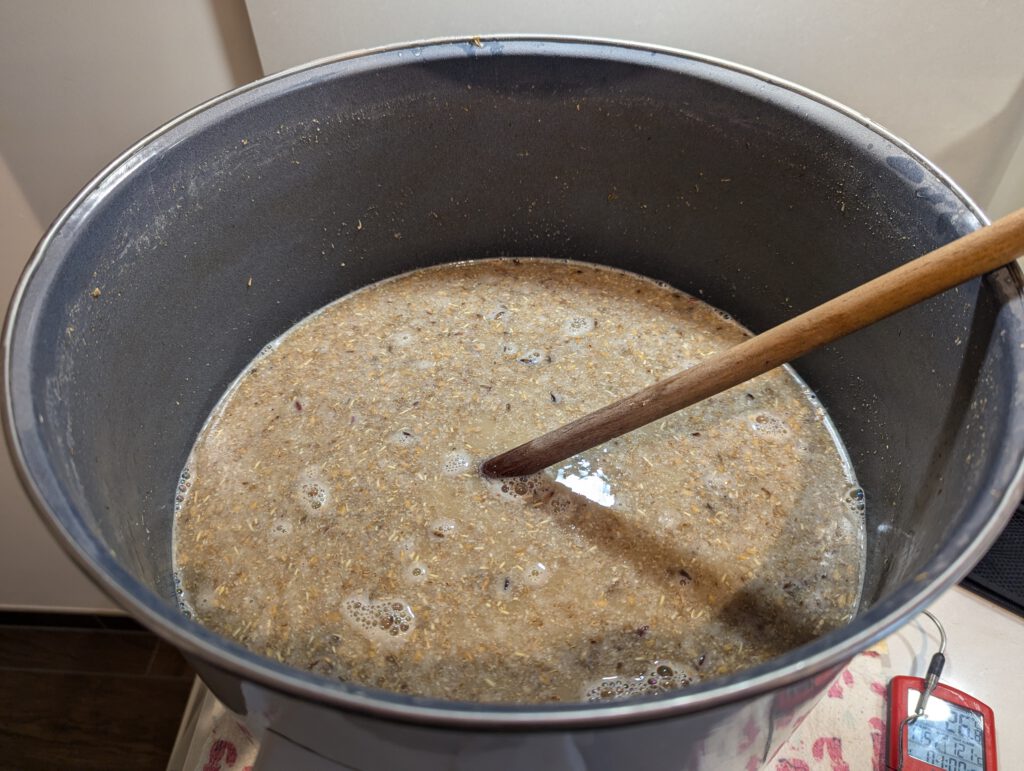
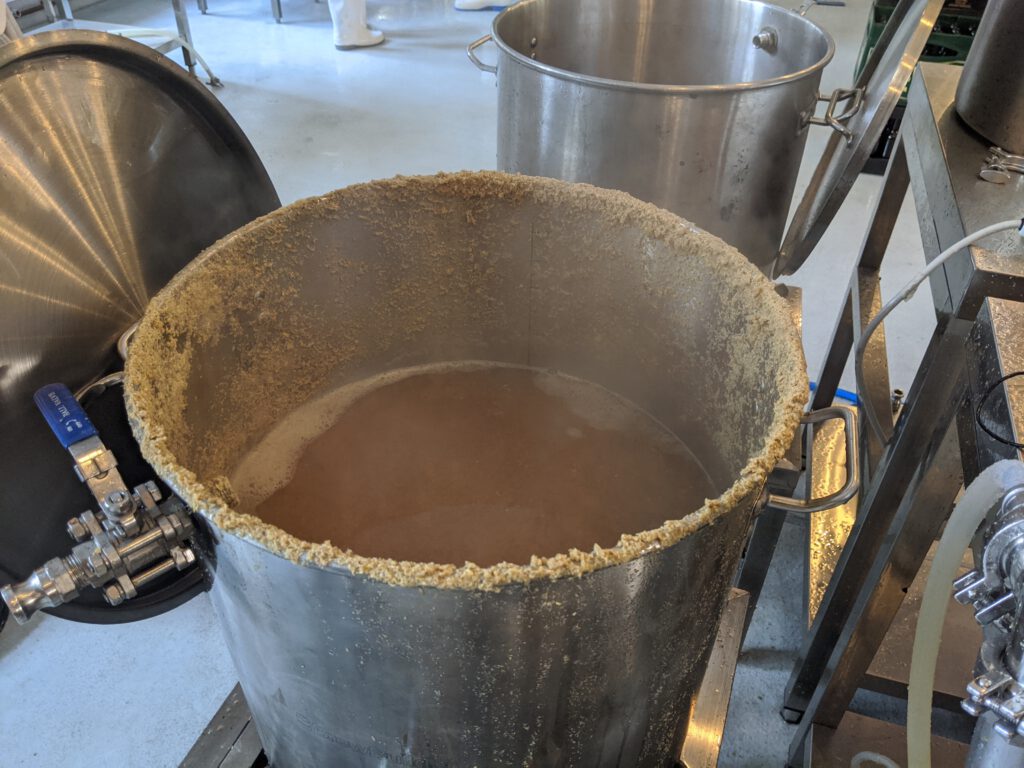
The decoction portion of the mash, while boiling.
The main mash, visibly paler than the boiling decoction portion.
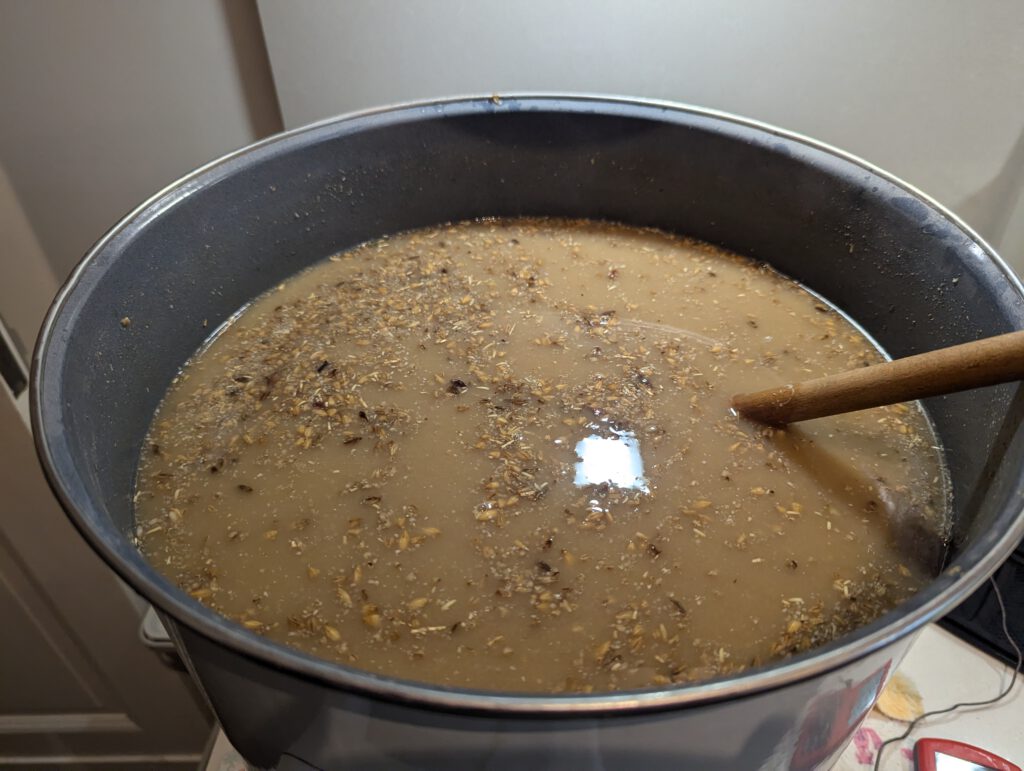
The main mash after the decoction portion has been mixed back in, noticeably darker than the main mash before mixing back.

So what’s the downside? Well, efficiency. I’ve not noticed any significant increase in efficiency between multi-step infusion mash and single decoction mash. The enhanced double decoction (which involves boiling two thirds of the whole mash) I normally on the other hand use gives me a bump of about 4-5 percentage points in efficiency. To compensate for that, I just need to buy 10% more in malt. At homebrew scale, those additional costs are very manageable (about €1).

This very positive experience made me rethink my approach to decoction mashing for German beer styles. I think I will stick to double decoction as a mash profile for Czech styles for maximum intensity, but for German styles, single decoction seems absolutely sufficient and saves me 1 to 1.5 hours of time.

Lager Beer Made In USA, Part 3: Live Oak, Trailblazers of Texas Craft Beer

This is the third part in my series about some of the excellent lager beer that I had on our trip to the US in June 2024. After almost a week in Chicago, we flew to Austin, TX for a change in scenery and culture. While a big part of our visit to Austin was about experiencing Texas barbecue, we still visited a few of breweries, one of which especially stood out.

Live Oak Brewing Company (Del Valle, TX): Trailblazers of Texas Craft Beer

There are others who have told the story of Live Oak, located just outside Austin, TX, much better than I ever could, like Ruvani de Silva, who called it “Bamberg on the Colorado” in her article for Good Beer Hunting from 2022.

We had actually gotten in touch with Ruvani a few months before our trip and said we’d meet up for a few beers. As things worked out, we agreed to meet her and her husband Justin at Live Oak. Parallel to that, Tom Beckmann of Goldfinger also gave me the contact details of Dusan Kwiatkowski, Live Oak’s head brewer. Arriving at the brewery, we were greeted by Dusan and quickly joined by Chip McElroy, one of Live Oak’s co-founders. This all very quickly turned into a conversation of beer nerds talking about beer nerd things, followed by even more beer nerd talk when Ruvani and Justin arrived.

Beer-nerd alert!!A fab night chatting all things beer history, styles, ingredients & culture with fellow beer writer @akrennmair.bsky.social ,his lovely wife @louise.krennmair.bsky.social & @LiveOakBrewing ‘s dream-team Chip & Dusan, while tucking into their ever-brilliant brews – cheers y’all!🤠🍻👍🏽

[image or embed]

— Amethyst Heels / Ruvani de Silva (@amethystheels.bsky.social) Jun 7, 2024 at 6:06 PM

I had brought a bottle of Knoblach Hell for Ruvani as a small gift from Germany, and she decided to share it with everyone, while I was asked to sign the brewery’s copy of my Vienna Lager book.

Dusan and Chip were so nice to invite us again the next day to actually show us around the brewery and hang out a bit more. Dusan even dropped us off at the Airbnb we were staying and picked us up again, as he happened to live basically around the corner.

Live Oak is a true trailblazer of Texas craft beer. When they started out in 1997, they basically had to make things work with the little funding they had, in a state that at the time did not have much microbrewing going on yet (to this day, Live Oak is Texas’ 7th-oldest operating brewery).

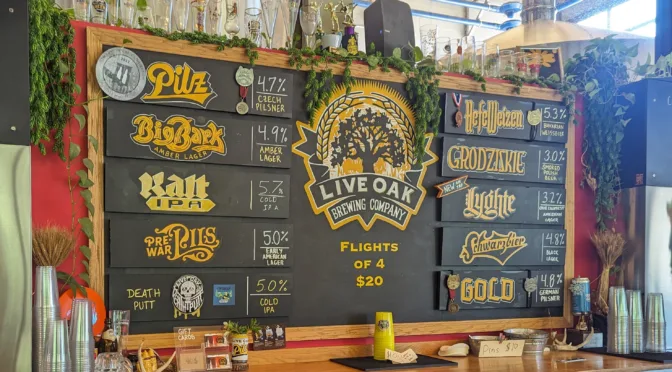
And what they were doing seemed very unusual at the time, namely to have a lager-focused brewery. To this day, Live Oak’s flagship beer is Pilz, a Czech-style pale lager, and they started out with just that beer because it was what the co-founders Chip McElroy and Brian “Swifty” Peters wanted to drink. Since then, the range of beer has grown substantially, but the focus on lager and Central European beer styles is still there (even the two IPAs on the menu when we visited were bottom-fermented Cold IPAs).

The first beer I had at the brewery was Big Bark. They call it an amber lager but it really is a Vienna Lager, and a pretty good one, too. Pilz was equally good, and even better straight from the Zwickel, which is how Chip served it to us.

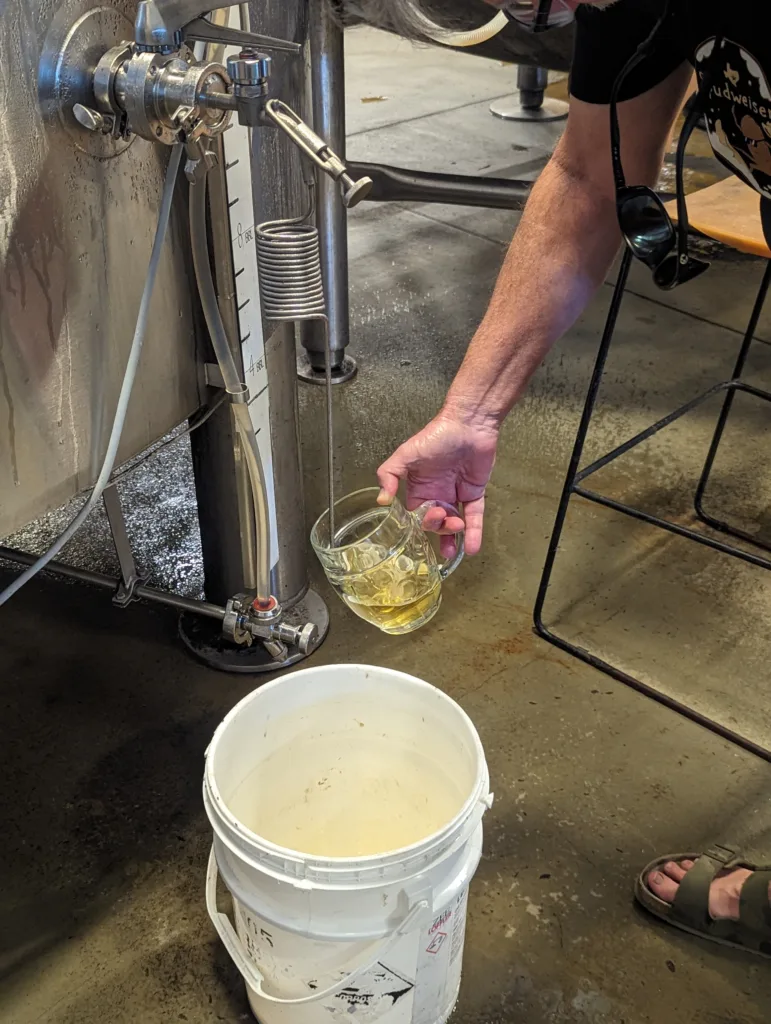
Chip MyElroy pouring Live Oak Pilz directly from a tank into a Tübinger glass. Please note Chip's t-shirt saying "Spudweiser", a potato adjunct lager that they had brewed.
Chip MyElroy pouring Live Oak Pilz directly from a tank into a Tübinger glass. Please note Chip’s t-shirt saying “Spudweiser”, a potato adjunct lager that they had brewed.

I tried all the classic styles, and they were all as good as they could be. The Hefeweizen caught me out in how poor my tasting skills are, as I misperceived the clove as banana. The Grodziskie at 3.0% ABV was absolutely on point, while the Schwarzbier captured the essence of the style: definitely a lot more flavourful and complex than Köstritzer, probably the baseline for the style, without getting too malty or full-bodied and/or verging into Czech Dark Lager territory (like some Franconian examples such as Neder Schwarze Anna do). Gold is their German Pilsner that I also couldn’t fault. Two friends of mine had told me beforehand that they actually preferred Live Oak Gold to Live Oak Pilz, and I get why. Personally, I found both equally good

Their latest beer on tap was Lyghte, a 3.2% American Light Lager, and it was absolutely gorgeous (for the style). Just the perfect lower-ABV beer for the summer heat in Texas, and unlike the classic big brewery brand examples of the style, full of flavour.

One thing I found particularly interesting was how both Chip and Dusan were drinking their own beer. More than once, Chip ordered a “Pilziskie”, a pour of half Pilz and half Grodziskie. I of course also had to try that, and yes, I get the appeal: just a hint of smoke (the pure Grodziskie doesn’t have much smoke aroma in the first place), and slightly less alcohol than Pilz. Dusan on the other hand drank a “Bark Lyghte” when he welcomed us, a blend of Big Bark and the new Lyghte. I found that one even better, as the malt character of Big Bark was still there, just as an overall lighter beer. Lower-ABV Vienna Lager, aka Abzugbier, was a thing after all (and still is if you brew it yourself). Louise suggested a “Spud Lyghte” blend if they ever brew their “Spudweiser” potato beer again.

As for being a trailblazing brewery, Live Oak was also very early in brewing a Grodziskie, and even brewed a collaboration once with Browar Grodzisk in Poland back in 2018. They even went all to way to specifically use Nowotomyski hops, a Polish hop variety that had been on the brink of extinction. Live Oak have since then formed a closer relationship to Polish hop-growers and hop-breeders, also had some of them over for a visit in Austin, and brew a seasonal Polish-style Pils called “Piwko Pils” using Polish hops. Stan Hieronymus’ 2019 article about Grodziskie tells us even more about Live Oak’s approach to the beer style.

Like most lager-focused breweries, Live Oak also love their decoction mashing. Their kit is not optimal for it, as they have a setup of a heatable mash tun, a lauter tun and a kettle. They actually use the mash tun for boiling the decoctions, but it means extra effort, as for every decoction, the portion of the mash not to be boiled needs to be pumped over into the lauter tun, then the decoction needs to be brought to a boil, then pumped over into the lauter tun, and finally the whole mash needs to be pumped back into the mash tun. It makes the process last quite a bit longer, but as Chip and Dusan said, it’s definitely worth it. They hope to eventually extend the brewery with a smaller kettle dedicated to just boiling decoctions which should significantly improve the brewing process and turnaround times.

Having been a trailblazer of Texas craft beer, Live Oak probably felt it the most how COVID and places serving draft beer basically shutting down completely leveled the field within the industry. When Live Oak started out, they had a hard time getting their beer into bars, and it was a lot of work for them to establish themselves on the market. Chip said that most of their draft accounts got wiped out, and instead of being one of only very few craft beer options in the state of Texas when they started out, post-COVID they now have to compete with 60+ other breweries to get their beers back into bars and restaurants. The trend towards drinking at home during COVID only partially covered the loss in draft beer business, and Live Oak still isn’t at pre-COVID production volumes.

Live Oak are still firmly rooted in their local community, though. Texas supermarket chain H-E-B is apparently their biggest customer (when we went shopping there once, I bought a six pack of Big Bark), while both barbecue places we went to, Franklin Barbecue and Micklethwait Craft Meats, had Live Oak beers on offer (for the record, I had Lone Star at Franklin because it’s probably the most iconic Texan beer and so I just had to have it at one of the best barbecue restaurants in the state of Texas, and Stiegl Grapefruit Radler at Micklethwait because it was just so incredibly hot).

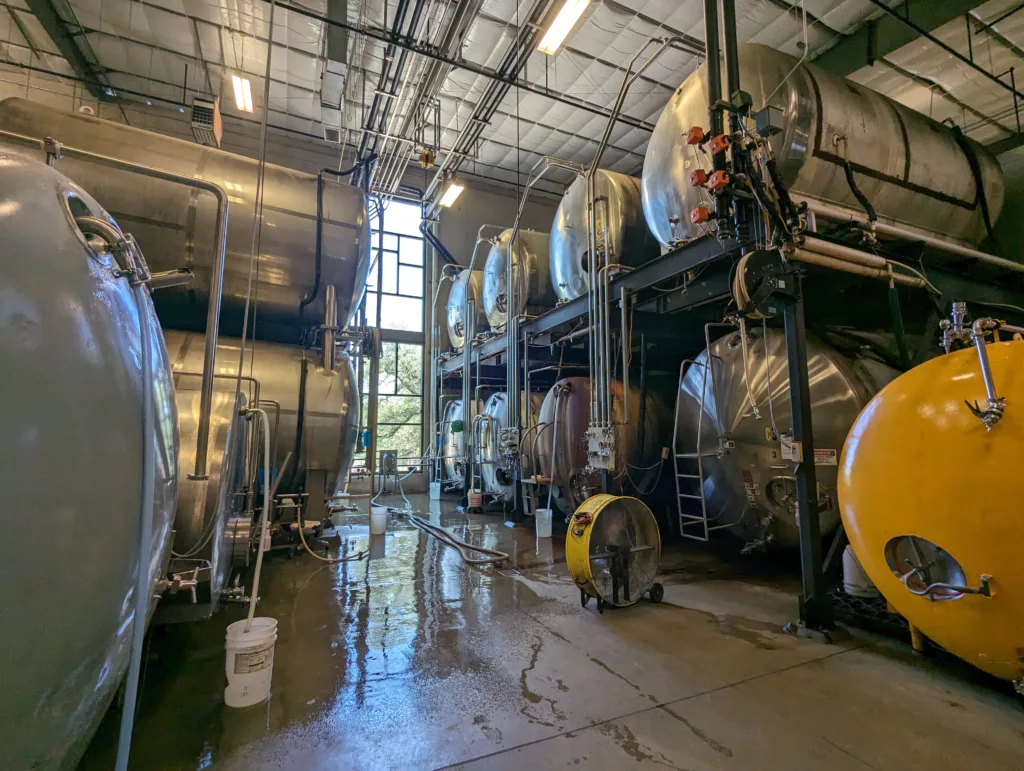
Lots of horizontal lagering tanks at Live Oak.

If you’re a subscriber to Craft Beer & Brewing magazine, Live Oak have published recipes to two of their beers in the magazine, in particular for their Grodziskie and for Schwarzer Rauch, their smoked Schwarzbier.

And even totally outside the topic of beer, Live Oak’s taproom is absolutely worth a visit. There’s a food truck there, a large outdoor seating area, and if you’re into Disc Golf (to be honest, I’ve not heard of it before visiting Live Oak), they have a large Disc Golf course, designed by head brewer Dusan.

In any case, Live Oak Brewing just outside of Austin is absolutely worth a visit, and was one of my top 4 breweries that I visited in the US.

Lager Beer Made In USA, Part 1: Dovetail, Franconian at Heart

My wife and I spent the first two weeks of June 2024 in the US for our holiday. I got this trip as a gift for my 40th birthday last year from my lovely wife (lucky me!): we started in Chicago, IL, then went to Austin, TX, and finished the trip with a few days in Boston, MA.

I could tell you all the details of my trip, and how absolutely amazing it was, but this is not a travel blog. I rather want to talk about beer. More specifically, about lager beer, because that’s what interests me, and that’s what I want to drink. So that’s what I did: lager beers of whatever style available was my first choice when ordering beer in the US. I had plenty of excellent ones, some good ones, some okay ones, and some bland and boring ones. So let me tell you about the outstanding ones, about 4 breweries that I was very much interested in from the start, and which did not disappoint. This is part 1 of a series of articles that I intend to publish in the next few weeks.

Dovetail (Chicago): Franconian at Heart

I had heard about Dovetail quite a few years ago, everyone I know who had visited there had told me that their beers were excellent, so naturally, I just had to go there as well. As I had previously communicated with them by email, I mentioned my intention to visit and say hello, and was invited for a tour around the brewery.

On our first full day in Chicago, our plan was to watch a baseball game (Cubs v Phillies) and then to visit the brewery for a few beers afterwards (Dovetail isn’t far away from Wrigley Field, the Cubs’ gorgeous historic stadium), which is exactly what we did. After ordering our beers (Vienna Lager for me, of course), we were greeted by Jenny Pfäfflin (one of Dovetail’s employees who I’ve known on social media for years) and Hagen Dost and Bill Wesselink, the brewery founders. We were chatting and trying out the beers. By coincidence, another group of people from Canada also visited the brewery to meet Hagen et al, so we also got to say hello to them. It was a pleasant surprise to discover Jordan St. John in the group, who I had followed online for years. The beer world seems so small when something like that happens.

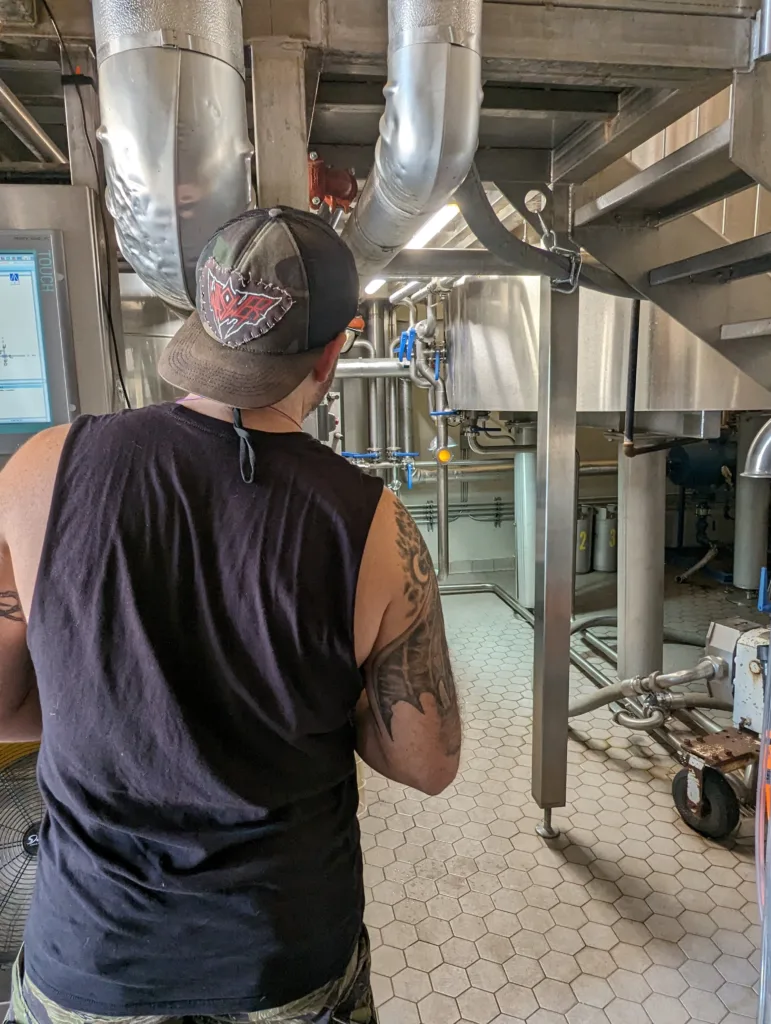
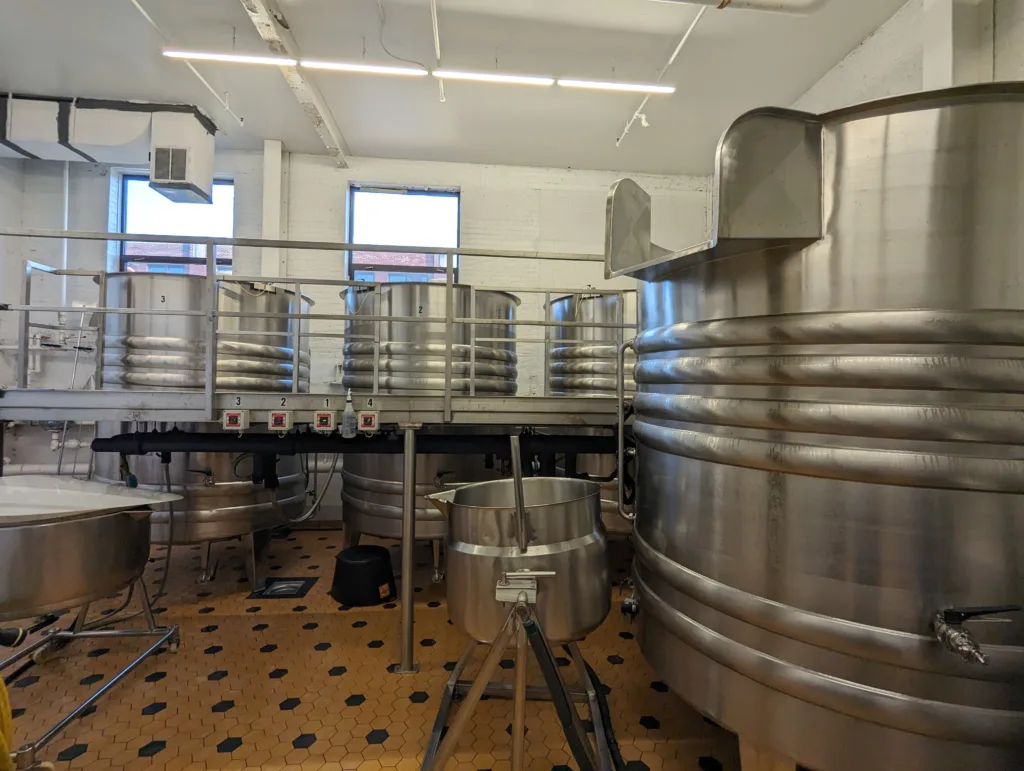
We were eventually shown around by Hagen and Jenny in a private tour of the brewery. Dovetail’s brew kit is very German: a mash tun, a lauter tun, a kettle, and a holding vessel.

Dovetail’s brewing system. From left to right: holding vessel, kettle, mash tun, lauter tun. They are accessible through a gallery via stairs. On the front, a computer panel is installed. Next to the stairs is a small standing desk with lab equipment and documents.

Following a rather traditional vibe, the brew kit is accompanied by a coolship located upstairs, into which wort is pumped after boiling and left to cool there until it’s dropped to 75°C (167F) after which it’s pumped through a plate chiller and into open fermenters (accomplishing the traditional vibe).

As Hagen had to leave but we had so much more to talk about, he invited me to come around another day for me to witness some of their brewing. And that was truly exciting: sure, I got to see somebody brewing on the kit, but most excitingly, I witnessed wort being cooled in the coolship!

A happy looking Hagen Dost leaning against the side of the coolship which is getting filled with wort of the day’s first turn of Hefeweizen, while the room fills with steam.

In my conversation with Hagen, what became clear to me is how well he understands Bavarian and Franconian beer culture, and how much he’s done to discover some great breweries off the beaten path. He then showed us how a coolship was part of the plan when he was brewing with Bill before they had even founded Dovetail: on one side of the room, a small rectangular metal vat was leaning against the wall, which is what they used as a coolship when they still test-brewed on essentially home-brew scale.

But Dovetail isn’t just a German-style brewery: they will brew the classic Central European styles, whether they’re from Germany, Austria, Czechia or Poland, but also do spontaneously fermented beers in the style of Belgian Lambic (they don’t call it that, though). I didn’t try any of the sour beers, but I tried plenty of the others: Helles, Dunkles, Vienna Lager, Lager (their idea of a Franconian Landbier), Sticke (a slightly stronger Altbier), Kölsch, Rauchbier, and Grodziskie. Honestly, I couldn’t fault any of them.

The Vienna Lager is straight to the point: just Vienna malt and Styrian Golding hops. According to Jenny, they occasionally get people complaining how it’s not adherent to the BJCP style guidelines, and they’re right. But neither would have been historic Vienna Lager, and the BJCP is meant for competitions. Dovetail’s Vienna Lager has a certain minimalism about it that just makes it an easy-drinking, uncomplicated beer with the right amount of malt complexity to make it exciting and a beer I could’ve been drinking the whole afternoon/evening (if I hadn’t wanted to try many/most/all of their beers).

The Dunkles was equally good, and exactly what I’d expect in a Bavarian brewery. Hagen later told me it had been inspired by Kloster Weltenburg’s Dunkel. Their Lager was a kind of Helles, similar but different from their regular Helles, and definitely something I’d expect in a small Franconian brewery served as the #1 beer consumed in large quantities by most of the village. Sticke and Kölsch tasted like the Rhineland, the Rauchbier would probably be well-received in Bamberg (personally, it reminded me more of Spezial than of Schlenkerla), and the Grodziskie wasn’t very different from the one I tried a few months ago.

But most importantly, all of the beers had character. They weren’t just very good, clean examples of their respective styles, they all had something about them that made them truly exciting to drink. Some cleaner, some maybe a bit rustic, but all of them with something that just screamed “this is the style in which we brew our beers, and we like it like that” to me.

That’s when I realised that there is something very Franconian about Dovetail, not just in the aspects of traditional brewing (like the coolship and the open fermentation), but also the “house style” that goes into them. At the same time, Hagen is very technically minded: he spoke to me about how they are very specific about certain temperature rests during mashing, such as alpha amylase rest (a mash rest at a temperature range that promotes the activity of alpha amylase, an enzyme that chops down chains of starch first into unfermentable dextrines and if given enough time, eventually into some fermentable sugars), as there are other things happening at around 72°C, such as the extraction of glycoproteins, which are relevant for head retention. Hagen even specifically spoke about glycoprotein rest and how important it was for their Hefeweizen which they brewed that day.

(Back home in Germany, I looked up glycoproteins in brewing literature, and really, Prof. Narziss mentions it in a few sentences in his book)

Four open fermenters in the fermentation room at Dovetail, accompanied by two yeast harvesting vessels.

Hagen also emphasised the importance of the coolship in removing DMS precursors from their wort. What I could contribute was to teach him the German term for that: “ausstinken” (lit. “to stink off”), and that it’s not only used to describe what happens in the coolship, but also in open fermentation, another traditional element Dovetail employs.

All in all, I was really happy with every single beer I drank at Dovetail. I also have to thank everyone at Dovetail, but especially Jenny, Hagen and Bill, for the friendly welcome we received. We actually brought a few cans of their Helles and their Vienna Lager back to Berlin, and they travelled quite well.

Thinking back, there is something quite special about a brewery like Dovetail, something that I wouldn’t be able to find the same way in Germany: I could go there to drink really well-brewed German, Czech, Polish styles, easily at the same level as a good, traditional brewery back in Europe. But unlike here, I could enjoy a whole range of local styles from all over Central Europe at the same time. I don’t know of any brewery that serves a Helles, a Kölsch, an Altbier, a Rauchbier, a Hefeweizen and a Grodziskie all at once, at an incredible quality.

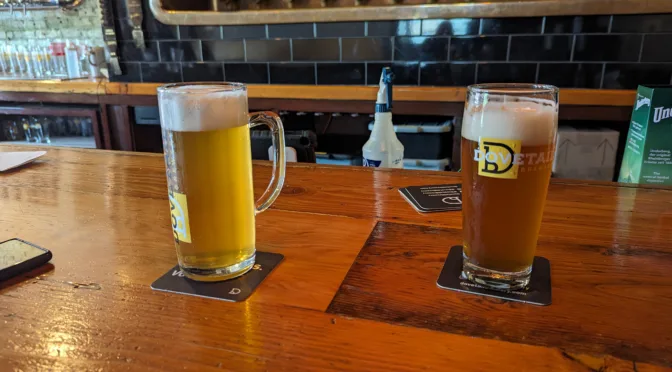
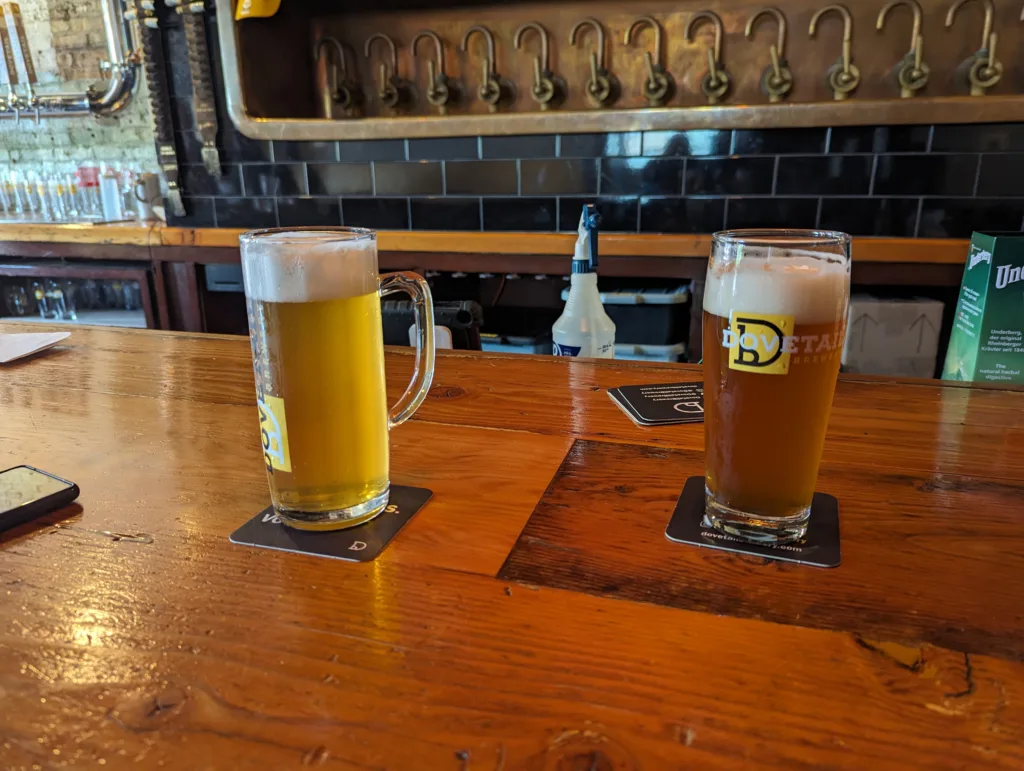
A handled beer glass of Helles on the left, and a Willibecher of Vienna Lager on the right, both sat on coasters on the bar at Dovetail. In the background, a historic copper Grant with swan neck taps for lautering can be seen embedded in the wall.

Book Review: Modern Lager Beer

Kevin Davey of Heater Allen said in a video a few months ago that there are two types of brewers: the ones that focus on a recipe and the ones that focus on the process of brewing, and that lager brewers are in the process brewer camp.

When I read the new book Modern Lager Beer by Jack Hendler and Joe Connolly, I was instantly reminded of this. Normally, home-brewing books focus on styles and on recipes. Of course, processes will also be discussed, but the focus usually lies on the former. The structure in Modern Lager Beer is very different, though: after a brief discussion of the major contemporary lager brewing traditions, the process-drivenness (is that even of a word?) of lager brewing is being acknowledged, and everything after that is being discussed is from a process perspective, not necessarily just the authors’ opinions, but also often from the view of other experienced brewers. Sometimes, these may not always match up, or even contradict each other. As such, I never felt that the book told me what is exactly right or wrong, but rather gave me insight into the possibilities and different viewpoints to achieve different goals in a beer.

Ingredients? Yeast is being discussed and compared in all its expressive parameters, including a quick guide how to choose the right strain for you, without ever getting prescriptive. The insight on malt is how much of its parameters are driven by the malting process itself, and how much of a beer (including aspects of the necessary production process) are predetermined in the malt house, including what’s relevant when working with adjuncts such as corn (maize) and rice. For water, the topics of hardness and alkalinity and their overall impact on the process and the beer are described, while hops are more discussed from the standpoint of how they can be utilized in the brewhouse, and what specific properties of hop varieties (e.g. farnesene content) can have which impact on the beer.

The emphasis on process is even more noticeable in three chapters that make up a large chunk of the whole book: fermentation, decoction mashing, and carbonation, all absolutely essential steps in brewing a great lager beer.

I think this is what sets this book really apart: fermentation is barely ever discussed to such a great detail unless you dig through the standard works like Kunze or Narziss. Whether it’s aeration, free amino nitrogen, pitching rates, top pressure or temperature, the impact on each of these is described and discussed, filled with the opinions and views of a multitude of respected brewers from both the US and Europe. Lagering is discussed in similar detail, including the question of how much of it is necessary, how progress can be monitored, what some of the risks might be under certain circumstances (such as yeast autolysis), and how they can be detected and mitigated.

The same goes for decoction mashing: only rarely discussed in detail otherwise, Modern Lager Beer really gets into all the details of single, double and triple decoction and how to decoct even on very simple brew kits that weren’t explicitly designed for decoction mashing. The authors even bring in the views of breweries that do not employ decoction mashing whatsoever, and their rationale of what they try to achieve in a beer and why decoction mashing would not be helpful in these instances.

The third otherwise rarely discussed topic is carbonation. The authors list the different options to do that, and what advantages and risks they all bring to the table, whether it’s force carbonation, spunding or kräusening. At the same time, they emphasise the importance of carbon dioxide in beer, and even call it “the fifth ingredient”.

The last third of the book is concluded with an overview over various traditional techniques and aspects, whether it’s Kellerbier, open fermentation, coolships, beer served from wooden casks, and even biological acidification (Sauergut) for pH control, an outlook on the possible future of lager beer, and finally, a collection of lager beer recipes of various styles which, matching the overall tone of the book, are still presented in a more process-oriented fashion than usual.

All in all, the book is a very dense (but not condensed) overview over all the more advanced aspects of brewing lager beer primarily in a commercial-industrial setting, but explained in such a way that home-brewers have ample starting points to get inspiration to improve their own brewing process. With plenty of sources and references, Modern Lager Beer is merely a starting point into what can become going down a rabbit hole full of rabbit holes. There’s a lot of information packed into just 300 pages, with the breadth and a level of detail that comes close to the likes of Kunze and Narziss, while remaining approachable.

As for me, I have yet to reflect on the book and what I can incorporate into my standard processes for lager brewing which have worked very well for me in the past. I’m sure there are still details that I can deal with better, but I think that requires a second and third reading of some of the chapters or sections of Modern Lager Beer.

And finally, I think it’s also worth pointing out what the book is not trying to be: it’s most certainly not a guide on individual beer styles (in fact, beer styles are rarely brought up, and my area of expertise, Vienna Lager, is only mentioned in passing as an early stage of the evolution of pale lager beers, on page 14). It is not a collection of recipe (though it does contain 30 recipes in total), nor does it contain a comprehensive history of bottom-fermented beers. And that’s fine, because in its focus on the brewing process in its many details is what makes the book really stand out for me.

If you’re a home-brewer, whether you’re just starting out with brewing lager beers, or whether you’ve gained a lot of experience already and are generally happy with what you’re brewing, do get this book and read it. It will open up your mind to all the complexities of lager brewing that most home-brewers can safely ignore, but which may still point you to some adjustments that may improve your beer even further.

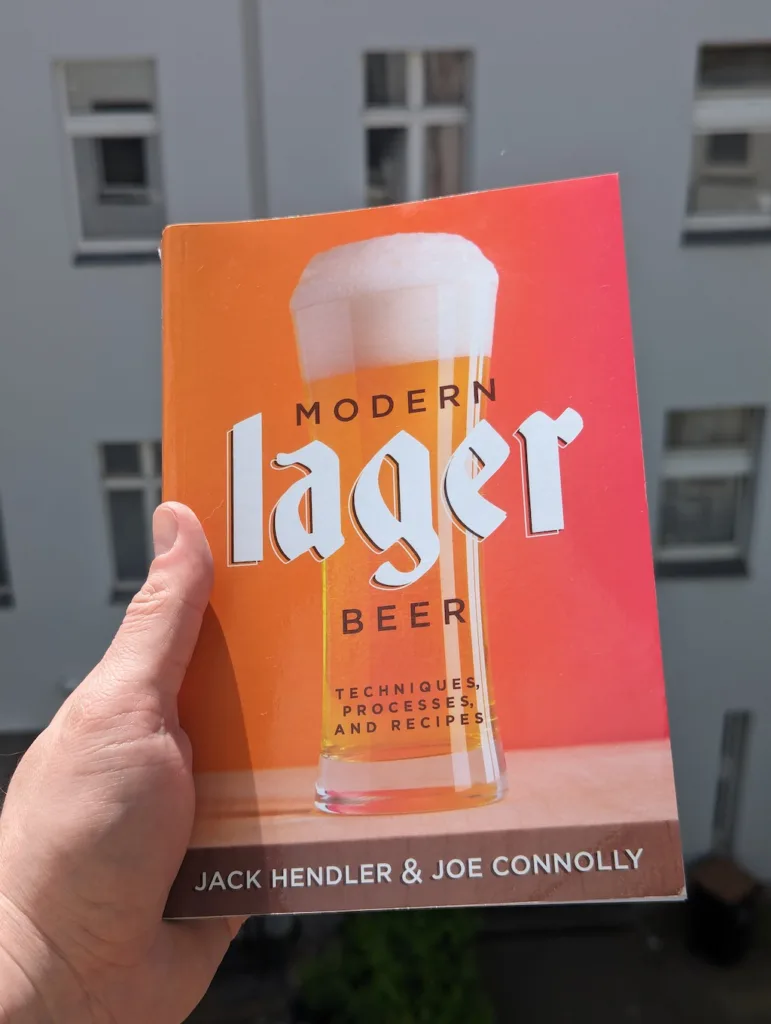
The book Modern Lager Beer by Jack Hendler & Joe Connolly, held in my hand

The Story of East-German “Motorist’s Beer”

Alcohol-free beers are a hot topic these days, both because of consumer demand and improvements in quality of this beer achieved through research.

When recently talking about the subject with my friend Ben, I brought up Aubi, the East-German “Autofahrerbier” (lit. “motorist’s beer”). When looking into the topic of Aubi more closely, I found out more about its history that I’d like to share here.

First the plain facts: in the GDR, beer brewing was guided by TGL 7764, an industry standard that defined which beer types could be brewed, how they could be brewed, which ingredients could be used for them, and under which parameters each of these types had to fall. In short, it was an early form of a beer style guideline, but specifically for the East-German brewing industry.

In the 1980 revision of TGL 7764, Aubi was listed as the only alcohol-free type of beer. In its production, at most 11 kg of brewing malt per hectolitre of sellable beer could be used, and at most 9 g of hop bittering compounds (i.e. alpha acid) per hectolitre. At most 70% of hop bittering compounds could be from hop extracts. It had to be matured for at least 3 days, with a recommended time of 6 days. Its original gravity was between 6.9 and 7.4 °P, its apparent attenuation 30 to 40%, its CO2 content at least 0.38% (i.e. 3.8g/l), and its bitterness 22 to 34 IBU. In terms of colour, it had to be about as pale as pale lager beer (I can’t translate the GDR colour scales to modern ones like SRM or EBC). In bottles, it had to last at least 90 days, the longest best-before dating of all beer types (together with the Pilsner Spezial type). And unlike most other GDR beer types, it had no specific beer label colour prescribed.

The development of the beer itself was a relatively surprising one: at the time, brewmaster Ulrich Wappler at VEB Engelhardt brewery in Berlin had an unexpected surplus capacity, as the Schultheiss brewery on Schönhauser Allee in Berlin was shut down and Wappler’s technicians managed to transfer tanks to his own brewery. In East Germany, the blood alcohol limit was at 0.0 since 1956, much stricter than other Western countries at the time. Truck drivers coming in from West Germany would bring their own, specifically Birell, a Swiss brand developed and brewed at Hürlimann, and at the time (as far as I could find out) the only alcohol-free beer on the German market (Clausthaler, the later dominant alcohol-free beer brand in West Germany, only launched in 1979). Birell was even specifically advertised near the border on the West-German side with the fact of the strict alcohol ban for drivers in East Germany.

The brewmasters in East Berlin were approached whether they would be able to develop a GDR-brewed alcohol-free beer. With the free capacity, Wappler would have been able to do it and agreed to it. His problem was rather finding a way how to brew an alcohol-free beer. In the GDR, he unfortunately had no access to Western brewing literature, nor any of the Western patents, and he wasn’t allowed to get in touch with West-German brewers either as he wasn’t a party member and his brothers had left the GDR for the West. He eventually managed to get access to Western patents through a source, and studied them for 6 months. Of the two methods of producing alcohol-free beer (biological, i.e. restricted fermentation, and mechanical, i.e. physical dealcoholisation), they decided that they could build the equipment to brew using restricted fermentation.

This was still not without problems: they did not have any special yeast, so a special apparatus to quickly chill down the beer that had only just started fermenting had to be built. Then higher-ups had heard about the efforts and the supposed progress, and basically forced them to send out unfinished beer that had not fully matured, which was actually well-received.

An area where this new beer was particularly successful were the heavy industries, in particular glass blowers and steel mills. In these jobs, workers were of the opinion that they needed to drink beer to help with salivating. They refused to just drink water, while at the same time, the union had strictly banned alcohol. So they tested the alcohol-free beer (at less than 0.5% ABV) in some of these factories, and the workers liked it. Also price-wise, at 75 Pfennig per bottle it was cheaper to buy than imported Birell, and also cheaper than other domestic beers. So their alcohol-free beer filled a gap, even more so in the heavy industries than for motorists. It took some tweaking of the recipe, including hop oils, to make it a really good beer, and in the end, the product also piqued the interest of other countries of the Eastern Bloc like Bulgaria and Czechoslovakia, who also tried to brew similar beer but all had over 1% ABV and none of them tasted nice.

The cheap domestic price of just 75 Pfennig also became a problem in terms of economics: while it required fewer ingredients, brewing Aubi was much more energy-intense, because mashing involved a special mashing schedule (more on that later) and restricted fermentation required more energy on top of that for chilling down the beer. Because of this, production volumes were lowered.

The beer itself was brewing like this: the grist contained 20 to 50% (sic!) unmalted adjuncts and was mashed using a special type of decoction mashing that specifically skipped the optimal temperatures of beta amylase and rather inactivated them to then have alpha amylase saccharify the starches, resulting in a much less fermentable wort. After only briefly starting fermentation, the wort was chilled down quickly to restrict fermentation.

Internationally, the East German alcohol-free beer was also a success, and was exported from 1986 to the United States under the brand name “Foxy light”. If we can believe a tasting and ranking of alcohol-free beers in the Chicago Tribune from 1988, Foxy light couldn’t exactly compete in terms of flavour with other European imported alcohol-free beers at the time, but fared well compared to domestic alcohol-free beers, while also being one of the cheapest ones. In England, the same beer was sold under the brand “Berolina”.

With the end of the GDR, production of Aubi also ceased. Most East-German breweries were shut down as they were completely outdated compared to their West German counterparts. Brewmaster Wappler managed to get work in West Berlin breweries for his workers. Until his retirement, he helped conceptualising brew systems for other breweries and training people on them.

Sources:

Interpreting a 1960s Bavarian Dunkel Recipe

Whenever somebody asks me how I would brew a Bavarian Dunkel, I have to respond that I never actually brewed one on my own. Instead, I rather point to an authentic modern-ish recipe from a Bavarian brewery from the 1960s.

A few years ago, Urban Chestnut Brewery from St. Louis, MO posted a sheet from 1967 brewing records of Brauerei Erharting in Bavaria. Their brewmaster, Florian Kuplent, had originally apprenticed there, and most likely got his hands on these records that way.

The recipe is interesting because there are a lot of assumptions baked into it that you’d only know if you had an idea about Bavarian brewing. It also challenges conventional wisdom that Bavarian brewers would just brew their Dunkel from 100% Munich malt. At least in the 1960s, this was not true anymore for this recipe.

This recipe for Export Dunkel starts with the grist: it simply says 1350 kg of malt, of that 50 kg pale malt (lit. “Hellmalz”), 50 kg CaraMunich (originally CaraMünch, the German brand name), 10 kg roasted malt (Farbmalz in the original). What the recipe doesn’t say is the rest. The use of Munich malt (likely on the darker side) was simply implied from the type of beer that was being brewed. The pale malt was most likely a Pilsner malt. That way, we end up with a grist like that:

  • 1240 kg Munich malt (91.9%)
  • 50 kg Pilsner malt (3.7%)
  • 50 kg CaraMunich malt (3.7%)
  • 10 kg roasted malt, e.g. Carafa special II (0.7%)

Why the Pilsner malt? I can only speculate, but I assume that this might have been formulated under the assumption that the Munich malt had so little diastatic power that it would only self-convert and not fully convert the (enzymatically inactive) caramel and roasted malts.

The next part is the mash. It starts with doughing in the malt and letting it sit for 20 minutes at 35°C. This was typically done to ensure that all the malt was fully hydrated. Nowadays, this would be ensured through a pre-masher that would combine water and malt just before it goes into the mash tun.

Then, the mash was heated up to 52°C within 15 minutes. The mash tun must have been heatable.

The recipe then further mentions to mashes. For the first mash, 22.5 hl of mash were pumped into the kettle while the stirrer was running. In the kettle, the mash the underwent a multi-step mash on its own: 10 minutes protein rest at 52°C while a bit of wort was drawn off (Malzauszug) and kept in the Grant, 10 minutes saccharification at 60°C, 10 minutes saccharification at 65°C, 70°C until iodine test was negative and the mash was fully converted (normally 20 to 25 minutes) and then 75°C for another 5 minutes.

This step mash prior to boiling the mash is done to maximize the use of the enzymes that will eventually be destroyed, and to convert as much starch as possible, so that the intense boil will only extract some more starches to be converted in the second mash.

Then the mash was brought to a boil, boiled for 35 minutes and then mixed back into the main mash which then reached a temperature of 65°C.

Then the second mash started: 23 to 23.5 hl of mash were again pumped into the kettle, rested for 10 minutes at 65°C, then again rested at 70°C until iodine test was negative, and then 10 minutes more at 75°C. It was then boiled for 25 minutes, and mixed back into the main mash to reach a temperature of 74°C.

The wort that was drawn off must have then been mixed back in, the recipe is not fully clear on this, though. I don’t know exactly why, but I assume that this was done to retain some amylase enzymes and ensure that some end up in the mash just before lautering to help convert any last few bits of starch (even though this is unlikely given how thorough the extraction must have been through 2 long decoction boils).

Then lauter and sparging happened to collect about 100 hl of sweet wort which was then boiled for 2.5 hours. The resulting amount of wort at the end would have been 78 to 79 hl with an OG of 12.7 to 12.8 °P.

The hopping schedule looked like this:

  • beginning of the boil: 4 kg Hallertauer hops
  • 1 hour after beginning of the boil: 4 kg Hallertauer hops
  • 45 minutes before the wort is pumped off the kettle: 3 kg Spalter hops

The last one is particularly important: the timing does not depend on the end of the boil, but rather on when the wort is moved from the kettle to the chillers. None of the hop additions come with any indication of alpha acid content. There is one source though where we can get an estimation: international hop trader Barth Haas has its full range of historic hop reports online, both in German and English. The 1966-1967 report in English at least reports the “bitter value Wöllner” for some hops: 6.2 for Hallertauer hops and 6.6 for Spalter hops, both from the 1966 crop.

This “bitter value Wöllmer” was an early approach to estimate the bittering quality of hops. In particular, this value is calculate as alpha acid % + beta acid % / 9. For both Hallertauer and Spalter hops, we can assume that the alpha acid content is roughly the same as the beta acid content.

6.1 = x + x / 9 and solving for x gets us an alpha acid content of about 5.5% for Hallertauer hops.

6.6 = x + x / 9 and solving for x gets us an alpha acid content of about 5.9% for Spalter hops.

Bear in mind that these are just estimations, but should nevertheless give us a general idea about whether these were more high or low alpha acid for the variety.

And this is how you interpret a 1960s German recipe for Bavarian Dunkel.

Double-Decoction Mashing on a Home-Brew System Not Designed For Decoction: A Post-Mortem

Today, I brewed together with Ben Palmer at the MASH PIT, a kind of nanobrewery/home-brewing co-working space that allows you to brew your own beer on the brew kits installed there. Ben had recently moved to Berlin, and since we knew each other through Twitter, we met up and eventually decided to brew a beer together.

One thing that I’ve been wanting to do for a long time at the MASH PIT was to brew a beer using a decoction mash. Ben was also happy to do that, so we agreed on a simple recipe. Our grist consisted of 98% Pilsner malt and 2% CaraMunich II, while the hops we chose were Celeia (Ben had never used Slovenian hops, and since I hadn’t either, I was happy to also try them out). The original idea was to ferment it with a Kölsch yeast, but since we were informed that the MASH PIT had run out of that yeast the day before the brew day, so we substituted it with Nottingham Ale yeast instead, another fairly neutral and attenuative top-fermenting yeast. For mashing, we wanted to do a double decoction, for several reasons: my reasons were that I wanted to try brewing a double-decocted beer on the MASH PIT kit, and I also wanted to try brewing an ale of some sorts that had a distinct decoction character. This was something I had stuck in my head ever since my last visit to Prague, where I tried a few ales [sic!] from Pivovar Matuška, and they all had a distinct “Czech” flavour that I could only attribute to decoction mashing. Ben’s reason to try out double decoction was that he hadn’t really much experience beyond a few demonstrations at his vocational school.

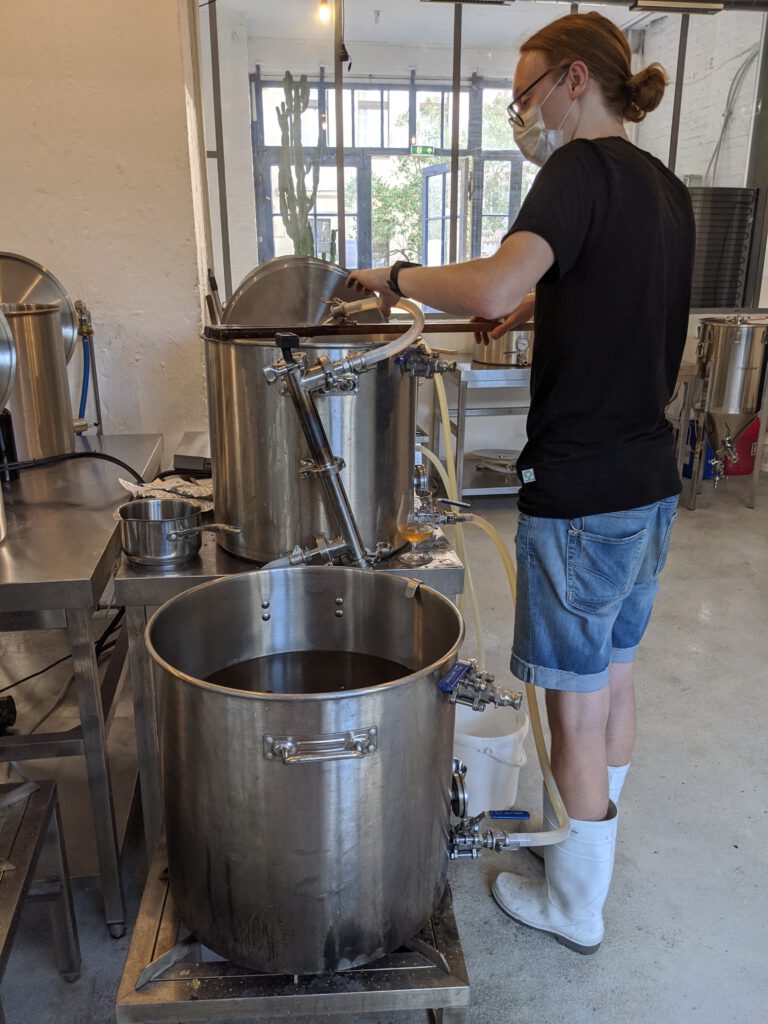
A few words on the MASH PIT brew kit: it is fairly simple and straight-forward. It consists of three large pots of maybe 75 litres volume (the scale only goes to 65), all equipped with taps on the bottom and the top and embedded thermometers. One of these pots is sat on a gas burner and mainly serves as kettle to boil the wort as well as to heat up the liquor (brewing water). The middle pot serves as mash and lauter tun and is equipped with a removable false bottom. It also comes with a RIMS attachment that allows you to pump wort (a liquid pump is part of the setup) from the false bottom through the attachment and sprinkle it again on top of the mash. The attachment has a heating element that can be turned off and on. With this setup, you can do a multi-step infusion mash fairly easily. The third pot is also equipped with an electric heating element and mainly serves as hot liquor tank (HLT). Through three switches, you can turn on and off pump, RIMS heating element and HLT heating element.

But instead of following this scheme, we instead decided to repurpose the kit for decoction mashing. With about 11 kg of grist, we filled the mash tun with 44 l of liquor at 45°C, then mashed in. This increased the overall mash volume to 55 l. The mash temperature was 41°C. After a short rest, we pulled 36 l (i.e. two thirds) of thick decoction and moved it over to the kettle. We brought the decoction up to a temperature of 70°C, which went very quickly thanks to the powerful burner. A quick rest of 15 minutes to at least partially convert the available starch, and then brought the mash up to a boil. That’s where the problems started: we had a bit of a boil-over, which was our mistake as we partially covered the pot with the lid and also kept it unwatched. After a quick cleanup and making sure we hadn’t lost much of our decoction, we continued boiling it for another 10 minutes.

A watched pot never boils, an unwatched pot boils over.

We then started mixing the decoction back into the main mash. We noticed that even though we had moved only about 50% of the decoction, we were already overshooting our target temperature of 65°C. That was not good. We had to improvise somehow, and so we decided to add some more cold water to the decoction to bring its temperature down. We eventually got that done and ended up with a mash at pretty much exactly 65°C, but now with a total volume of more than 60 litres, which we left to rest for 50 minutes.

So obviously we had overdone it with the decoction volume. I had chosen two thirds as the initial volume because that’s what had worked for me at home on my home-brew kit. Except my kit at home is for 20 litre batches, while this system is for 50 litre batches. I realize that my home system is at such a small scale that boiled mash can cool down fairly quickly, but I didn’t think that effect would effectively disappear at at scale-up from 20 to 50 litres.

The change in mash volume also meant that any previous estimations of the volume for the second decoction were out the window. We then decided to just estimate it to one third of the total volume, and then a bit, so the second decoction we pulled was thin and sized at 25 litres.

We brought this second decoction again to a boil, boiled it for 5 minutes, and then mixed it back again. By that time, the main mash had cooled down to 61°C, so the final temperature after mixing back was only 71°C. Not exactly the 75°C where we wanted to get to, but still good enough. We then left the mash to rest for another 30 minutes and prepared for lautering and sparging: we cleaned the kettle, filled up the HLT and heated the sparging liquor.

With everything prepared, we decided to just skip the iodine rest (YOLO, right?) and started a vorlauf. We only got very few hard bits and very quickly got a very clear wort. We then connected the mash/lauter tun’s tap to the kettle, and slightly opened the tap. Lautering went quickly and ran off smoothly, looking very clear and bright. We then started sparging by pumping liquor from the HLT onto the mash, breaking up the stream with a highly technical piece of equipment: the mash paddle.

Kettle in the front, sparging action in the back

We managed to collect a total of 63 litres of sweet wort. In the end, this was limited by gravity: at 63 litres, the level of the wort was the same as the tap of the mash/lauter tun. We then starting bringing the wort to a boil.

Ben then had the idea that we should check the gravity of the last runnings with the refacrometer that we had used to check on gravities during the process. Turned out, the “last” runnings still were at more than 5°Brix. Instead of just conceding to the laws of gravity, we should have lautered the last remains into a separate vessel and topped off the kettle instead. It probably would have also helped with another issue we noticed: according to the refractometer, the pre-boil gravity was at 12.4°Brix. Our plan was to have an OG of 11.8°P (°P and °Brix are very similar scales, and virtually identical and practically interchangeable). So strangely, we seemed to have a much higher OG to expect than what we had planned and calculated. Of course, we didn’t know what extract efficiency to expect on this home-brew kit, but still.

We decided to continue with boiling the wort anyway, and added hop additions at 90 minutes and 5 minutes before flame-out, and then more during whirlpool. Post-boil gravity according to the refractometer was at 15°Brix. This was way too much, and would have meant a much greater efficiency than what we could have planned for.

We then sent the hot wort through the plate chiller to the fermenter at a nice 18°C, and measured the OG using a saccharometer. It really was at 14.1°P. This was weird, a difference of almost one degree. I then rechecked the refractometer with just water, and it turned out that refractometer wasn’t properly calibrated.

Another problem also popped up when pumping the wort from the kettle through the plate chiller to the fermenter: towards the end, we started pulling in hot break and hop particles. We were then told that they actually had a hop filter that we should have attached that would have allowed us to get more of the wort from the kettle to the fermenter without sucking up any of the gunk. We had to stop the pump early, and only ended up with about 45 litres of wort, but at a higher OG than we what we wanted.

Our solution to that was simple but almost embarrassing: we decided to dilute the wort with cold water to bring the OG down to 12°P. The final step was then to hydrate the yeast (3 sachets of Nottingham Ale yeast should do just fine) with some fresh wort, pitch it, and move the fermenter to the temperature-controlled fermentation room.

The day was concluded with lots of cleaning up and a glass of cold, fresh beer from the MASH PIT tap room. A lot of things went wrong during the brew day, but we managed to salvage any issues, and still arrived at something that I think should come out pretty nicely. I’m definitely looking forward to trying out the resulting beer. The main things I want to see is whether I really do get a pronounced decoction character in the beer, and of course, what Celeia hops taste like in a beer.

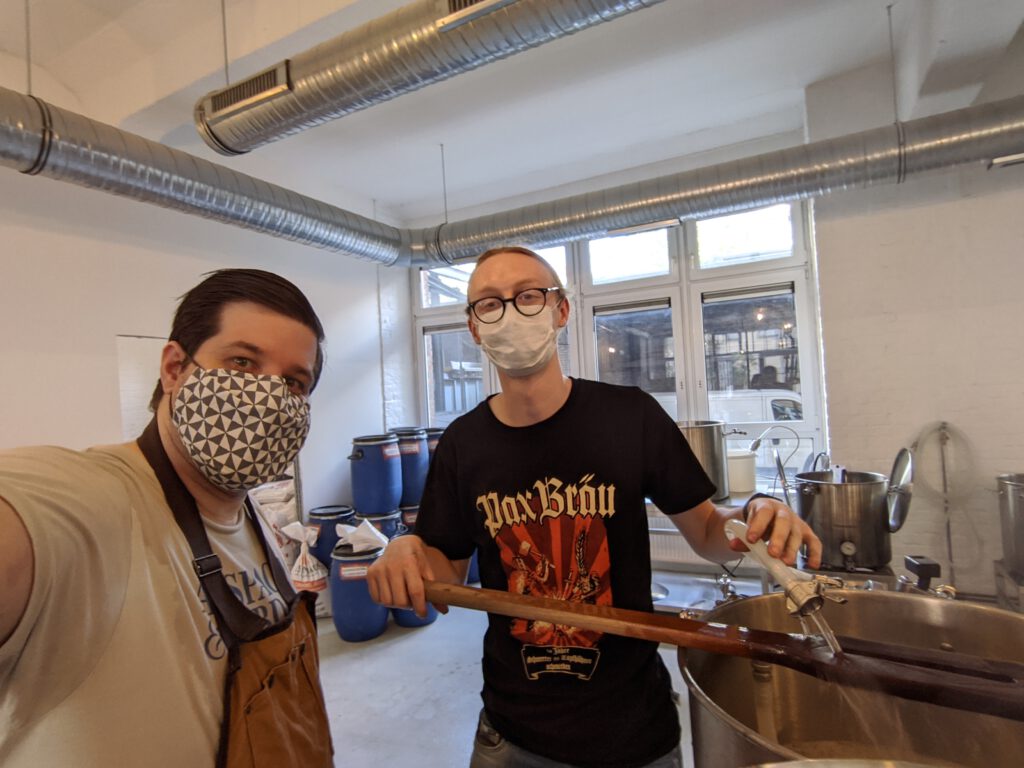
A brewing selfie. We were smiling under these masks, I swear.

Mahrs aU Clone, Iteration 1

As I’ve announced a month ago, my homebrewing project for 2020 is to develop a clone recipe for Mahrs aU. I brewed the first iteration on December 27, and here’s a quick report on how that went:

My grist was fairly simple, 2.4 kg Pilsner malt and 2.4 kg Munich I malt, both from Weyermann. I doughed in with 20 litres of water which I had treated with 6 ml of lactic acid (something something counteract local water’s hardness, I calculated this ages ago and stuck to it since, I’m terrible with water chemistry). I then conducted my preferred double decoction mash where I start with a very large thick decoction, rest it at around 70°C when heating up, then boil it and mix it back, and then pull a thin decoction, boil it, and mix it back again. The temperature steps the main mash was undergoing in this case were 39°C (dough-in temperature), 62°C and 72°C. I then moved the mash to the lauter tun, recirculated to get clear wort and then started lautering, measuring 17.6 Brix on the first runnings. I continuously sparge, and after 30 minutes, I had enough wort collected to bring it to a boil. Pre-boil gravity as determined by refractometer was 11 Brix.

After 90 minute boil, with hop additions (2019 harvest Perle, 7.2% alpha acid) at 90 minutes (32g) and 10 minutes (10g) before the end of the boil, I moved the wort the a fermenter and chilled it down to 10°C before adding two rehydrated sachets of W-34/70 yeast. Fermentation took off about 36 hours after pitching the yeast.

Things didn’t go quite as planned, as the wort’s OG turned out to be 13.3°P. My grist calculation was based on previous batches in which I employed the same mashing regime, but this time, for whatever reason, efficiency was quite a bit better than what I wanted to achieve. I’m not going to complain about it, as it’s only 0.6°P (roughly 0.002 in gravity points) higher than where I wanted to get to.

Fermentation was quite a bit slower than usual. I’m not sure why, but I may have rehydrated the dry yeast improperly, therefore slightly underpitching. Even after four weeks, fermentation did not seem quite finished. I would have waited, but two days ago, another problem came up: the seal on the fermenter’s tap was leaking. Not a whole lot, but in the tray underneath, a few hundred ml of beer had built up. Since this was just the first iteration, and things weren’t 100% right from the beginning, I decided for an emergency plan: instead of lagering properly, I just cold-crashed the beer, hoping not more would leak between Friday and today, and then bottled the beer today. With 4.4°P, I’m not 100% sure the beer had completely finished fermenting (though there wasn’t really much of a noticeable residual sweetness), but I bottled it anyway and just let it naturally carbonate over the next few weeks. To be frank, I’m not particularly happy with that, but given that things weren’t right from the beginning, it’s still an acceptable shortcut for a first iteration.

A quick taste test directly from the fermenter revealed that the beer indeed tasted remarkably close to the original Mahrs aU. While the beer was pretty clean-tasting, the hop bitterness still seemed a bit rough. My concern is that whenever this has aged a bit and smoothed out, the bitterness might not be quite high enough. Bear in mind that I based the hop additions and overall bitterness just on some very flimsy circumstantial evidence. Since then, I’ve received multiple pointers to other sources talking about the Mahrs aU parameters, such as this very helpful comment by DB who mentioned that Michael Jackson had written about aU in 1999, when it was still bittered with Northern Brewer and Hallertauer Tradition to 36 IBU, and this reply on Twitter pointing out that Ron Pattinson’s book Decoction! (seriously, you should buy it) contains OG, ABV, real extract, apparent attenuation, colour and bitterness from the year 2000 for “Mahr’s Bräu ungespundet – hefetrüb” (aka Mahrs aU), setting the bitterness at a whopping 42.5 EBU.

I’m still waiting for the bottled beer to condition and slightly mature before I’ll start a proper taste test the results of which will then be the basis for my next step. Based on the brew day itself, I will probably slightly reduce the amount of malt the next time so that I can get closer to 12.7°P in OG than the 13.3°P of the first iteration. Also depending on how the bitterness shines through, I may slightly increase the bittering hops.

I also chucked out that particular fermenter and ordered myself a 30 litre Speidel fermenter instead.