Category Archives: Brewing

My Kellerbier Experiment 2024

I don’t homebrew that much anymore these days, at most 4 to 5 times a year, and really only the beers that I absolutely want to brew and drink, which includes fixtures like an 8° Czech-style pale lager for summer and a Czech-style dark lager (which I brew with Ben) for winter. So there is really not that much room for experimentation, simply because I don’t have the time, the drinking capacity (I’m 40, it’s all about quality over quantity now) or the resources like free fridge space for fermentation and lagering.

But there have been a few things that I kept wanting to try out, all in the context of Franconian Kellerbier that I had learned about in the last year or so.

The first thing was when my friend Joe Stange visited Brauerei Knoblach just outside of Bamberg end of last year, and came back with the information that Knoblach generally uses a 1:1 blend of Pilsner and Vienna malt as a grist, that their water is fairly hard parts of the year, and that they rely on that hardness (though he couldn’t provide any concrete numbers, nor was I able to find any analytical data about the water of Schammelsdorf, where the brewery is located). I really like Knoblach’s beers, and I know its peculiar taste, so I was wondering whether these were two factors that played into it (Joe also published an excellent article about Kellerbier in the latest issue of Craft Beer & Brewing magazine which does not seem to be online yet, but as a subscriber myself, I highly recommend getting an online subscription).

The second thing was what I learned at HBCon earlier this year about how Mönchsambacher brewed their Weihnachts-Bock. The two things I wanted to incorporate were their mash profile (which I wrote about in July) and the water profile, which has roughly equivalent hardness of calcium and magnesium, and plenty of it as sulphates. Luckily, my local Berlin tap water has about the right calcium hardness, so all I needed to do was to add the right of magnesium to get my tap water roughly where the Mönchsambacher water is in terms of hardness and mineral composition.

The third point on my agenda of things to try out were Aurum hops, a relatively new German hop variety that was launched as more disease- and climate-resistant with a “highly fine” aroma. As a daughter of Tettnanger, it is meant to replace Tettnanger and similar varieties, and German hop growers as well as hop merchants have been promoting it because they see it as a variety better suited to climate change than others, including German landrace varieties. What I wanted to know was well the hops fared in a traditional style.

I know, integrating all three elements in a single experiment is not exactly scientific, as I don’t have a baseline to compare it to, nor do I isolate any of the multiple variables. I’ll still call it an experiment simply because I want to know what a beer brewed that way would taste like.

And that’s how I formulated the recipe:

The grist was simple: 50% Pilsner malt, and 50% Vienna malt. As hops, I used Aurum hops, with additions at 60 minutes for bittering, 25 minutes for flavour, and to the whirlpool for aroma, which should end up at 41 IBU (calculated):

  • 2.3 kg Pilsner malt
  • 2.3 kg Vienna malt
  • 30 g Aurum hops (5.8% alpha acid) @ 60 min
  • 30 g Aurum hops (5.8% alpha acid) @ 25 min
  • 40 g Aurum hops (5.8% alpha acid) @ whirlpool for 20 min

My tap water needed to be enriched with magnesium, so I simply spiked the mash with food-grade epsom salts (MgSO4). According to my calculations, 18g should get me the right amount of magnesium hardness for 22 liters of beer.

As yeast, I used the Fermentis S-23 dry yeast strain. It’s not my absolute favourite, but it’s all I had at hand, also because I had forgotten to order anything else, which is all my bloody fault.

When it came to mashing, I just stuck to the Mönchsambacher mash profile, a single decoction mash. I boiled the wort for 60 minutes, then cooled it down to 6°C, pitched the yeast, and let it ferment at 10°C until it was finished fermenting. I then ramped down the temperature to 1°C for a week, and bottled it with wort I had held back for bottle conditioning.

The resulting beer has an OG of 11.6°P (slightly lower than a typical Kellerbier, but that’s mainly from me buying the ingredients and only afterwards deciding on a mash profile with a slightly lower efficiency than my regular double decoction mash), and fermented down only to 3.5°P FG, resulting in just 4.3% ABV.
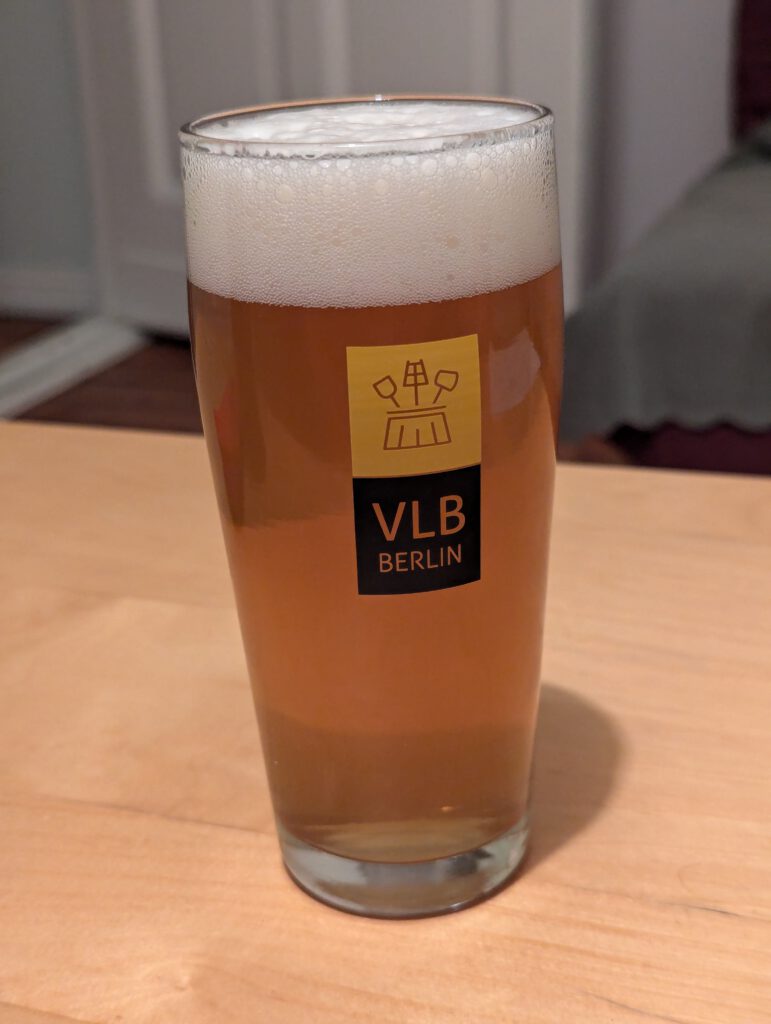
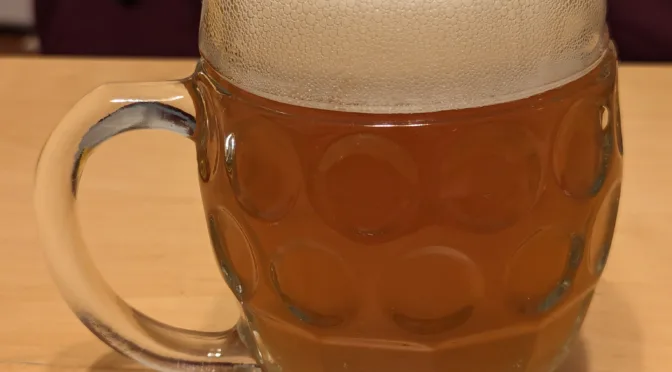
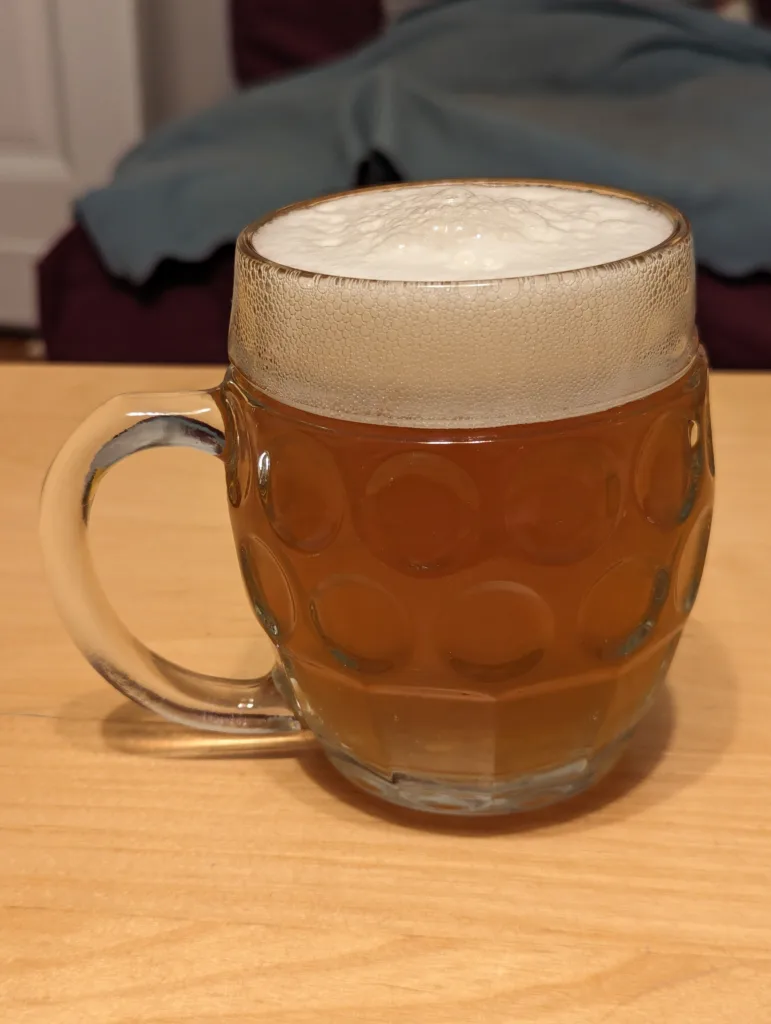
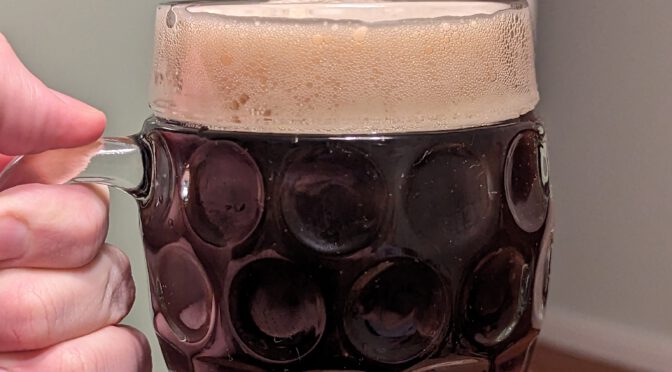
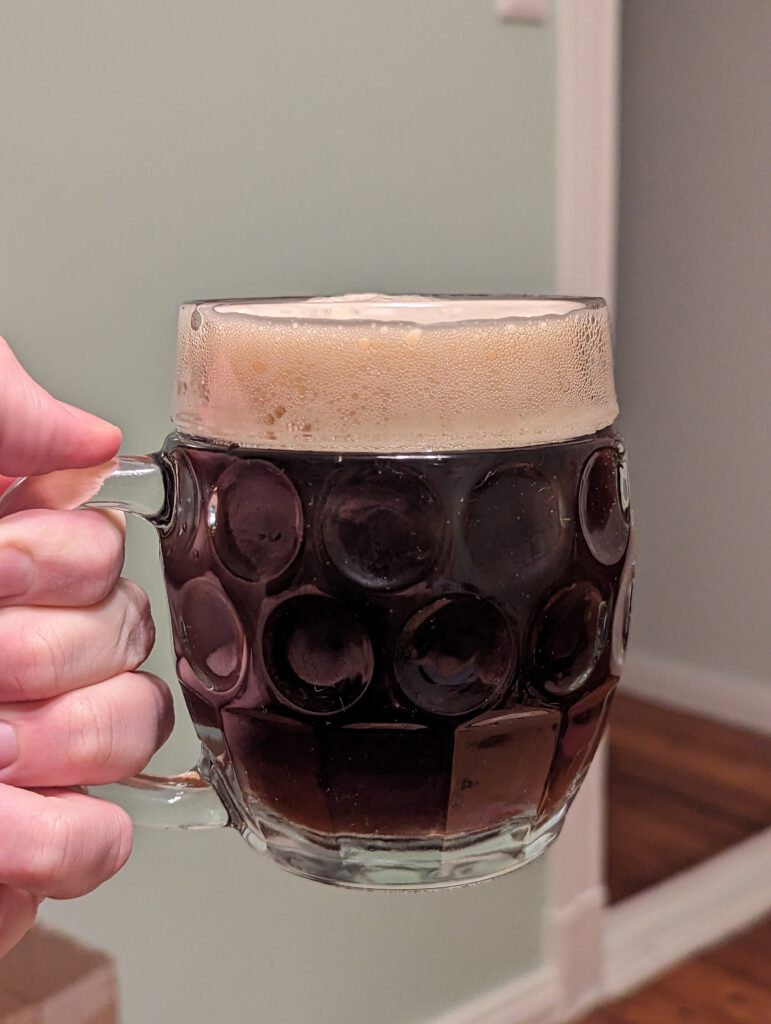
A Willibecher of the Kellerbier. The colour is golden with a tiny bit of haze, with a moderately dense head of foam on top.

A first taste test showed that the experiment, in my opinion, was successful: the beer has a minerality and a maltiness very much reminiscent of Knoblach and Mönchsambacher. The same goes for the bitterness: while it’s not quite as pronounced as I hoped it would be (I blame the low attenuation which probably leaves just enough residual sweetness to slightly mute it), as it is very lingering: even minutes after, that hop bitterness just stays on your tongue. Which is exactly what I appreciate so much about these beers.

As for the hop aroma of Aurum itself: there’s not that much there. Even though I kept the hops in the fridge and sealed at all times, it was not the freshest batch (2021 harvest), so that may have had an influence. Still, the bitterness the hops provide was quite on point.

Still, I’m very happy with the end result. I think it shows that the local water profile of Bamberg’s surrounding area has a large impact on the flavour of the beer, as long as breweries don’t soften or otherwise treat the water and embrace their very local water profile instead (which is one of the points that Joe makes in his article).

Even the yeast played out alright: I didn’t like S-23 in the past because it can produce rather fruity fermentation byproducts. In this case, the beer came out fairly clean, just with a high final gravity. In retrospect, that actually wasn’t too surprising, as S-23 is the closest known relative of the Wyeast 2001 strain, which is purported to be the Pilsner Urquell “H” strain, and is also known for relatively low attenuation.

My take-aways of this brew are the following:

Hard water, especially similar to the Mönchsambacher water profile, can get you a flavour profile in beer that is similar to the slightly rustic flavour profiles of beers like Mönchsambacher, Knoblach and others in the region.

The combination of Pilsner and Vienna malt probably adds to that rustic character.

A lower attenuation seems to help with the style, but another experiment to try out a more highly attenuating yeast should bring more clarity.

Aurum hops are probably okay for standard German styles, but also require more experimentation to understand their exact aroma potential and how to use them. A more recent harvest would be great to try next time. I generally support the idea of hop varieties that are better suited to climate change (which is an inevitability that will hit the brewing industry hard in the decades to come, so good on German hop breeders to be as forward-thinking as that), as long as we understand well enough how to apply the hops to get the same aromas and flavours as with more traditional varieties.

The Brilliance of Mönchsambacher’s Mash Profile

Yesterday, I brewed a Kellerbier, a recipe that I had developed myself but was based on a number of inspirations that I picked up over the last year, such as water profile, mash profile and ingredients.

The grist I chose was based on what I had heard about Knoblach, as they apparently use 50% Pilsner and 50% Vienna malt in their pale lagers. I just liked the idea of adding that bit more malt complexity to a pale beer.

The water profile was based on what Stefan Zehendner talked about at HBCon 2024. Fortunately, my Berlin tap water is already as hard as it should be on the calcium side, all I had to do was to add magnesium. Epsom salts are the way to do that.

The hops I chose were Aurum, a relatively new variety (first approved in 2020 and probably a bit lost in the whole COVID troubles) that is a daughter of Tettnanger with a “highly fine” hop aroma. It apparently has a high disease resistance and better agronomic properties in hotter, drier climates. From what I remember reading, it is expected to take over other varieties like Tradition and Perle, so I thought I’d better try it out now.

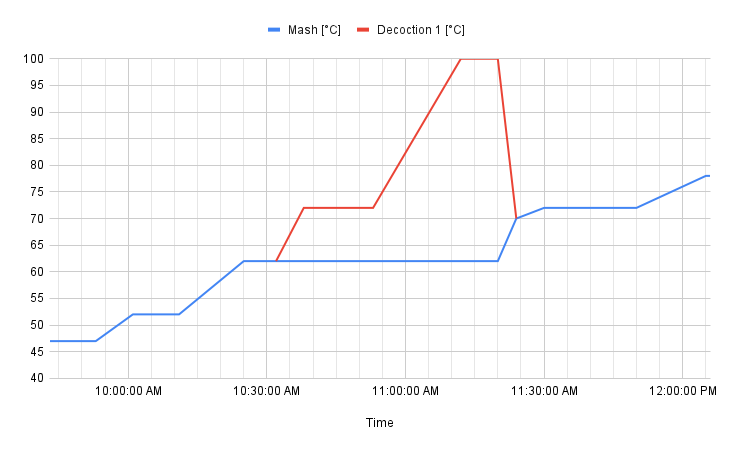
And finally, the mash profile: instead of doing my typical double decoction, I thought I’d try out the Mönchsambacher mash profile Stefan Zehendner described at HBCon 2024. Only when I actually used it, I realised how low-key brilliant it is. It basically goes like a normal multi-step mash: start with a protein rest, then heat up to 62°C for the beta amylase to do much of the conversion, followed by a rest at 72°C for the alpha amylase. This forms dextrins for body and also gets glycoproteins into solution for better head retention. Finish by heating up the mash to denature most of the enzymes.

If this is done as a multi-step infusion mash, the temperature steps are simple done by heating up the mash and stirring. The difference at Mönchsambacher is that the step from 62°C to 72°C is done as a decoction instead: about a third of the volume is drawn off and heated up, briefly rested at 72°C for 15 minutes, then brought to a boil and boiled for 5 minutes until it is mixed back into the main mash. The main mash still remains at 62°C until mixing back.

A time/temperature diagram that illustrates the single decoction mash profile that I used.

So what’s so brilliant about it? Well, the whole mash overall takes about the same time, no matter whether done as multi-step infusion mash or as single decoction mash. But most importantly, a part of the mash is boiled, causing Maillard reaction products to be formed. It’s really the best of both worlds: more Maillard products while not spending most of the brew day on extensively boiling decoctions.

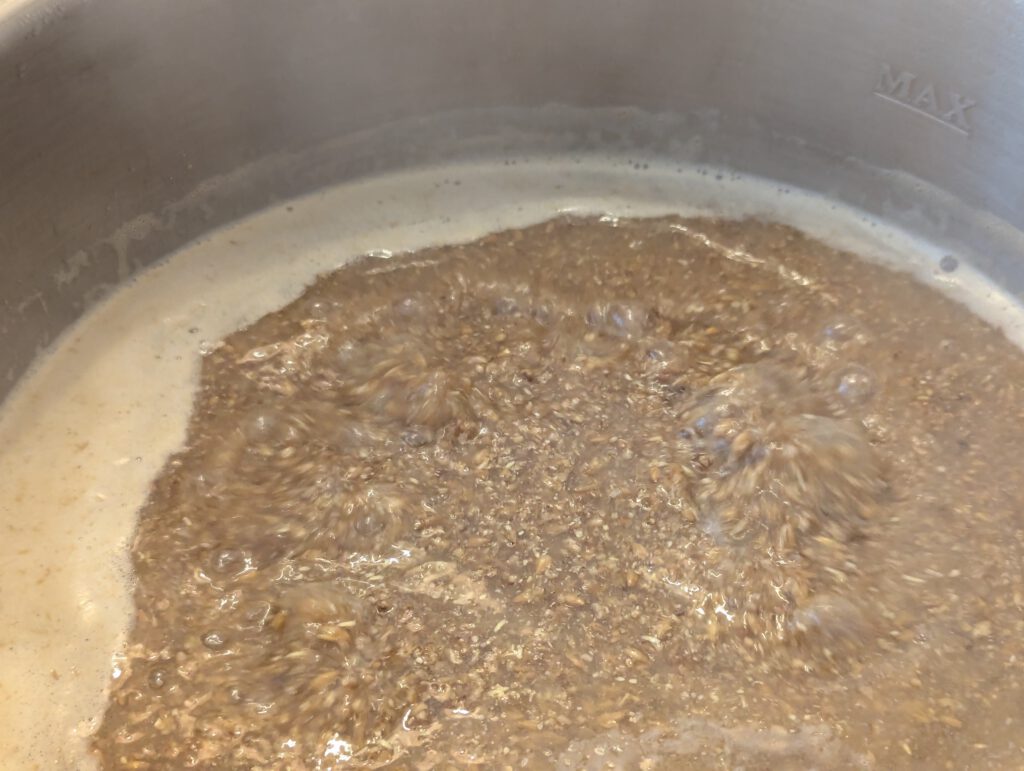
The decoction portion of the mash, while boiling.
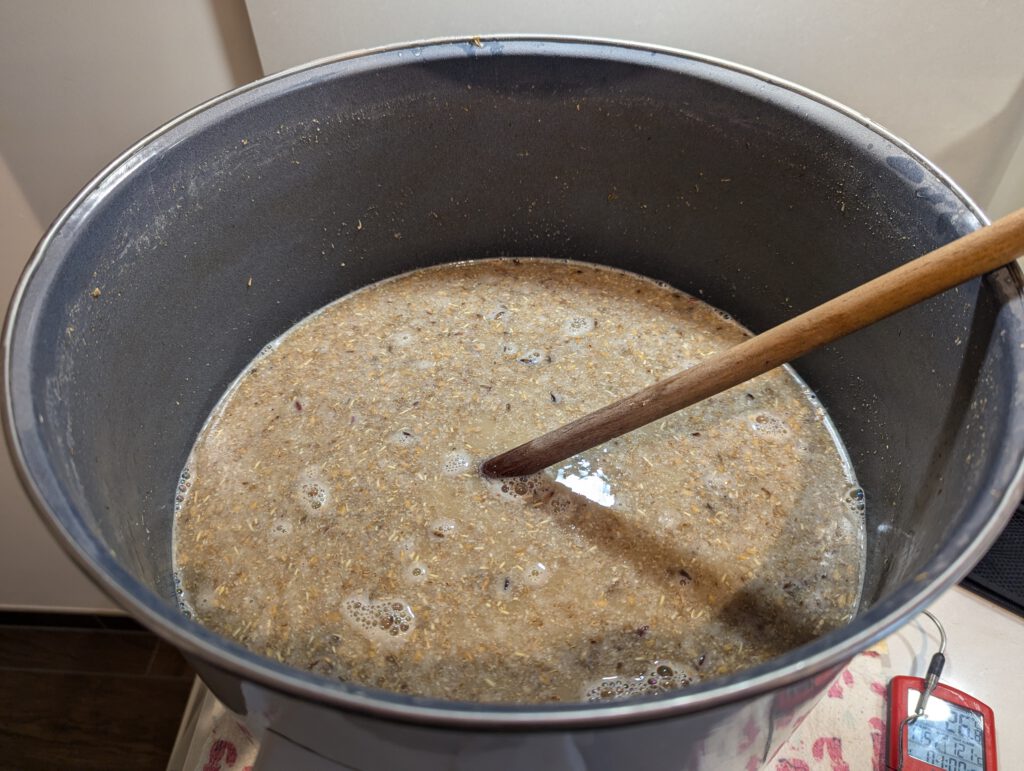
The main mash, visibly paler than the boiling decoction portion.
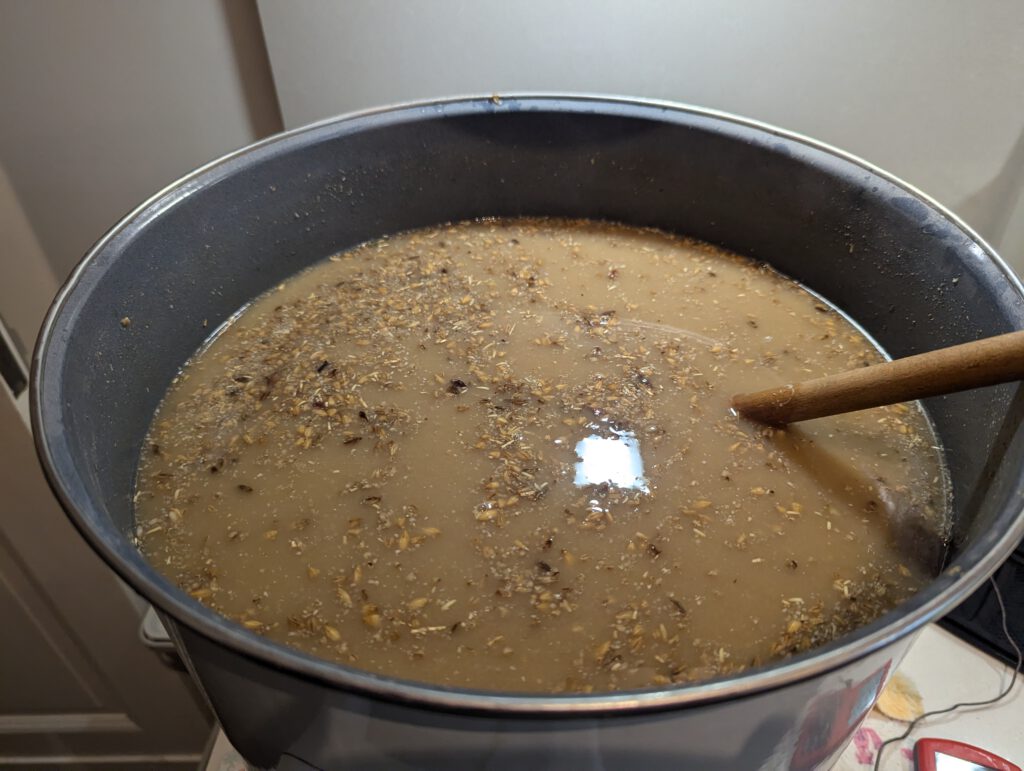
The main mash after the decoction portion has been mixed back in, noticeably darker than the main mash before mixing back.

So what’s the downside? Well, efficiency. I’ve not noticed any significant increase in efficiency between multi-step infusion mash and single decoction mash. The enhanced double decoction (which involves boiling two thirds of the whole mash) I normally on the other hand use gives me a bump of about 4-5 percentage points in efficiency. To compensate for that, I just need to buy 10% more in malt. At homebrew scale, those additional costs are very manageable (about €1).

This very positive experience made me rethink my approach to decoction mashing for German beer styles. I think I will stick to double decoction as a mash profile for Czech styles for maximum intensity, but for German styles, single decoction seems absolutely sufficient and saves me 1 to 1.5 hours of time.

My Summer Beers for 2024

I feel like I’ve mostly blogged about beer history in the last year, but the truth is: I still brew beer at home. So this time, I want to talk about what beers I brewed for myself together with friends as the summer beers of 2024.

Czech 8° Pale Lager, Revision 3

Both in 2021 and 2022, I brewed Czech Pale Lagers specifically for the summer: refreshing, with lots of character, but lower in alcohol. In Czechia, beer “styles” are most often described in two dimensions, one is the colour (pale, semi-dark, dark, black), the other one is a band of strength, but not alcohol content, but rather original gravity, i.e. the amount of sugar in the wort before fermentation. “Eight degrees” thus refers to an original gravity of 8° Plato. It’s certainly on the lower end for Czech draught beers (10° is much more common), but it’s certainly allowed, though quite rare these days.

In my first version in 2021, I tried out a grist of mostly Pilsner malt with a small amount of dark caramel malt (CaraBohemian in my case), double decoction mash of course, Czech Saaz hops for bittering, German Brewers Gold hops as a late addition, and fermented with Lallemand Diamond Lager yeast. The idea was to get a citrusy-zesty note from the Brewers Gold like I had tasted it in other beers I had previously brewed, but in practice, the beer was a bit fruitier than expected. Still, it was very drinkable and well-received even by a few professional brewers I gave samples to.

In my second version in 2022, I slightly changed things: still double decoction mash, but just 100% Bohemian Pilsner malt this time, 100% Czech Saaz hops (did somebody say SMaSH?), and Imperial L28 yeast (allegedly the Pilsner Urquell D strain). That one was absolutely amazing.

So for my third version for 2024 (I had only brewing plans for 2023), I collaborated with my friend Christian, co-founder of THE MASH PIT (which unfortunately had to close during the pandemic) to brew a slightly different version: the change this time was to the grist: instead of 100% Bohemian Pilsner malt, we instead went for 80% Pilsner and 20% Munich malt. Christian in his time as brewer had made the experience that such additions of Munich malt can add just a bit more malt complexity, while I had noticed the use of Munich malt in Vinohradský Pivovar’s Káranská 9 beer which is described as being brewed with Munich and Pilsner malt.

We still stuck to 100% Saaz as well as double decoction mashing, but changed the yeast to the more affordable option of W-34/70 (because it doesn’t make that much of a difference, anyway).

The Recipe

Now that the beer is finished and both Christian and I tasted it, I can report back that it’s also a smashing success. Here are the ingredients:

  • 2.7 kg (79.4%) Bohemian Pilsner malt (Weyermann)
  • 0.7 kg (20.6%) Munich II malt (Weyermann)
  • 34g Saazer hops 2021 harvest (4.7% alpha acid) @ 60 min
  • 30g Saazer hops 2021 harvest (4.7% alpha acid) @ 5 min
  • 2 sachets of Fermentis Saflager W-34/70

Basic specs:

  • OG 8.7 °P
  • FG 2.5 °P
  • 3.3% ABV
  • Colour 7.4 EBC (calculated)
  • Bitterness 22.5 IBU (calculated)
A Tübinger glass with a slightly hazy, dark golden to pale amber beer in it, topped by a thick layer of white foam. It’s darker on the photo than what it really looks like.

And this is how we brewed it:

We mashed in all the malt with 20 liters of water to end up with a mash temperature of 32°C. After a brief wait, we pulled 12 liters of thick decoction, heated it up to 72°C, let it rest for 15 minutes, brought it to a boil for 5 minutes, then mixed it back. The resulting temperature of the mash was 66°C.

After 33 minutes, we pulled 8 liters of thin decoction, brought it to a boil, boiled it for 5 minutes, and mixed it back. The resulting mash temperature was 72°C.

We then rested it for 10 minutes, heated it up to 78°C, and then moved the mash into the lauter tun. After lautering and sparging, we brought the wort to a boil, and boiled it for 60 minutes, with hop additions at 60 minutes and 5 minutes before the end of the boil.

We then transferred the chilled wort to a fermenter and pitched two sachets of rehydrated W-34/70 yeast at 10°C. The beer then fermented until terminal gravity and was then lagered for 3 weeks at 1°C. We bottled it with some of the wort that we had held back so that it could referment in the bottle for natural carbonation.

Looking back at the first version of a Czech-style summer beer, I noticed that I had mentioned Mahrs Sommerpils in my blog post as an inspiration that lower-ABV beers with lots of bitterness and hop aroma can actually work. I actually had a bottle of Mahrs Sommerpils just the other day, and it’s just not the same beer it was back in 2019 when I first had it directly from the source. It lacks that bitterness and hop aroma it initially had. Even if I had Mahrs Sommerpils available in my local supermarket, I would still rather drink my home-brewed summer beer, and it’s definitely something I will brew again next year.

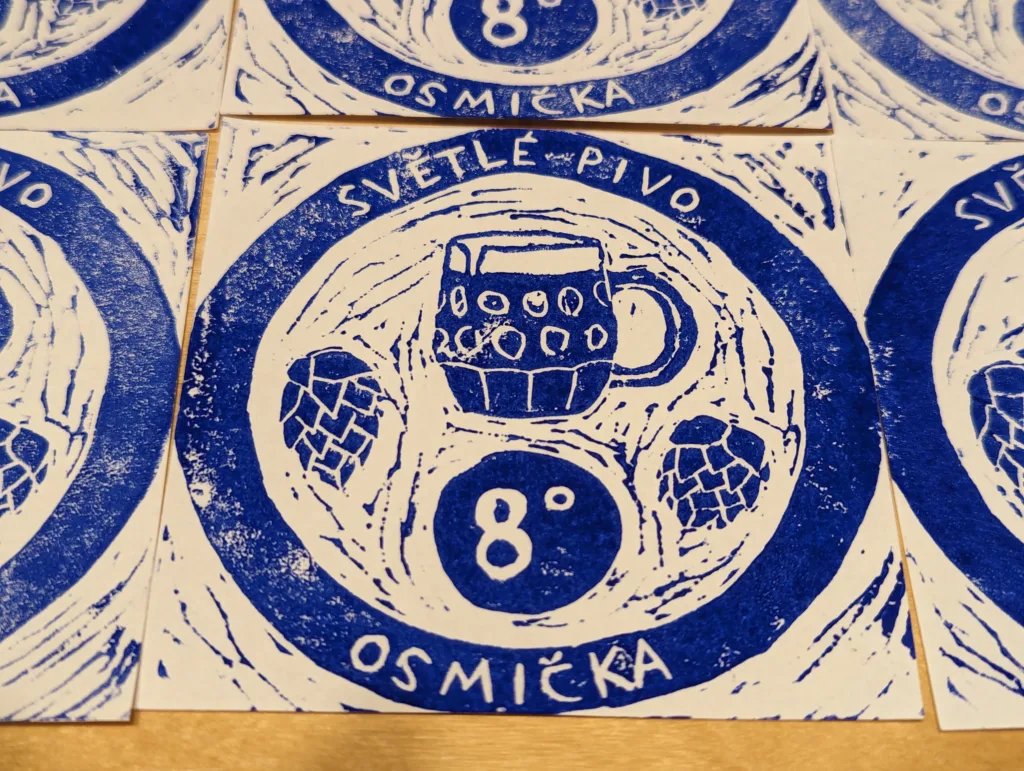
A beer label I designed for the 8° Pale Lager and printed using linocut. It consists of a circle that says “SVĚTLE PIVO” (pale beer) on the top and “OSMIČKA” (eighter, referring to the 8° Plato strength) on the bottom. Inside the circle, there is a Tübinger glass on top, left and right below it two hop cones, and underneath it, a circle with the text “8°” inside, again referring to the beer’s strength.
Best Bitter

This is a beer that I brewed with another friend and former work colleague of mine, Joel. It was actually born out of failure: Joel wanted to learn how to brew beer at home, so I showed it to him, but the first recipe for a Best Bitter I had come up with was not very good: a slight touch of chocolate malt turned the beer to be too roasted and astringent, while the substandard quality of the liquid yeast caused it to perform badly during fermentation. The resulting beer was also too hazy.

So this beer was a revision of that, and I wanted to approach it as simple as possible this time: about 90% pale malt, 10% Dark Crystal malt, Irish moss to help with a clearer beer, and the popular and often-used SafAle S-04 yeast.

The Recipe
  • 3.75 kg (90.4%) Pale malt (Weyermann)
  • 0.4 kg (9.6%) Warminster Crystal Malt 150 EBC
  • 60 g Fuggles (3.1% alpha acid) @ 60 min
  • 30 g Fuggles (3.1% alpha acid) @ 10 min
  • 1 tsp Irish moss @ 10 min
  • 2 sachets SafAle S-04 yeast

Basic specs:

  • OG 10°P
  • FG 2.8°P
  • 3.8% ABV
  • Colour 18.6 EBC (calculated)
  • Bitterness 26.3 IBU (calculated)

This time, the approach was much simpler: we mashed in all the malt with 15 liters of water to end up at a mash temperature of 67°C. We then rested it for 60 minutes. We then heated up the mash to 72°C and rested it for another 10 minutes. We then lautered and sparged it, followed by boiling the wort for 60 minutes, with hop additions 60 minutes and 10 minutes before the end of the boil. We then chilled down the wort to 20°C, pitched two sachets of S-04 yeast, let it ferment, and then bottled it with wort we had held back so that the beer could referment in the bottle for natural carbonation.

In the end, I was actually quite surprised about the resulting beer: it does taste remarkably close to a proper cask bitter (though it may be slightly undercarbonated), it has the right expression of fruity esters that makes bitters so unique, and it has absolutely the right malt character. I very firmly believe that British bitters, whether it’s ordinary, best or extra special bitter, stand and fall with using the right ingredients, and crystal malt from a British maltings is quite crucial for that, I think a lot more important than what people think it is. And I think it’s where most non-British brewers fail, even if they get the hops, the yeast and the water treatment right.

And while a Best Bitter may not be the most typical summer beer, I think what still makes it very good for this time of the year is the relatively low amount of alcohol of just 3.8% ABV.

The Best Bitter in the wrong kind of beer glass, visibly undercarbonated, with signs of chill haze.

The best beer I ever brewed?

OK, this is probably the clickbaitiest title of a blog post that I’ve ever come up with, but bear with me.

For the June/July 2022 issue of Craft Beer & Brewing magazine, Evan Rail wrote an article about Czech Dark Lager, aka tmavé pivo. I’ve always quite enjoyed this particular style, especially whenever we were visiting Prague, as it is (in my opinion) a very balanced beer type that combines the complexity of flavours of dark kilned and roasted malts with a great drinkability, the kind of balance that other dark beer styles don’t quite achieve. But it is not always hard to find.

Inspired by this article, I noted all the tips and tricks on formulating a recipe and brewing the beer, then developed a preliminary recipe, and got together with my friend and neighbour Ben to actually brew this.

What we brewed in the end had the following grist:

  • 2.5 kg Bohemian Pilsner malt (49.0%)
  • 1.9 kg Munich II malt (37.2%)
  • 0.6 kg CaraBohemian (11.8%)
  • 0.1 kg Carafa Special II (2.0%)

One important technique that was emphasized in Evan’s article was to add the roasted malt (Carafa Special II) only in the lauter/sparge stage. If this hadn’t been mentioned, I would have simply added it to the main mash, intensely boiled it in the first decoction, and probably ended up with a beer with too much roasty bitterness.

In Czech tradition, we chose a double decoction as our mashing regime. We mashed in relatively cold, then pulled a very large decoction which we step-mashed with a rest at 73°C, and then boiled it for 15 minutes until we mixed it back to get to our conversion temperature of 66°C. After a while, we pulled a thin decoction, boiled it for 6 minutes, then mixed it back to get to 73°C. After 15 minutes, we then heated the mash up to 78°C for mash out.

After transferring to the lauter tun, we added the roasted malt to the top of the mash, and started collecting the wort. The impact of the roasted wort is subtle at the start, but will develop over time until we ended up with a dark but still slightly translucent wort.

As for the hops, we went for something really simple: just Czech Sladek hops (8% alpha acid), with two additions at 60 min (1 g/l to contribute about 17 IBU) and 20 min (1.7 g/l to contribute about 17 IBU) before the end of the boil, for a total of 34 IBU. That was another tip from the article, namely that the beer style can do with more bitterness that you’d think.

(As a side note, I find the name Sladek for that hop variety just great; Sladek was developed as a cross of Czech Saaz hops and Northern Brewer hops; Sladek means brewer in Czech, so crossing Northern Brewer with the classic Czech hop variety made it a Czech Brewer – a Sladek; this is my personal theory of why this name was chosen)

After 60 minutes of boiling, we chilled down the wort which had a OG of 13.6°P, even better than the 13.3°P I had planned the recipe for. When the wort had reached a temperature of 10°C, we finally pitched a healthy dose of bottom-fermenting yeast. That was actually a point where we deviated from the tips in the article. Ben had gotten his hands on fresh pitching yeast from a large industrial lager brewery here in Berlin, so of course we just had to use this very fresh, vital yeast instead of using a genuinely Czech strain (which was actually a bit hard to find at the time).

Fermentation went a bit slow, but after 4 weeks, we finally reached our FG of 3.8°P. This may seem high, but a point of the mash schedule was to produce a larger quantity of unfermentable sugars which would keep the FG high and the beer’s body full. After an excruciating 6 weeks of lagering at low temperatures, we finally bottled the beer last weekend, adding just half a liter of wort we had held back as a source of sugar for bottle conditioning. During lagering, the beer had already attained quite a bit of carbonation where CO2 simply naturally went into solution due to the lower temperatures, so not much Speise was necessary.

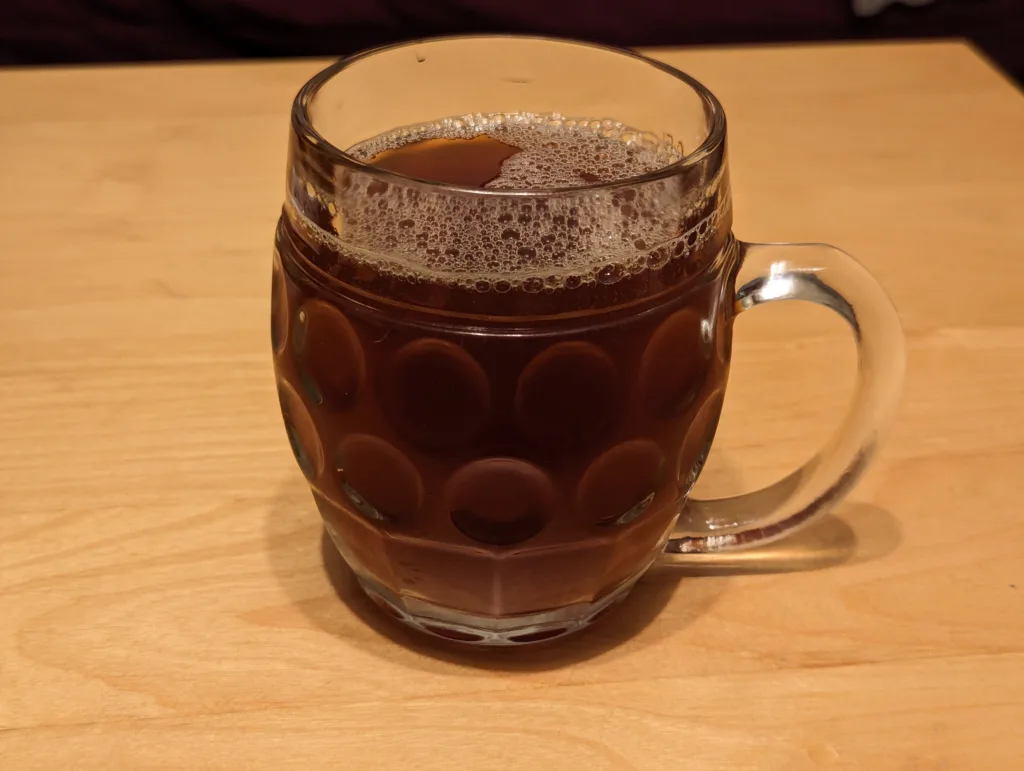
The final beer probably has about 5.3% ABV, at least that’s what our calculations said. And now look at this beauty:

The beer is dark, but not black. The foam is dense and off-white. And the taste? Just sublime. Better than any of the samples I had taken from the fermenter or even during bottling. If I had been served this in a pub in Czechia, I would have been very happy. There is some roasted bitterness, but it melds nicely with the hop bitterness. There’s a lot of chocolate and coffee going on in there, the body is full but not too full, making you want to drink another one at the end of it (I restrained myself and only had one, as I want to keep more of the beer for Christmas). There are notes of dark malts and caramel malt, but no cloying sweetness whatsoever.

Ben and I then went through the BJCP style guideline’s description of Czech Dark Lager, and the beer seemed to tick all the boxes. The bitterness is certainly on the high side, but I think it only makes it more interesting and adds some complexity.

All in all, we’re both very happy with the result. For me, it is probably the best beer I’ve brewed myself. I’m rather self-critical, and I could not find a single flaw. And I think what got me there were the quality ingredients, sticking to all the traditional methods that I had learned about, and most importantly, not cutting any corners in the brewing process.

My Summer Beer 2022

Like last year, I decided for 2022 to brew a light and refreshing beer for the the summer. I was really really happy with my 2021 beer, and so for this year, I again brewed an 8° Czech-style beer, this time even more traditional than last year.

And that was my exact approach: be as simple as possible, but stick to the ingredients that would constitute a Czech beer according to PGI (if I brewed commercially in the Czech Republic and wanted to sell my beer with a Czech Beer PGI label): the sugar from the wort needs to be at least 80% from Czech barley varieties, at least 30% of the alpha acid needs to come from Czech hops varieties, decoction mashing needs to be used, and the beer needs to be bottom-fermented. So I went all in:

The brewing and fermentation process itself was rather uneventful: I hit 8.4°P OG, chilled the wort to 10°C, pitched a yeast pack, fermentation took off in less than 36 hours, and after about 3 weeks, it was finished, with a FG of 2°P. I then ramped down the temperature to 2°C, let it sit at that low temperature for just 2 weeks, and then bottled it, bottle-conditioning it with 1 liter of wort that I kept back.

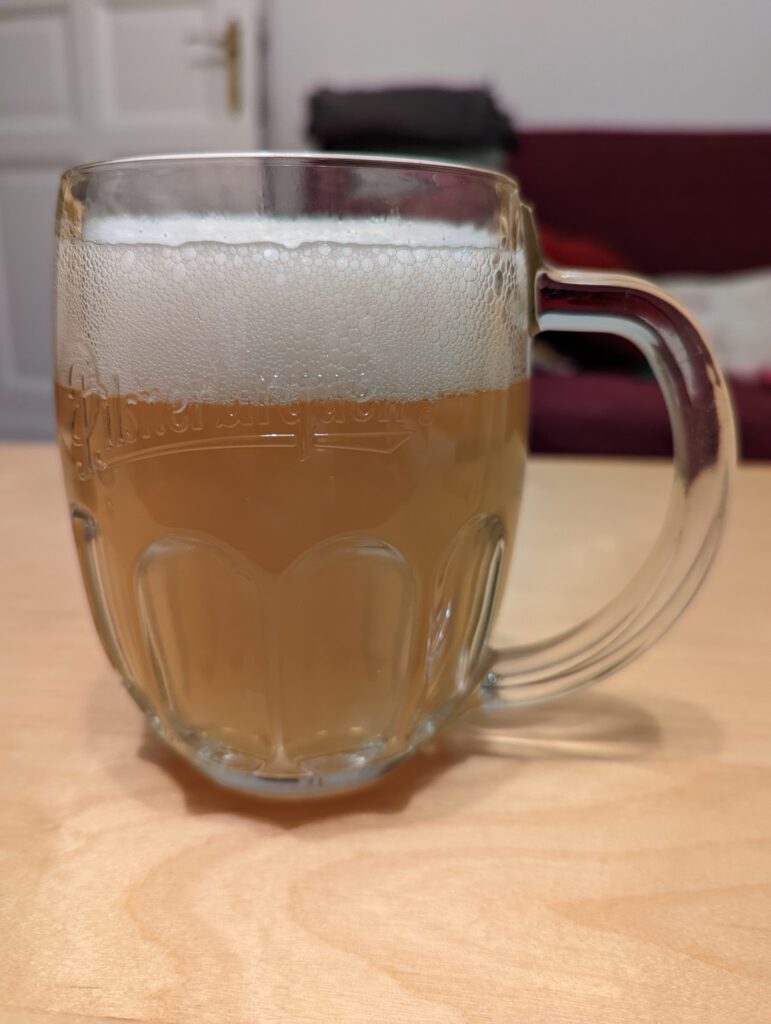
I’m absolutely impatient when it comes to waiting for beer to be finished maturing and bottle-conditioning, so I had to crack one bottle open after just 1 week. I pre-chilled it for a few hours, and then poured it into a Pilsner Urquell glass I had at home. While carbonation wasn’t 100% there yet, it was definitely enough to drink it. The foam was fluffy but with rather big and open bubbles (I hopes this improves when carbonation is higher), the beer still looked slightly hazy with a very pale colour). It smelled absolutely amazing, and just after the first sip I could definitely say that this was exactly like a Czech beer (it’s not a Czech beer because I brewed it here in Berlin, hence why I call it Czech-style). It has that exact bitterness and the kind of hop flavour and aroma that I would expect from any Czech beer, it has a unique edge to its malt character that I would attribute to the intense decoction mash (hard to describe, but once you’ve had plenty of Czech beers, you just notice it, from your easy-drinking 10° beers to modern Czech-brewed IPAs e.g. from Matuška), and it’s got a very good body for such a low-strength beer.

The Urkel Lager strain, despite (allegedly) having a Pilsner Urquell provenance, does not seem to produce diacetyl at any detectable levels. What it does though is produce lots and lots of sulphur. This was particularly noticeable during fermentation and at the beginning of the very short lagering period, but at packaging, all of that was gone.

In the end, choosing the right ingredients and processes for the kind of beer you want to brew matters, and I’ve only ever gotten all the details of a Czech-style beer right when I applied all the techniques that I knew, with all the right ingredients.

What follows is a quick recipe. In terms of ingredients, it’s incredibly simple and one of those beers that can be formulated as a SMaSH beer – single malt and single hops. In this case:

  • 3.1 kg floor-malted Bohemian Pilsner malt from Weyermann
  • 24 g 2021 harvest Saaz hops (4.2% ABV) @ 60 min
  • 24 g 2021 harvest Saaz hops (4.2% ABV) @ 30 min
  • 24 g 2021 harvest Saaz hops (4.2% ABV) @ 5 min
  • 1 pack Imperial Yeast L28 Urkel Lager yeast

Use enhanced double decoction mashing scheme. Lauter, sparge, chill to 10°C, pitch yeast. Ferment fully, lager at low temperature for 1 week (I went down to 2°C), bottle or keg and carbonate. This should get you about 20 liters of a beer with 8.4°P OG, 2°P FG, 3.4% ABV, about 25 IBU in bitterness, and a very pale colour.

Experience in Brewing a Belgian-Style Tripel

I’m not really an expert on Belgian beer styles. I do like my gueuzes and lambics, and there are some Belgian beers that enjoy occasionally (my wife and I keep a collection of various vintages of Orval), but my personal interest is not exactly focused on Belgian beer, and therefore I don’t seek them out regularly or brew them at home.

My Dutch neighbour Rick though, he’s very much into Belgian beer styles. When he learned that I knew how to brew beer at home, it was clear that we had to brew something together. I asked him what his favourite beer style was (it’s Tripel, with his favourite beer being Tripel Karmeliet), and so we decided to brew a Tripel. Prior to that, I had only brewed one Tripel that was loosely inspired by Brooklyn Brewery’s Local 1. So off I went to do a bit of research.

My first decision was to make the base mostly Pilsner malt, and use some sort of sugar so as to make the beer “thinner”. With a high original gravity, you’d expect the final gravity to be fairly high and the beer to be full-bodied, so adding sugar to amp up the original gravity but keep the final gravity at a fairly low level is the way to go.

With the hope of adding a bit more complexity to the malt profile of the beer, I decided to also add 500g of flaked spelt. Not only is it a fairly cheap and easy to get ingredient, it could potentially also impart its own flavour to the beer, and (as a relative of wheat) also help with head retention.

When it came to the choice of sugar, I first looked at what my options are with pale candi sugar. Turns out, candi sugar syrup from home-brew stores is really expensive, and so I decided to look into other types of sugar. I found a slide deck “The Sugars of Tripel” by Ted Hausotter which discusses several option in great detail and also involved some experimentation. If you plan to brew a Tripel yourself and are thinking your sugar options as well, don’t miss this presentation. Looking at the slides of tasting results and rankings of the type of sugar used, I opted to go for cane sugar, as it seemed an okay option that also didn’t deteriorate flavour-wise over time. There was some warning that sucrose could add a slight cidery note to the finished beer, but I was willing to risk that.

As for the yeast, I took a closer look at what my options were with dry yeast. Fermentis has two options that could roughly fit the phenolic and estery profile of Tripel, namely SafAle BE-256 and SafAle T-58. Lallemand also has two options, one is their LalBrew Abbaye, the other one a more recent offering that might seem a bit unusual at first: LalBrew Farmhouse, which they describe as a hybrid-style saison yeast. Unlike most other saison strains, this one is non-diastatic, meaning the yeast is missing a gene that would otherwise help it enzymes to break unfermentable sugars down to help ferment a beer to absolute dryness.

When I came across that product, it actually got me thinking: normally, saison yeasts are a bit more phenolic in their flavour profile, but if that yeast is indeed non-diastatic, I could end up with a beer less dry and still with enough body to make it a convincing Tripel. What’s the worst that could happen? If the flavour profile does turn more towards a typical saison, I’d have something akin to Dupont Bons Voeux. So let’s be a bit experimental.

When it came to hopping, I wanted to have enough bitterness and hop aroma so as not to make this beer too sweet. It’s what I had noticed with some Tripels, and Joe Stange had also mentioned to me in the past that Tripels can work surprisingly well even with higher levels of bitterness. I think his prime example was Westmalle Tripel. When aging strong beers, my experience is that you could lose quite a bit of noticeable bitterness, so it’s better to aim too high than too low. In the end, I decided for go for 1g/L of Herkules (16.7% alpha acid) as bittering addition, 1g/L of 2021 harvest Saaz hops (4.2% alpha acid) as flavour addition (30 minutes before end of boil), and 2.5g/L of the same Saaz hops as late aroma addition (5 minutes). In terms of calculated IBU, this should end up at about 38 IBU.

The brew day itself was fairly relaxed: Rick and I mashed in 5.2 kg of Bohemian Pilsner malt and 500g of flaked spelt, did an initial protein rest for about 15 minutes at 54°C, then ramped up to 62°C for saccharification for about 40 minutes, and then 72°C for another 30 minutes, finished off with an increase to 78°C. Lautering and sparging went fine, and we mixed in and dissolved 1.2 kg of cane sugar (an organic own brand from a local health and beauty retailer that is ever so slightly darker than regular table sugar). After 60 minutes of boiling and adding all our hop additions according to schedule, we chilled the wort to 20°C, measured OG (19°P) and pitched two sachets of the Lallemand Farmhouse yeast.

I had originally planned the recipe for an OG of 18.5°P, but for whatever reason, we had slightly higher extraction and got 19°P. Surely not a bad thing.

After about 2 weeks, the beer was fully fermented. We then bottled it, using the same cane sugar for priming, and then let it sit for a few weeks for bottle-conditioning. The final beer came out at 2.7°P FG, which means that the final beer should have about 9.2% ABV.

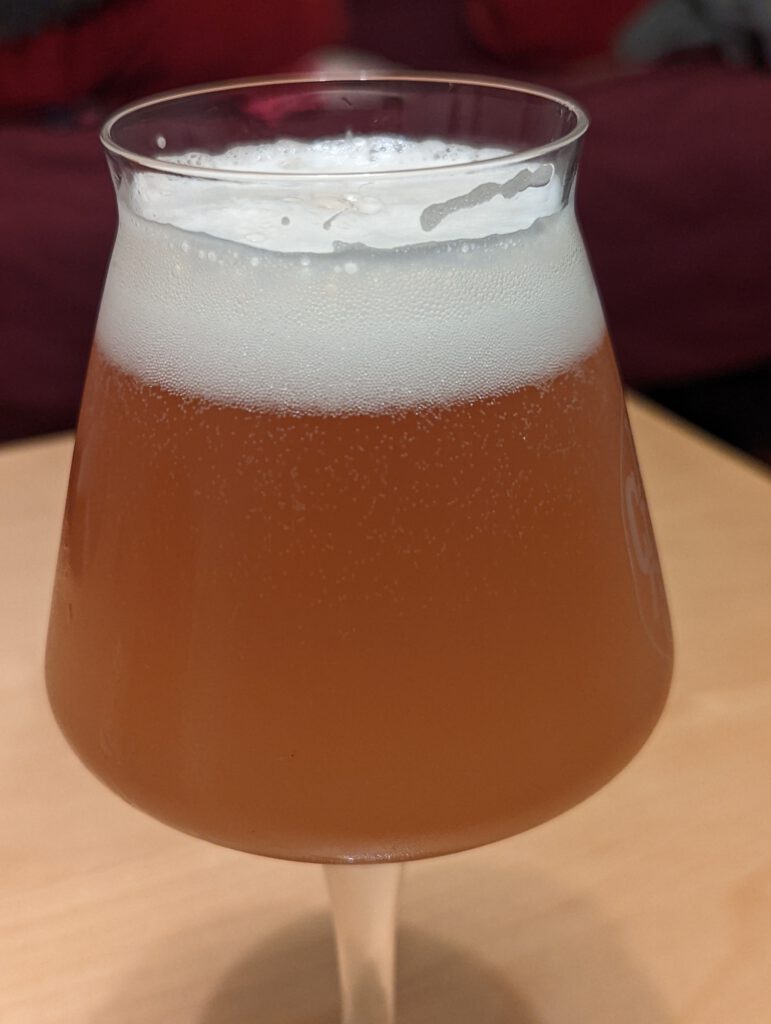
We finally sampled the first bottle together this Friday. The resulting beer was actually less bitter than expected, and the hop aroma was more subtle than what I had expected, but nevertheless present in sufficient amounts. The beer itself looked slightly hazy, with a pale orange tone that made it look very inviting. The foam was very white, long-lasting and pretty dense, while the carbonation was exactly the right amount to make it pleasantly fizzy but not overly so (we went for about 2.5 volumes / 5g/L carbon dioxide). As for the flavour of the beer itself, I think the yeast expressed a very balanced amount of fruity ester and spicy phenols without either of them being too much in your face or overpowering anything. The body is just right, not too dry and not too full, which makes the beer dangerously easy to drink. The alcohol does not show at all, it is very smooth and slightly warming, and no cidery note from using cane sugar was noticeable. Rick (as a home-brewing newbie and Belgian beer aficionado) was very happy, and so was I, as I hadn’t brewed this style much beforehand, and therefore was really just guessing my way into a recipe based on some reading about the style that I had done.

(it glows more when held against the light)

The choice of yeast, although a bit risky because it was supposedly not an ideal match for the style, was a good call, and I can absolutely recommend Lallemand Farmhouse dry yeast for Belgian Tripels and similar styles. Keeping the grist simple with just Pilsner malt and spelt flakes also turned out to be a good choice, as was the use of cane sugar.

To summarize the recipe:

  • 5.2 kg Pilsner malt
  • 0.5 kg flaked spelt
  • 1.2 kg cane sugar
  • 20 g Herkules hops (16.7% alpha acid) @ 60 minutes
  • 20 g Saaz hops (4.2% alpha acid) @ 30 minutes
  • 50 g Saaz hops (4.2% alpha acid) @ 5 minutes
  • 2 sachets Lallemand Farmhouse hybrid saison yeast

Mash in and do multi-step infusion mash as described above (54°C, 62°C 40 min, 72°C 30 min, 78°C mash-out), lauter, sparge, add cane sugar to wort, boil 60 minutes with hop additions as describe above, chill to 20°C, pitch yeast, package with carbonation level of 2.5 volumes / 5g/L.

My Summer Beer 2021

Due to a rather bad episode of COVID, I hadn’t brewed a beer since October 2020, a Helles, which, when I bottled it in April this year, didn’t properly bottle-condition, and instead became an oxidized mess.

So this beer was a fresh start, my first home-brewed beer in a long time, and just something I wanted to have for myself. When I developed that recipe, I got inspired by two things:

First, the Czech Republic’s culture for lower-alcohol beers, with original gravities of 10°P or lower, and moderate amounts of alcohol of 4% ABV and lower.

Second, a particular Leichtbier that I had at Mahrs Bräu in Bamberg, which they call Sommerpils: it’s a very bitter beer at only 2.8% ABV and 7.2°P OG, and the first time I realized that highly hopped beers with low ABV can work really well.

After some thinking, I came up with an idea: I wanted to create a Czech-inspired 8° beer, with a good amount of bitterness coming from a late hop addition at flameout. One particular hop variety that I really liked in the past was Brewers Gold. I had used it in a Golden Ale previously, and it just gave off lovely citrusy notes with a fruitiness that some describe as blackcurrant.

But why would I call it Czech-inspired? First of all, the OG: 8°P is something that you would in the Czech Republic more often that in e.g. Germany. German Leichtbiere are typically even lower than that.

Second, the grist: I decided to stick to just Bohemian Pilsner malt and a small ~3% addition of a dark caramel malt, in my case CaraBohemian.

Third, the mashing regime: I’m a huge fan of double decoction. Even though it takes a long time, it has given me very good results in previous beers. In particular, I’m using an enhanced double decoction scheme that basically skips protein rest or keeps it to a very short amount time. Decoction mashing is also extremely common in Czech brewing.

Fourth, the bittering hops: I used Saaz hops simply because I had them available, they’re reliable and suitable for what I wanted to achieve. As aroma hops, as mentioned above, I got Hallertau-grown Brewers Gold.

Let’s quickly compare this to the PGI regulation for the term “Czech Beer”: at least 80% of the sugar in the wort needs to be from malt from Czech barley varieties (which I assume Weyermann’s Bohemian Pilsner malt should fulfill), at least 30% of alpha acids from hops must come from Czech hop varieties (I’m using Saaz for bittering), local water must be used (I do that), bottom-fermenting yeast must be used, and decoction mashing must be used. I’d say I’m pretty close, except I don’t brew in the Czech Republic, nor do I attempt to get any PGI Czech Beer certification for my home-brewed beer. Nevertheless, the regulation is still a good indicator of what’s considered to be traditional or necessary for Czech beer, and therefore also serves as a good template for Czech-style or Czech-inspired beers.

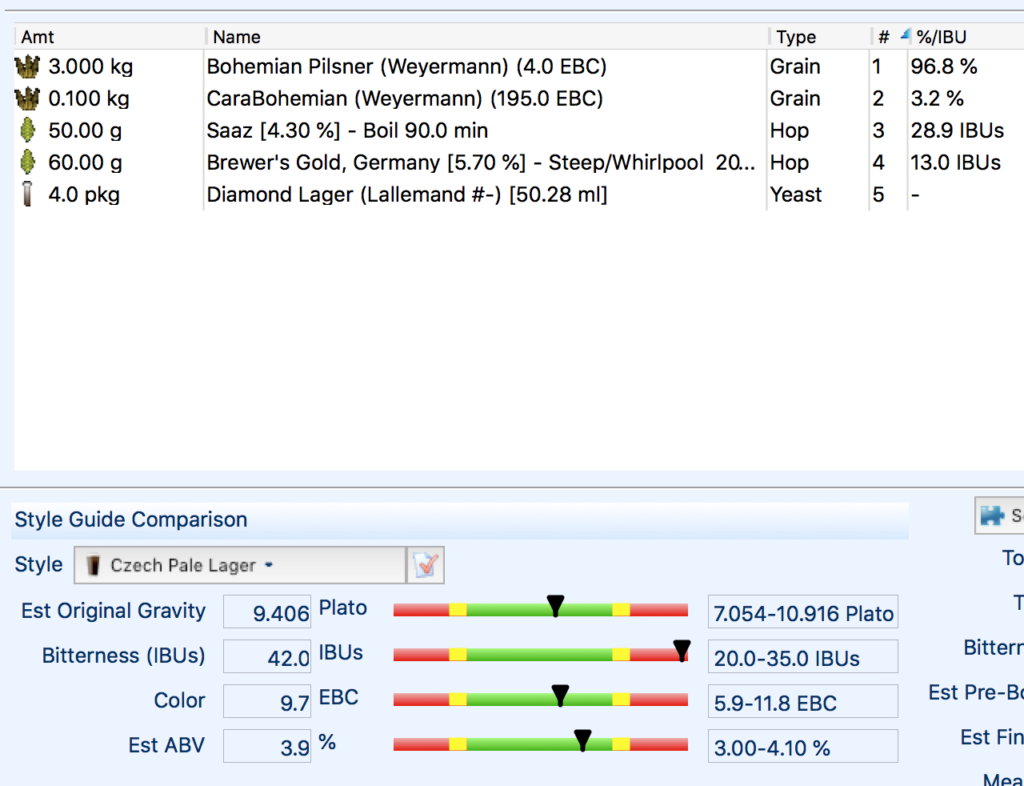
Grist, hop additions, yeast and basic numbers.

The brew day itself was relatively uneventful, except for a slightly higher than expected OG of 9.4°P. The 8° beer became a 9° beer. I can cope with that.

I chilled the wort, pitched plenty of Lallemand Diamond Lager yeast, and just let it ferment. When the beer was fully attenuated, I decided not to bother with lengthy lagering, but instead just slowly lowered the temperature down to -1°C, kept it there for a few days, and then bottled the beer.

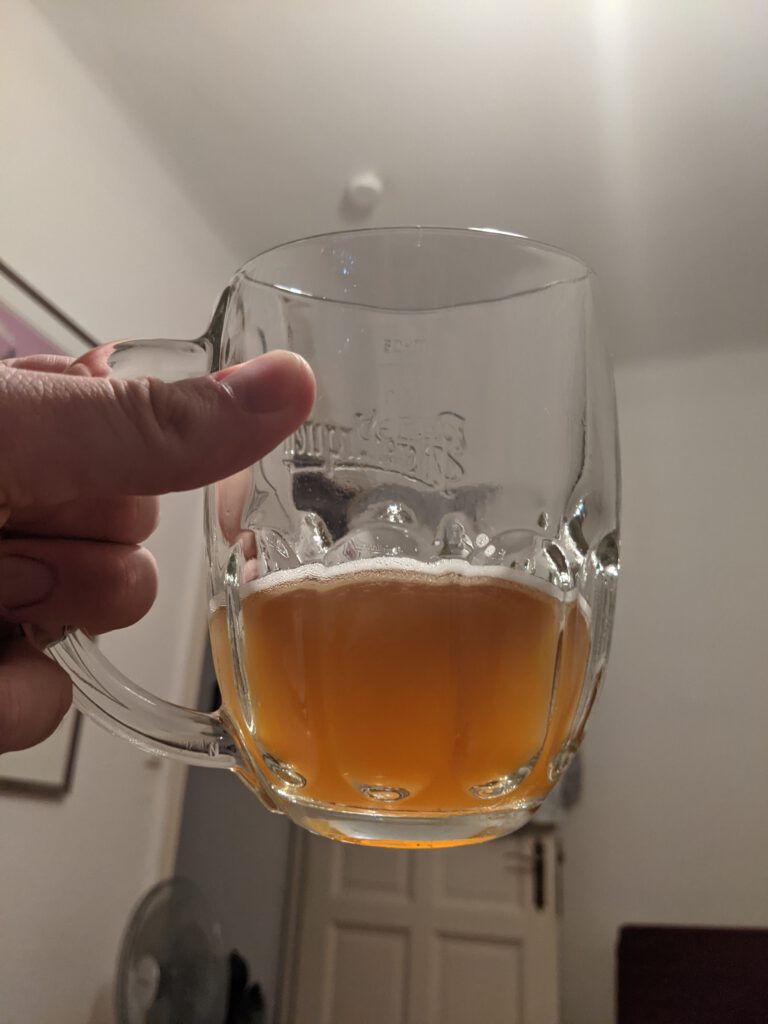
My Czech-inspired beer is now bottle-conditioned and ready to be consumed. When I first poured it, I was surprised about how hazy it was. Even after several more days in the fridge, it still remains hazy. I blame hop haze from the flame-out addition, but to be honest, I don’t actually care. Because the beer itself tastes great.

It’s got a full body, at a FG of 2.2°P, and with 3.9%ABV, it’s a very drinkable beer with a robust bitterness that lingers on. The Brewers Gold hops provide a nice citrusy flavour, but its additional fruitiness in the aroma combined with a slightly lower than expected carbonation (my fault) gives the beer an English Bitter vibe. Brewers Gold was originally an English hop variety, and it still shows in this bottom-fermented beer.

All in all, I’m really happy with the result. It’s a nice, refreshing beer perfect for a hot summer. I still have ~17 litres in my fridge that likely won’t last till the end of summer.

And finally, a photo of what the beer actually looks like. An alternative title for this blog post that I had in mind earlier was “my crispy boi is also a hazy boi”.

A Conversion Chart Between Beer Colour Scales

In a recent Twitter discussion about beer colour and colour scales, Ron Pattinson said how handy it would be to have a conversion chart between colour scales, ideally for Lovibond, SRM, EBC, Stammer (famously used by Professor Schwackhöfer in his 1876 analyses of beers sold in Vienna) and “Einheiten nach Brand”. In particular, the discussion revolved around the latter, as it’s one of the scales used in TGL 7764, East Germany’s industry standard for beer.

TGL 7764 is a particularly interesting industry standard, as it’s a rare example of beer styles getting standardized down to original gravity, bitterness, beer colour and even beer label colour and (in the case of Porter) microorganisms (Brettanomyces). And unlike style guidelines nowadays, like BJCP or the Brewers Association’s ones, this was actually prescriptive, i.e. it was compulsory for breweries in the GDR to follow these beer styles. I’m not aware of any other country doing that, but then, I haven’t really looked into it systematically.

Unfortunately, there does not seem to be a linear relationship between the Brand scale and EBC, so a simple conversion based on a few data points that we have from the 1980 and 1986 versions of TGL 7764 (which uses NFE, Brand, K450 and EBC) is not possible. Nevertheless, I’ve looked at the conversion between Stammer and the other common scales in the past and even put a simple table in my latest book, so I took this as a chance to at least present the data that I already have.

I will try and find out more about the Brand scale and if I do, I will update this table accordingly.

Conversion Formulas

Stammer to Lovibond: °L = Stammer / 1.38

Lovibond to SRM: SRM = 1.3546 × °L – 0.76

SRM to EBC: EBC = SRM * 1.97

Conversion Table

EBCSRMLovibondStammer
1.00.50.91.3
2.01.01.31.8
3.01.51.72.3
4.02.02.12.8
5.02.52.43.4
6.03.02.83.9
7.03.63.24.4
8.04.13.64.9
9.04.63.95.4
10.05.14.35.9
12.06.15.17.0
14.07.15.88.0
16.08.16.69.0
18.09.17.310.1
20.010.28.111.1
25.012.79.913.7
30.015.211.816.3
35.017.813.718.9
40.020.315.621.5
45.022.817.424.0
50.025.419.326.6
60.030.523.031.8
70.035.526.837.0
80.040.630.542.1
90.045.734.347.3
100.050.838.052.5

Double-Decoction Mashing on a Home-Brew System Not Designed For Decoction: A Post-Mortem

Today, I brewed together with Ben Palmer at the MASH PIT, a kind of nanobrewery/home-brewing co-working space that allows you to brew your own beer on the brew kits installed there. Ben had recently moved to Berlin, and since we knew each other through Twitter, we met up and eventually decided to brew a beer together.

One thing that I’ve been wanting to do for a long time at the MASH PIT was to brew a beer using a decoction mash. Ben was also happy to do that, so we agreed on a simple recipe. Our grist consisted of 98% Pilsner malt and 2% CaraMunich II, while the hops we chose were Celeia (Ben had never used Slovenian hops, and since I hadn’t either, I was happy to also try them out). The original idea was to ferment it with a Kölsch yeast, but since we were informed that the MASH PIT had run out of that yeast the day before the brew day, so we substituted it with Nottingham Ale yeast instead, another fairly neutral and attenuative top-fermenting yeast. For mashing, we wanted to do a double decoction, for several reasons: my reasons were that I wanted to try brewing a double-decocted beer on the MASH PIT kit, and I also wanted to try brewing an ale of some sorts that had a distinct decoction character. This was something I had stuck in my head ever since my last visit to Prague, where I tried a few ales [sic!] from Pivovar Matuška, and they all had a distinct “Czech” flavour that I could only attribute to decoction mashing. Ben’s reason to try out double decoction was that he hadn’t really much experience beyond a few demonstrations at his vocational school.

A few words on the MASH PIT brew kit: it is fairly simple and straight-forward. It consists of three large pots of maybe 75 litres volume (the scale only goes to 65), all equipped with taps on the bottom and the top and embedded thermometers. One of these pots is sat on a gas burner and mainly serves as kettle to boil the wort as well as to heat up the liquor (brewing water). The middle pot serves as mash and lauter tun and is equipped with a removable false bottom. It also comes with a RIMS attachment that allows you to pump wort (a liquid pump is part of the setup) from the false bottom through the attachment and sprinkle it again on top of the mash. The attachment has a heating element that can be turned off and on. With this setup, you can do a multi-step infusion mash fairly easily. The third pot is also equipped with an electric heating element and mainly serves as hot liquor tank (HLT). Through three switches, you can turn on and off pump, RIMS heating element and HLT heating element.

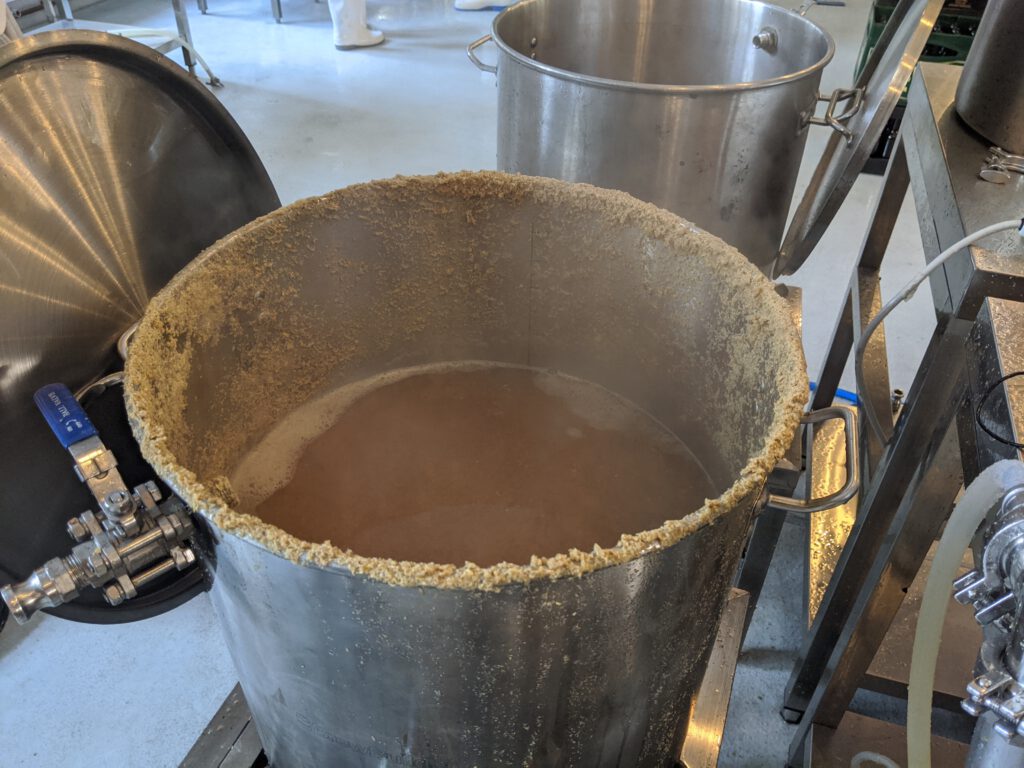
But instead of following this scheme, we instead decided to repurpose the kit for decoction mashing. With about 11 kg of grist, we filled the mash tun with 44 l of liquor at 45°C, then mashed in. This increased the overall mash volume to 55 l. The mash temperature was 41°C. After a short rest, we pulled 36 l (i.e. two thirds) of thick decoction and moved it over to the kettle. We brought the decoction up to a temperature of 70°C, which went very quickly thanks to the powerful burner. A quick rest of 15 minutes to at least partially convert the available starch, and then brought the mash up to a boil. That’s where the problems started: we had a bit of a boil-over, which was our mistake as we partially covered the pot with the lid and also kept it unwatched. After a quick cleanup and making sure we hadn’t lost much of our decoction, we continued boiling it for another 10 minutes.

A watched pot never boils, an unwatched pot boils over.

We then started mixing the decoction back into the main mash. We noticed that even though we had moved only about 50% of the decoction, we were already overshooting our target temperature of 65°C. That was not good. We had to improvise somehow, and so we decided to add some more cold water to the decoction to bring its temperature down. We eventually got that done and ended up with a mash at pretty much exactly 65°C, but now with a total volume of more than 60 litres, which we left to rest for 50 minutes.

So obviously we had overdone it with the decoction volume. I had chosen two thirds as the initial volume because that’s what had worked for me at home on my home-brew kit. Except my kit at home is for 20 litre batches, while this system is for 50 litre batches. I realize that my home system is at such a small scale that boiled mash can cool down fairly quickly, but I didn’t think that effect would effectively disappear at at scale-up from 20 to 50 litres.

The change in mash volume also meant that any previous estimations of the volume for the second decoction were out the window. We then decided to just estimate it to one third of the total volume, and then a bit, so the second decoction we pulled was thin and sized at 25 litres.

We brought this second decoction again to a boil, boiled it for 5 minutes, and then mixed it back again. By that time, the main mash had cooled down to 61°C, so the final temperature after mixing back was only 71°C. Not exactly the 75°C where we wanted to get to, but still good enough. We then left the mash to rest for another 30 minutes and prepared for lautering and sparging: we cleaned the kettle, filled up the HLT and heated the sparging liquor.

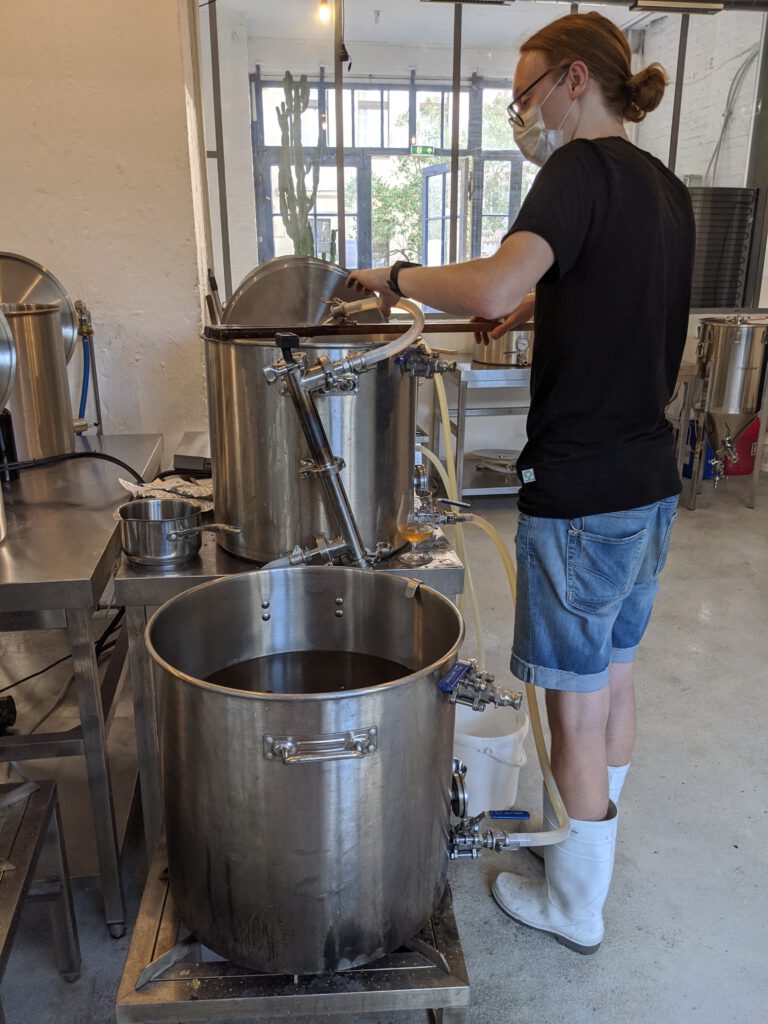
With everything prepared, we decided to just skip the iodine rest (YOLO, right?) and started a vorlauf. We only got very few hard bits and very quickly got a very clear wort. We then connected the mash/lauter tun’s tap to the kettle, and slightly opened the tap. Lautering went quickly and ran off smoothly, looking very clear and bright. We then started sparging by pumping liquor from the HLT onto the mash, breaking up the stream with a highly technical piece of equipment: the mash paddle.

Kettle in the front, sparging action in the back

We managed to collect a total of 63 litres of sweet wort. In the end, this was limited by gravity: at 63 litres, the level of the wort was the same as the tap of the mash/lauter tun. We then starting bringing the wort to a boil.

Ben then had the idea that we should check the gravity of the last runnings with the refacrometer that we had used to check on gravities during the process. Turned out, the “last” runnings still were at more than 5°Brix. Instead of just conceding to the laws of gravity, we should have lautered the last remains into a separate vessel and topped off the kettle instead. It probably would have also helped with another issue we noticed: according to the refractometer, the pre-boil gravity was at 12.4°Brix. Our plan was to have an OG of 11.8°P (°P and °Brix are very similar scales, and virtually identical and practically interchangeable). So strangely, we seemed to have a much higher OG to expect than what we had planned and calculated. Of course, we didn’t know what extract efficiency to expect on this home-brew kit, but still.

We decided to continue with boiling the wort anyway, and added hop additions at 90 minutes and 5 minutes before flame-out, and then more during whirlpool. Post-boil gravity according to the refractometer was at 15°Brix. This was way too much, and would have meant a much greater efficiency than what we could have planned for.

We then sent the hot wort through the plate chiller to the fermenter at a nice 18°C, and measured the OG using a saccharometer. It really was at 14.1°P. This was weird, a difference of almost one degree. I then rechecked the refractometer with just water, and it turned out that refractometer wasn’t properly calibrated.

Another problem also popped up when pumping the wort from the kettle through the plate chiller to the fermenter: towards the end, we started pulling in hot break and hop particles. We were then told that they actually had a hop filter that we should have attached that would have allowed us to get more of the wort from the kettle to the fermenter without sucking up any of the gunk. We had to stop the pump early, and only ended up with about 45 litres of wort, but at a higher OG than we what we wanted.

Our solution to that was simple but almost embarrassing: we decided to dilute the wort with cold water to bring the OG down to 12°P. The final step was then to hydrate the yeast (3 sachets of Nottingham Ale yeast should do just fine) with some fresh wort, pitch it, and move the fermenter to the temperature-controlled fermentation room.

The day was concluded with lots of cleaning up and a glass of cold, fresh beer from the MASH PIT tap room. A lot of things went wrong during the brew day, but we managed to salvage any issues, and still arrived at something that I think should come out pretty nicely. I’m definitely looking forward to trying out the resulting beer. The main things I want to see is whether I really do get a pronounced decoction character in the beer, and of course, what Celeia hops taste like in a beer.

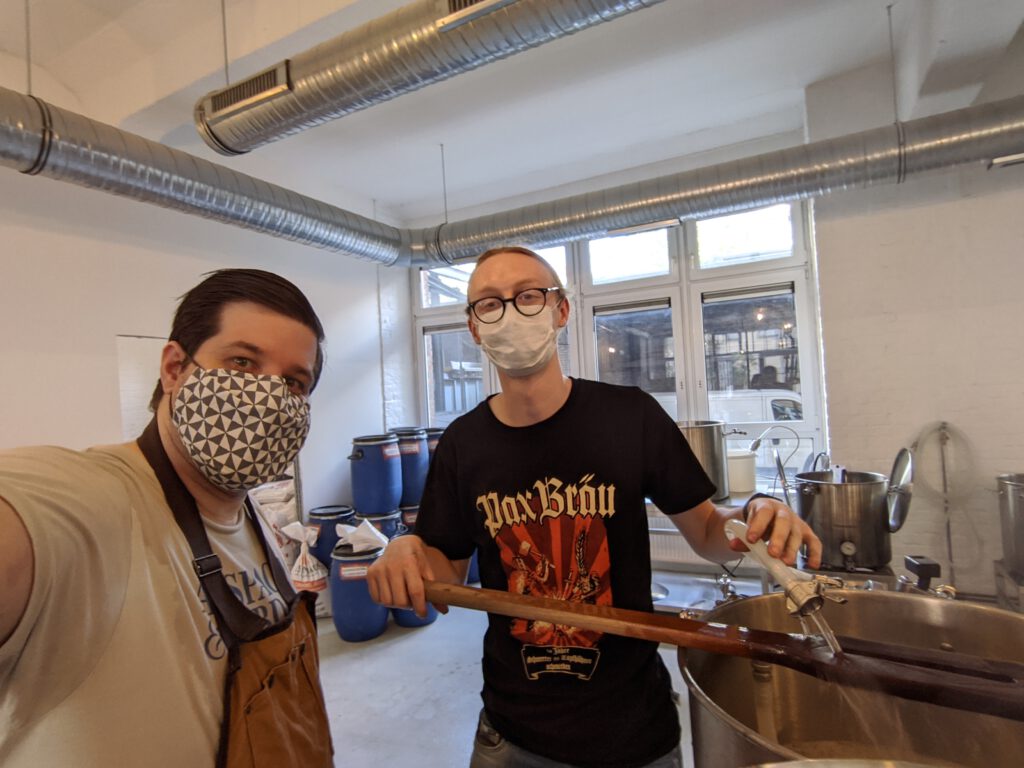
A brewing selfie. We were smiling under these masks, I swear.

My Beer At Slosh 2019

On May 4, Berlin’s homebrewing competition SLOSH happened at BRLO brewery. I took part with a beer myself. I didn’t win anything, but it was nevertheless a good event to serve samples of your own beer, drink beer, and talk homebrew.

In total, 37 or so homebrewers took part, serving 40-something different beers. The competition mode is different what you may know from other competititons: brewers were divided up into 8 different tables of 4 to 5 brewers each, labelled A to H. Every brewer and visitor could vote on the beers of another table, selecting their three favourites, giving them 3, 2, and 1 points respectively. Obviously, brewers were assigned different tables to vote on than their own.

At the end of round one, the points were added up, and the most popular beer of each table was selected for round two. In this second round, professional judges tasted the beers and selected an overall winner.

Of course, this mode makes it relatively hard to choose the “right” beer style to win over other homebrewers as well as visitors, as crowd pleasers would more likely be voted favourite than just technically well-executed beers. My table was a relatively strong one: besides my own beer, a Golden Ale inspired by our last year’s visit of New Zealand, there was a citrusy Pilsner (quite classic, but with a late addition of Pacifica hops), a Saison hopped with (IIRC) Galaxy hops, and a NEIPA. From what I’ve heard, the votes were relatively close, and in the end, the NEIPA won.

As for my NZ Golden Ale, it suffered from my “competition curse”. So far, not a single beer that I submitted to a competition worked out as intended: 4 years ago, a Czech pale lager (essentially a PU clone) got oxidized rather badly when bottling and therefore scored rather poorly. 3 years ago, two beers that I submitted (a Saison and an ESB) got mixed up, and the ESB also caught an infection when bottling. The Franconian-style Kellerbier (inspired by Mahrs aU) didn’t work out because the dry lager yeast I used stalled twice, once at lager temperature, and once at room temperature, and so the beer never finished and was dumped. And this year’s beer, that’s a story on its own…

When we brewed our NZ Golden Ale, everything went fine until we went to boil the wort. That’s when we found out that the immersion heater that we use to boil the wort had broken. I normally boil in an electric cooker, but the cooker’s own heating element is a bit too weak to bring 25+ liters of wort to a full boil. I nevertheless tried that, but even after 3 hours or so, I still couldn’t bring it higher than 90°C. So I had to improvise, and split up the wort between two electric cookers (the second one normally functions as a kettle to boil decoctions, and later on as hot liquor tank).

With pouring the wort back and forth, I think I unnecessarily oxidized the wort, making it darker that what I had planned for. Also, the boil-off rate was quite different, so instead of ending up with a 11°P wort, I instead got a 13.5°P wort.

I was also worried about possible underpitching, so I pitched two sachets of Nottingham Ale dry yeast. Unexpectedly, this caused a very rapid and intense fermentation which finished only 72 hours after pitching. The resulting beer had a slight taste of fusel alcohol, confirming my suspicion that the beer may have heated up too much during fermentation at room temperature. In total, I wasn’t super happy about the result, but nevertheless served it at yesterday’s competition.

The overall feedback was surprisingly positive, and fortunately for me, serving the beer cold masked the unpleasant fusel alcohol notes.

Here’s the recipe:

  • 4.5kg Pale Ale malt (it was kindly provided for free by competition sponsor Weyermann)
  • 20g East Kent Goldings (5% alpha acid) – 60 minutes boil
  • 40g Nelson Sauvin (10.8% alpha acid) – whirlpool
  • 20g Waimea (15.5% alpha acid) – whirlpool
  • 2 sachets of Nottinghame Ale dry yeast, rehydrated

Unlike most of my other brews, the mash was simple: just 60 minutes of mash at 67°C, then lautering, and then boiling for what was planned to be 60 minutes (see above). I used East Kent Goldings hops for bittering. After the end of the boil, I waited until the wort was down to 94°C to reduce the amount of additional bittering contributed by the whirlpool hopping, and then added the whirlpool hops for 20 minutes. I then transferred the wort to the fermenter, chilled it down to 20°C, pitched the yeast, and let it do its thing.

The outcome were 18 liters of Golden Ale with an OG of 13.5°P, and 5.7% ABV (stronger than your typical Golden Ale). The colour of the beer goes very much towards orange rather than gold, and probably due to the large amount of whirlpool hops, it also looks rather hazy and never dropped bright.