Well, yesterday was the day. I’m currently in Munich for my job (it’s a hard life, eh), and so I tried to get some bottles of it. My wife had sent me to a bottle shop that may have it, but alas, no chance (“nobody has it right now”, as the guy behind the counter said).
So after dinner, I went to Augustinerkeller with a work colleague (a second one joined us later), to have some fresh Helles from wooden cask and to try the alcohol-free Helles because if one place just has to have it, it’s one of Augustiner’s top spots in Munich, right?
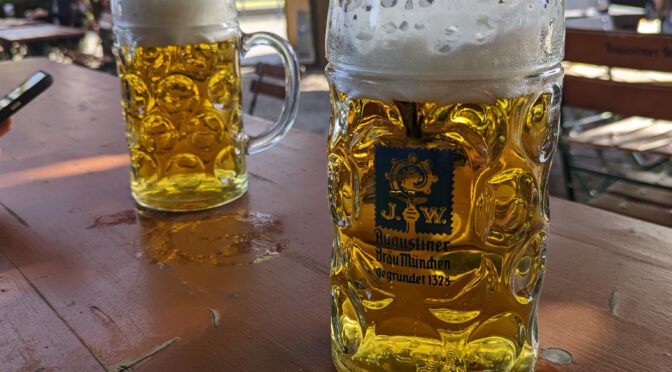
So, yes, they did have it.
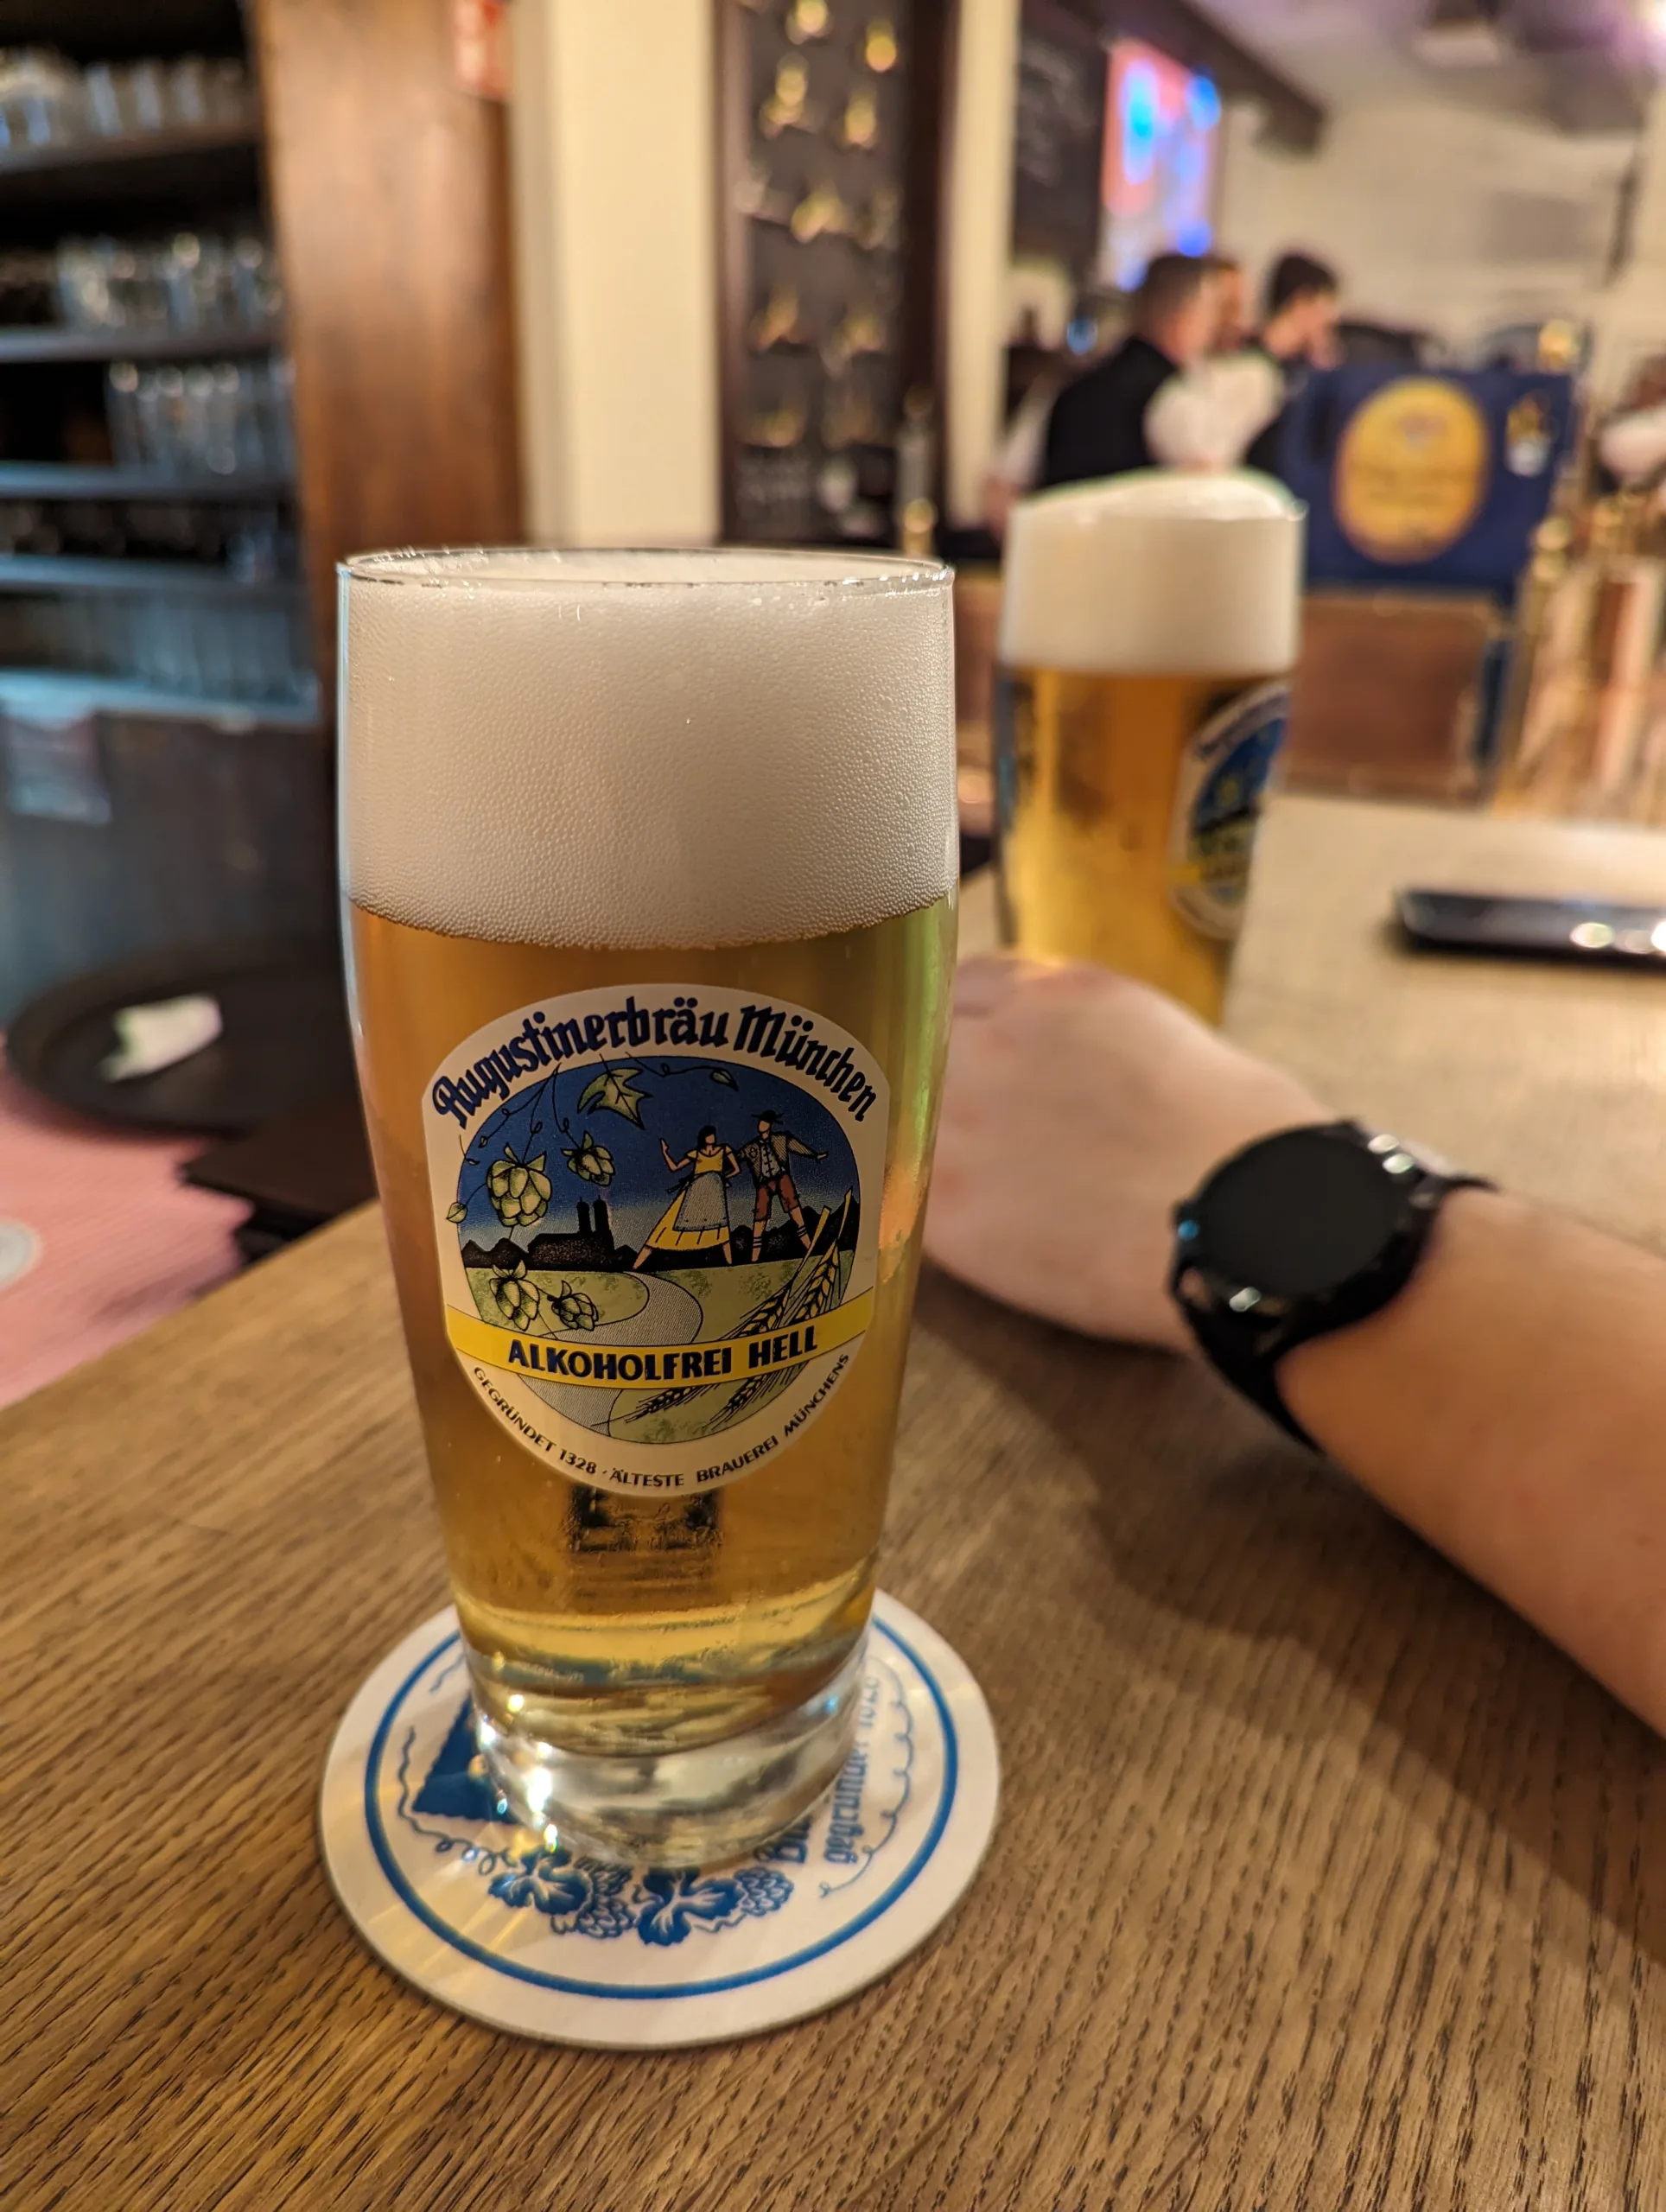
A glass of Augustiner Alkoholfrei Hell on a beer coaster on a bar counter, with a second glass of it in the background, and a number of waiters further in the background
So let’s just get to the point: it’s very good, but it still tastes like an alcohol-free beer. I would happily order it again, and I would also happily use it to blend it with regular bottled Augustiner at home.
Last time I wrote about it, I said that with the traditional methods of brewing alcohol-free beer, you either end up with a full-bodied but sweet beer, or a very thin and slightly sour tasting beer. This beer balances this out: it’s full-bodied with a very mouthfeel compared to virtually all other alcohol-free beers I’ve had, it’s not sweet, and that sour taste is a lot less than in other beers. It’s more bitter than their regular Helles. It does not have that Augustiner house flavour (that bit of pleasant sulphur), though, but still all the other properties of a good Bavarian Helles.
My work colleagues also both liked it, one of them compared it favourably to Jever Fun. All of us ultimately still preferred Helles from wooden cask, which is understandable because at Augustinerkeller, it’s about the best Augustiner beer you can possibly get.
After that very unscientific sensory evaluation of this new alcohol-free beer, I stand by my prediction that this could be a game-changer. I think the fact alone that it’s impossible to get even in Munich and that Augustiner seemed to be slightly overwhelmed by the success of this new beer shows that they’ve created a bit of a hype.
Fun fact: while we were at Augustinerkeller, we witnessed 3 big wooden casks getting tapped, in a very consistent 40 minute interval. I asked what size they were. One-hundred litres, they waiter said. 100 litres, in just 40 minutes, at least 3 times over. Absolutely massive. But then, football was on, with Bayern playing Arsenal, and Augustinerkeller were showing it on big screens.
Just yesterday, I wrote about Pilsner in Germany and how it lost its geographic indication the courts, including a beer named Pilsator. Of course, I couldn’t resist looking a bit more what was written about it in the newspapers after the name was announced. Let’s just say… the classic philologists and linguists weren’t particularly impressed.
On 17th August 1909, Professor Dr. J. Röhr pointed out that the suffix -ator indicates a male person performing a particular action, such as mercator for merchant, viator for traveller, lignator for woodcutter, etc., so for somebody who has any idea about Latin, a pilsator is somebody who pilses (don’t we all like to pils every now and then?).
In a short newspaper article in Bielefeld from the 19th of the same month, Pilsator is called a “badly done portmanteau of two words every beer drinker should know, Pilsner and Salvator”, and the fact that Böhmisches Brauhaus simply used two existing terms made them not look particularly sympathetic.
And on a similar note, a Cologne newspaper mentions that the inventor must have thought about Salvator but had no idea about the Latin roots of the -ator suffix and how to correct apply it, making “Pilsator” yet another “language stupidity” that will shout at people from thousands of ads and countless beer casks and bottles. The author even recommended that Gustav Wustmann should add this word to the next edition of his book “Allerhand Sprachdummheiten: kleine deutsche Grammatik des Zweifelhaften, des Falschen und des Hässlichen” (lit. All sorts of linguistic stupidities: a little German grammar of the dubious, the wrong and the ugly).
On the 23rd September, German writer Johannes Trojan, introduced as drinker and language connoisseur, responded to Prof. Dr. Röhn by saying that that scientific standpoint should not be considered, as “Pilsator” is a beautiful and bite-sized name that alludes to both Pilsner and Salvator.
At the shareholders’ meeting in December 1909, criticism was voiced about the naming competition, but one of the judges defended it that it was good advertising for the brewery and got people to talk about the brewery and the new beer. In total, an increase in sales of 1,000 hl was attributed to it by the directors.
In the 19th and early 20th century, it was common to call beers in Germany and Austria by the place where they came from, a geographic indication if you will, such as Pilsner, Budweiser, or Münchner. Nowadays, this concept is applied to all other kinds of food and drink, and even has its own categories of protection on the EU level.
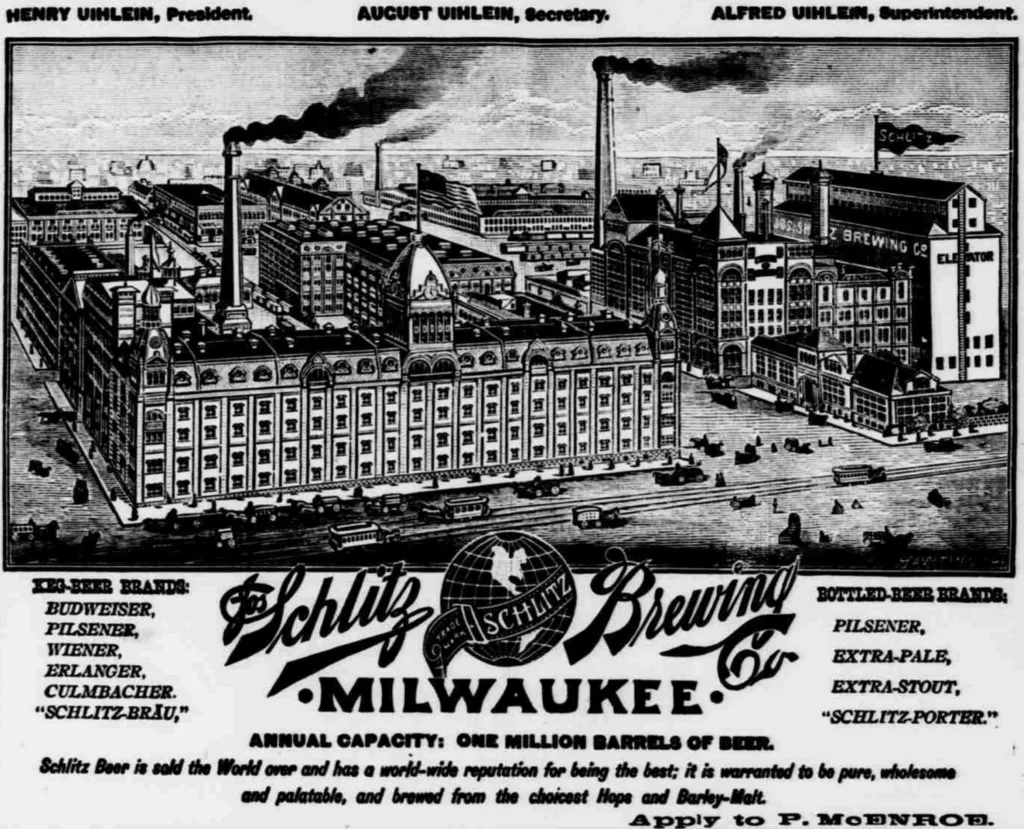
The success of specific beers of course often came with imitators. Some American breweries were good at marketing their locally brewed beers as all kinds of European beer types. One of my favourite examples is this Schlitz ad from 1891 that mentions Schlitz-brewed Budweiser, Pilsener, Wiener, Erlanger and Culmbacher, all referring to places in either Bohemia, Austria or Bavaria, all of them well-known for their beer at the time.
An ad for Schlitz Brewery Milwaukee from 1891, advertising Budweiser, Pilsener, Wiener, Erlanger and Culmbacher, among others.
The case of Budweiser, which meant a century-long legal struggle between the breweries of Budweis/České Budějovice and Anheuser-Busch, is probably the best known one, but in the early 20th century, also some of the breweries of Pilsen/Plzeň weren’t super happy about the proliferation of the “Pilsner” resp. “Pilsener” name used for beers not from the Bohemian city of Pilsen/Plzeň.
(Ironically, nobody ever seemed to care about Anheuser-Busch stealing coopting another Bohemian place name well-known for its beer as a brand name, Michelob/Měcholupy)
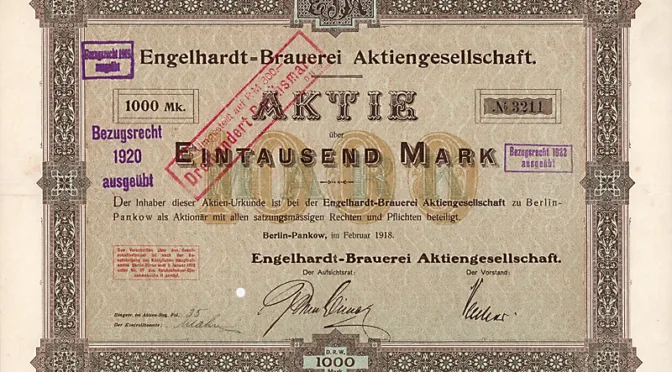
In 1910, the breweries of Pilsen seem to have sued a number of German breweries, such as Pankow-based Engelhardt brewery, which were then initially banned from calling their beer “Engelhardt Pilsener” resp. “Engelhardt Export Pilsener”. The German court then found them to abuse the designation of origin of a foreign beer without clearly specifying that their beer wasn’t from Pilsen, but rather from Pankow just outside Berlin. This initial verdict is quite interesting, as it even specifically points out that a “light [i.e. pale], highly hopped, bottom-fermented bitter beer” didn’t necessarily need to be called a “Pilsner”, and specifically mentions Schultheiss Märzen as a counter-example of a beer with similar properties that makes no reference to the Bohemian city.
In December 1913 though, the Reichsgericht (Supreme court of the German Empire) in Leipzig passed a verdict that the term “Pilsener” had simply changed in meaning and couldn’t be seen as a pure geographic indication anymore, but rather as a statement of quality about the product, and that enforcing it as a geographic indication would be an interference into the “free development of business” by the court. The court also rejected any possible confusion of customers because of the price difference between “German Pilsener” and “real Pilsener”, and referred the case back to a lower court (this basically means that the Supreme court told the lower court what the correct legal opinion was meant to be). The complaining parties, namely Bürgerliches Brauhaus Pilsen, 1. Pilsener Aktienbrauerei and Pilsener Genossenschaftsbrauerei, were presumably not happy about it.
Just earlier that year, they had also sued Geraer Aktienbrauerei in Timm near Gera, Radeberger Exportbierbrauerei and Böhmisches Brauhaus in Berlin to stop calling their beers Timmser Pilsner, Radeberg Pilsner, resp. Pilsator (a brand that Böhmisches Brauhaus had started using only in 1909). The courts in these cases argued slightly differently, namely that while “Pilsner” hadn’t entirely lost its geographic indication, the prefixes of respective place names “Timmser” resp. “Radeberger” made the origin clearer and demoted “Pilsner” to a generic product name. In the case of “Pilsator”, it also noted that the beer had always been used in connection with Böhmisches Brauhaus Berlin, thus always making clear where it had come from.
Little fun fact: the brand name “Pilsator” was the outcome of a competition in 1909 by Böhmisches Brauhaus Berlin that had been advertised with the slogan “Thousand Mark for One Word”. Among many thousand submissions, the jury selected the brand “Pilsator”. As this brand had been submitted by 26 competitors, the winner had to be chosen through a lottery, in which Josef Seestaller from Munich was drawn as the official winner. The Pilsner Tagblatt reported on this with the sarcastic comment that now the Berlin-based brewery just needs to do one more thing: brew a real Pilsner. The Pilsator name continued as a beer type in East Germany’s TGL 7764 regulation, and is still used as a brand name, namely Pilsator Pilsner brewed by Frankfurter Brauhaus in Frankfurt/Oder.
Pilsner beer wasn’t the only concern of the Pilsen breweries, though. In 1911, they petitioned the Prague commodity exchange (Produktenbörse) to stop using the terms “Pilsner malt”, “Vienna malt” and “Munich malt” because German and American breweries using “Pilsner malt” could claim that they were making “Pilsner beer” and that they had to defend their geographic indication in German courts. At the time, the question was referred to the Viennese commodity exchange.
Trade publication Der Böhmische Bierbrauer discussed in April 1912 how the term “Bohemian malt” was really more appropriate as it had been in use in scientific and trade publications, while “Pilsner malt” was more of a marketing term by maltings at the time. They suggested to change the official terminology at the Prague commodity exchange from “Pilsner malt” to “malt of wort colour up to 0.25 cm2 ⅒ n iodine solution”, “Vienna malt” to “malt of wort colour up to 0.40 cm2 ⅒ n iodine solution” and “Munich malt” to “malt of wort colour over 0.40 cm2 ⅒ n iodine solution”.
The article relents that this won’t get the term “Pilsner malt” banned but it will simply not get used anymore in official commodity exchange documents. They still asked readers to use the term “Bohemian malt”, not “Pilsner malt”, “as nobody will gain anything from it.”
Just a few days later, Der Böhmische Bierbrauer published another update about this matter. A report of the commodity exchange came to the conclusion that the proposal was practically a failure as it would only be limited to official documents at the exchange. At the exchange itself, it would also affect the interests of trading maltings that have used that term in their trade for a while now. Abuses of geographic indication should be pursued in other ways, according to the exchange.
Assuming from the lack of further reports on the matter, that seems to have been the end of it with regards to malt, and since the terms “Pilsner malt”, “Vienna malt” and “Munich malt” are still common trade names in the 21st century, the maltings have definitely prevailed.
Augustiner brewery of Munich, known to be very conservative, secretive and loaded, recently announced their latest addition to their portfolio, an alcohol-free Helles, aptly named “Augustiner Alkoholfrei Hell”. Augustiner hadn’t released a new beer in 38 years, and in fact was the last of the “big six” Munich brands without an alcohol-free beer.
They first teased the release of a new beer type on Instagram without getting specific, which of course came with lots of outcry, “oh no, not an alcohol-free one! Please anything but an alcohol-free beer!” and such, but my first thought that this could be a game changer. Augustiner obviously cares a lot of about the quality and presentation of their own beers (for example, they still run their own cooperage on the outskirts of Munich to ensure that they can serve all their Oktoberfestbier from massive 200 liter “Hirsch” wooden casks, and will typically serve at least one beer from wooden casks in their prime locations), and a poorly-received alcohol-free beer (or any new beer type, really) could have really tarnished their reputation.
On Monday, 18th March 2024, the rumours of an alcohol-free beer turned out to be true, when Augustiner officially presented their new beer. I was of course very curious, and checked out early reports about it. Süddeutsche Zeitung was probably the first one to report on it (link to a paywall-free archived version of the article), and one thing that caught my eye was how openly Augustiner spoke about their method of production.
Basically, there are two ways of producing an alcohol-free beer: one is to brew a low-gravity wort and ferment either with a poorly attenuating yeast (essentially, one that cannot ferment maltose sugar) or to stop fermentation shortly after it’s started by chilling down the beer very quickly to prevent the yeast from metabolizing any further sugar. This approach is called arrested or restricted fermentation. The other method is to brew a regular beer and then dealcoholize it, i.e. remove the alcohol after fermentation through some method of cold distillation. This is generally called physical dealcoholisation. Both methods have their advantages and disadvantages, leading to either worty-sweet beer with the former method, or very thin, watery and slightly sour with the latter method. And as the Süddeutsche Zeitung says, “Augustiner decided on a mix of both methods.”
Through my very good friend Ben who works as a brewing scientist at VLB, I’ve learned about the paper Effect of Production Technique on Pilsner-Style Non-Alcoholic Beer (NAB) Chemistry and Flavor by Nils Rettberg, Scott Lafontaine, et al., published in early 2022 (Ben himself wrote about his experience with non-alcoholic beers after completing Dry January 2022). One of its conclusions was that blending non-alcoholic beers from restricted fermentation and from vacuum dealcoholisation produced a more harmonious beer that generally fared better in blind tasting than beers solely produced using either method. Another conclusion was that more hop compounds, such as through late kettle-hopping or dry-hopping, can mask the less pleasant flavours of non-alcoholic beers. This a very interesting paper, though of course rather technical, but if you’re interested in all the nitty-gritty details, definitely worth checking out.
While the paper is about Pilsner-type beers, and Helles is certainly not a beer type that has a particularly large amount of hop aroma or flavour, it still shows that for more lightly hopped beers, it still seems to be a practical approach for Augustiner, and they seem to have either drawn the same conclusions as the paper above or got convinced by the methods through it.
The tasting notes from Mareike Hasenbeck describe the beer as having a fresh, spicy and malty aroma with a hint of sulfur, while the flavour is malty-bready with a touch of lemon and sulfur and ample carbon dioxide on the tongue, finishing with a noticeable hop bitterness. Especially that last bit made me wonder whether the hopping rate was slightly increased compared to Augustiner’s regular Helles to create an overall nicer and rounder beer. Even though Augustiner’s approach was not to create a 1:1 copy of their flag-ship Augustiner Lagerbier Hell but rather a really good alcohol-free beer that meets their exacting, Mareike Hasenbeck notes that straight from the fridge, the fact that the beer is alcohol-free could be easily missed by laypeople (i.e. the non-nerdy, less discerning drinkers).
And I think that’s a big deal. If a regular beer drinker can have the non-alcoholic beer served under optimal conditions and not notice that it doesn’t contain alcohol (or at least, less than 0.5% by volume), you’re at a point where it is satisfying enough for consumers. At least for me personally, unless I specifically want to get inebriated, it would then make no difference whether I drink the regular version or the alcohol-free version. In fact, I would sometimes even want to specifically have the alcohol-free version, for example to avoid getting tipsy too quickly.
Previously, only one beer got close enough for me to this ideal, and that’s Guinness with the 0.0 version of their draught stout. When I first had it from nitro can, this was quite the revelation. To this day, I would still call it the most convincing alcohol-free beer, and don’t mind having a can or pint (or two) whenever I have the chance. Unfortunately, Guinness 0.0 has not made it to Germany yet, but I’m still hopeful. The only other beer that got close to it for me was Riedenburger Dolden Null, a German alcohol-free IPA, but their trick is basically to hide the worty flavour under loads of hops.
Everything I’ve read about the Augustiner Alkoholfrei Hell sounds to me as if Augustiner may have pulled off the same as Guinness, to release a convincing alcohol-free Helles that may be pleasing even to consumers and Augustiner fans that otherwise would not choose an alcohol-free beer. That’s a big deal, and could change the landscape and expected quality of alcohol-free beer in Bavaria and the rest of Germany.
As for myself, I have yet to try the new beer, and it doesn’t seem to have arrived in Berlin yet. One drinks wholesaler with a dedicated beer shop in Charlottenburg estimated it 3 to 4 weeks until they get it, while a restaurant/beer garden near the government district that is known for its Augustiner from wooden cask estimated it to take more like 4 to 8 weeks.
Ben on the other hand has already had a chance to try the beer at Augustinerkeller in Munich, and called it “unsurprisingly excellent”. With everything he also told me about it in private conversations, I am very hopeful that Augustiner Alkoholfrei Hell will indeed be a game changer.
The rising costs of ingredients is not just something professional brewers are struggling with, homebrewers also notice the price increases. And ironically, the ingredient that is the smallest by weight is often the most expensive one: yeast.
When I started homebrewing over 10 years ago, dry yeasts were still considered kind of inferior, with a relatively small choice in yeast strains compared to nowadays, they were thought of as sub-standards products because cold chains weren’t considered as crucial as with liquid yeast, and there was a general association with “that homebrew flavour”, probably also because of improper storage.
Liquid yeast on the other hand was thought to be the gold standard, with a large variety in strains, all with their own unique, interesting flavours and aromas that would give homebrewers a key ingredient to push their beer from lackluster to amazing.
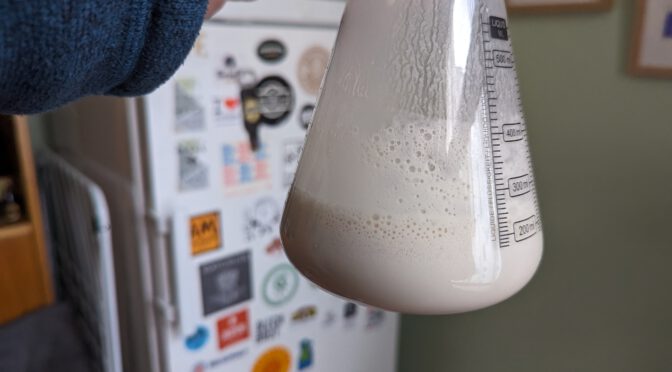
It’s March 2024, and I spent €11.49 on a pack of liquid yeast, allegedly the Pilsner Urquell “D” strain, for which I had to create a starter using malt extract to multiply its cell count and improve its vitality. What really happened though was that the yeast was dead, completely dead, and I only noticed it when the starter did not elicit any fermentation activity whatsoever after more than 24 hours on the stir plate.
Instead, I had to resort to my backup plan and rehydrated and pitched two sachets of W-34/70, probably the most widespread bottom-fermenting yeast strain these days. Full disclosure: I got these two sachets for free from a friend who in turn had gotten them at BrauBeviale last December, but if I had had to buy it myself, it would have cost me €9.98. Not much cheaper, but a lot less hassle, because that W-34/70 was rehydrated and noticeably very active in less than 40 minutes, and after pitching it got past the lag phase in something like 24 to 32 hours (no signs of CO2 production at 24 hours, but happily burping away at 32 hours after the pitch).
Now why do I even bother? In the last 5 years of homebrewing, I’ve been mostly brewing bottom-fermented beers, I tried out a number of dry yeast strains, and they were good, with maybe one exception that I found a bit too fruity (and that is a common criticism). Thinking back about all the different bottom-fermenting liquid yeast strains that I used, there was only one that really stood out, and that was Wyeast 2001 (allegedly the Pilsner Urquell “H” strain) due to its very prominent diacetyl note (perfect for a Pilsner Urquell clone). All the others produced beers where the yeast character was just a standard neutral, bottom-fermented flavour, i.e. not much at all.
Every time I picked a specific yeast strain, I chose it for some expected specific flavour element, or “authenticity”, because clearly, a Czech style requires a Czech yeast strain, no? Really, actually, no. One thing I learned in the last few years was that there is so little difference in the yeast strains, you just won’t taste the difference. My Czech Dark Lager, probably the best beer I ever brewed, was fermented with harvested yeast from a German industrial brewery in its 2022 version, and with Fermentis S-189 in its 2023 version, both of them decidedly not Czech yeast strains, and yet both batches tasted exactly like a Czech beer.
So why should I bother about liquid yeast? I probably shouldn’t. The dry yeast strains I’ve had the most success with were Fermentis W-34/70 (a yeast strain is basically an industry standard in its own right, given how ubiquitous it is), Fermentis S-189 (I couldn’t even describe the differences of it to W-34/70, because they absolutely miniscule), and LalBrew Diamond (again, very similar to the others). Fermentis S-23 is also popular, but I found it a bit too fruity, so not exactly my favourite.
With that many similarities, it all boils down to personal preference and maybe price. At my homebrew store of choice, an 11g sachet of LalBrew Diamond costs €4.14, while 11.5g sachets of Fermentis S-189, W-34/70 and S-23 are sold for €4.83, 4.99 and €4.49, respectively. In my experience, two sachets are usually enough for a 20 liter batch of normal-strength beer.
After the frustrating experience with liquid yeast last weekend, I decided for myself that I simply won’t bother with it anymore. Should I ever have the urge of using a pack of liquid yeast, you will definitely hear about it here.
At HBCon 2024 (more about the event here), one of the sessions I attended was a seminar about how to brew easy-drinking Bockbier. Basically, brewmaster Stefan Zehendner told us all the details about the beer, the idea an concept behind, everything about the ingredients and the brewing process, and of course lots of little details and anecdotes.
Mönchsambacher produces a total of about 6000 hl of beer per year, with no intention of further growing the business. Of this, about 1,500 crates (i.e. 150 hl) is Weihnachts-Bock, which is usually sold out within a week.
The Weihnachts-Bock has about 17.5 to 18 °P original gravity. To achieve consistency, all the lager tanks are blended into one beer during packaging. It has about 3.3 to 3.5 °P residual extract, and is hopped to 48 IBU. Compared to the brewery’s other beers, this CO2 content is slightly higher, making this whole beer a hop-forward, not too sweet, well-integrated beer.
The brewmaster considers his brewing water to be one of the keys to his beer. The water is very hard: 28 °dH (German degrees of hardness), where 1° equals 0.1783 mmol/l. About 13 to 14 °dH are magnesium, and about the same amount is calcium, much of it bound to sulfate. This hardness results in a higher mash pH for the Bock, around 5.6 to 5.7.
The grist is simple: 100% Pilsner malt. As many other local breweries, Mönchsambacher gets their malt from local maltings Bamberger Malz. The grist is also used for all the other bottom-fermented beers, except for the Festbier, which is brewed from a 50/50 blend of Pilsner and Vienna malt. The Pilsner malt from Bamberger Malz is slightly less modified.
This is what the mash schedule looks like:
The grist is mashed in at 45°C, then rested for 10 minutes.
Then the mash is heated up to 52°C, for another 10 minute rest.
After this rest, the mash is heated up to 62°C, and the first (and only) decoction is pulled: about one third of the mash volume (relatively thin mash) is pumped into the kettle, brought up to 72°C and rested for 15 minutes for saccharification. It is then brought to a boil and boiled for 5 minutes before it is mixed back.
Stefan called this decoction to be important for the bright golden colour of the beer and a more robust (he used the word kernig which is impossible for me to translate) body.
After mixing the decoction back, the mash should have reached 72°C. It is then left to saccharify for another 20 minutes, after which it is heated up to 78°C, which is when lautering starts.
The wort is boiled for a total of 75 minutes. The only hop variety used in the brewery is Perle. In the case of the Weihnachts-Bock, the hops are added at 3 points: at the beginning of the boil, 25 minutes before the end of the boil, and in the whirlpool. The hops in the whirlpool are added beforehand, so it has 10 minutes of contact while the wort is pumped into the whirlpool, and then left for a trub cone to form for another 15 minutes until the wort is pumped out of the whirlpool.
The wort is then chilled to 7.5°C, yeast is pitched, and fermentation happens at 9.2°C. The brewmaster said the yeast strain they use is W-34/72 which they get delivered from Speckner yeast lab in Augsburg. I’ve not been able to find that particular strain in Speckner’s list of available strain, so this is probably a matter of miscommunication (Speckner has W-34/70 and W-34/78 in their portfolio). In any case, Zehendner finds the water much more important than the yeast, so for home-brewers, W-34/70 is probably totally sufficient.
What is important though is that the yeast must have gotten used to the brewery before it is used for fermenting the Weihnachts-Bock. So any yeast going into Weihnachts-Bock has been pitched once or twice before.
Fermentation takes 13 days in tanks which are left open, so it is effectively open fermentation. Before moving the beer into lagering tanks, Kräusen (freshly fermenting beer) from another tank is added at about 10% before it is lagered to ensure a very clean secondary fermentation/lagering. Lagering itself happens at 2°C for a total of 12 weeks, with fermentation slowly progressing for 10 weeks.
The last time this recipe has changed was when the brewery upgraded their brew system in 2000. As part of the adjustments, the number of decoctions was reduced from 2 to 1, and because they had sold the coolship, the hop addition had to be removed. Because there was no more coolship, the whirlpool was instead chosen to have a similar geometry so that the wort can “stink out” in the same way, so basically that DMS and other unwanted chemical compounds can evaporate in the same way and at the same rate.
When the beer is bottled, it is always unfiltered. Zehendner considers a bit of yeast to be absolutely vital to have a beer that can age well. Apparently, the beer will ferment a little bit more after bottling, so practically, the Weihnachts-Bock is a bottle-conditioned beer. The best before date is 3 months for the Weihnachts-Bock and just 5 weeks for the regular Lager. The main reason for the short date is that the beer changes in the bottle, and slowly loses its sulphur notes, making it taste different from what regular drinkers expect. Mönchsambacher also keeps their bottled beers chilled at all times, and are selling it chilled directly from the brewery.
Something that I had never heard before was the anecdote of a pediococcus infection they struggled with for about a year. Pediococcus is a bacteria that makes beer go “ropey”, it gives it a slimey texture and leaves behind plenty of diacetyl. They struggled with such an infection on and off for about a year, until they finally discovered the unlikely source of the infection: the water source! After spending about €80,000 on a membrane filter, this has finally been cleaned up and now the brewery is infection-free again. The brewmaster pointed out that the water treatment with chlorine dioxide would have been another option, but he decided against it specifically because he thinks that it could also negatively affect yeast health in the long run.
Still, this is the only time where I’ve heard that the infection vector of a brewery was the water. It is quite insidious: after disinfecting the whole brewery, all it needs is some water to rinse off disinfectants, and you got the infection back on your equipment.
Stefan Zehendner is not just a traditional Franconian brewer, he also likes to experiment: recently, they filled a batch of Weihnachts-Bock into a wine cask that was previously filled with spontaneously fermented Silvaner wine. In the future, he’s also thinking about producing Weihnachts-Bock wort and getting it fermented somewhere else as a sour beer, which also sounds absolutely intriguing. And apparently if you visit the brewery taproom at the right times, there’s a chance that a keg of Cantillon might be on, about the last beer you’d expect in Franconia.
The process I described here does not just apply to the Weihnachts-Bock, but their other Bock, the Maibock, is also brewed essentially the same way. The only differences are a slightly reduced original gravity of 16.5°P and a reduced bitterness of about 40 IBU.
And that’s how you brew Mönchsambacher Weihnachts-Bock, based on all my notes from the session at Heimbrau Convention 2024. I think this description is complete enough to brew a pretty faithful clone at home.
My journey to this year’s Heimbrau Convention (HBCon) was rather turbulent: just a few days before I was supposed to travel from Berlin to the city of Romrod, the train driver’s union announced a strike that affected my initial journey from Berlin to Fulda.
Fortunately, I managed to find an alternative route by booking alternative provider FlixTrain, which in the end was slightly quicker and cheaper than Deutsche Bahn. The journey itself went fine in the end.
This year, I was invited to speak about Vienna Lager at HBCon, the largest (and probably only?) home-brewing conference in Germany, all community-organised. As in previous years, the event venue was Schloss Romrod, a historic castle in the city of Romrod that got renovated to be used as a hotel.
The inner yard of Schloss Romrod, as seen from the castle wall
This was actually my first time to speak in front of such a large audience about this topic, so I was rather excited and nervous, with weeks of preparation beforehand.
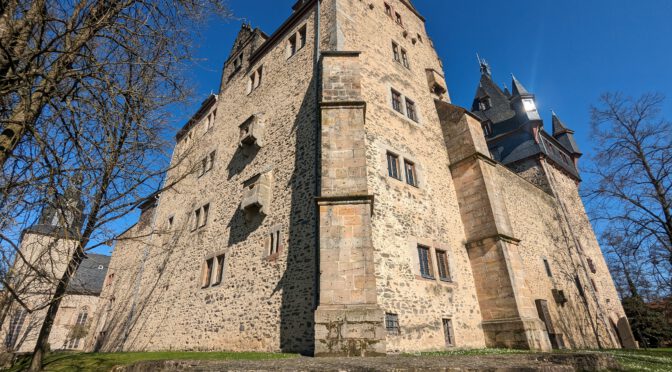
With HBCon being community-organised and community-driven, there were of course ample opportunities to share and show off your own beer. For me, I decided to bring a little specialty, namely the Bretted Imperial Stout I had brewed with Ben back in November 2022. Unfortunately, the bottles did not handle the journey well, and even though they remained intact, 2 out of 3 bottles were gushers. I had packed them cold, and refrigerated them again shortly after I arrived in Romrod, but I have a feeling this may not have been enough time for the beer to settle. A bit of a bummer, but the beer that I could serve was well-received, in particular by the few people who specifically said they liked dark beers. The slight acidity from the acetic acid that Brettanomyces produces under the presence of oxygen really does add something to even a strong beer, it just makes it ever so slightly more refreshing, and gives the beer an impression of dryness.
A messy and embarrassing beer spillage
Of course not all beers were top notch. While I had quite a few really well-made home-brewed beers, there were also some good examples for specific off-flavours, or simply weird flavour combinations that just didn’t work for me.
Friday was arrival day and a first opportunity to meet people and share beer. Since my talk was scheduled for Saturday 9:30am, I decided to take it easy and did not drink very much on Friday evening. I still enjoyed the opportunity to try original Polish Grodziskie, which was actually much lighter in smoke than what I thought it would be. It was an incredibly refreshing beer that would be perfect for summer.
Saturday morning was easy, I got up early enough, had breakfast, and then went to the venue where my talk was supposed to happen. Due to the large number of sessions, the convention had additional venues outside the castle, some only reachable by shuttle bus, but this one fortunately was only 5 minutes of walking away.
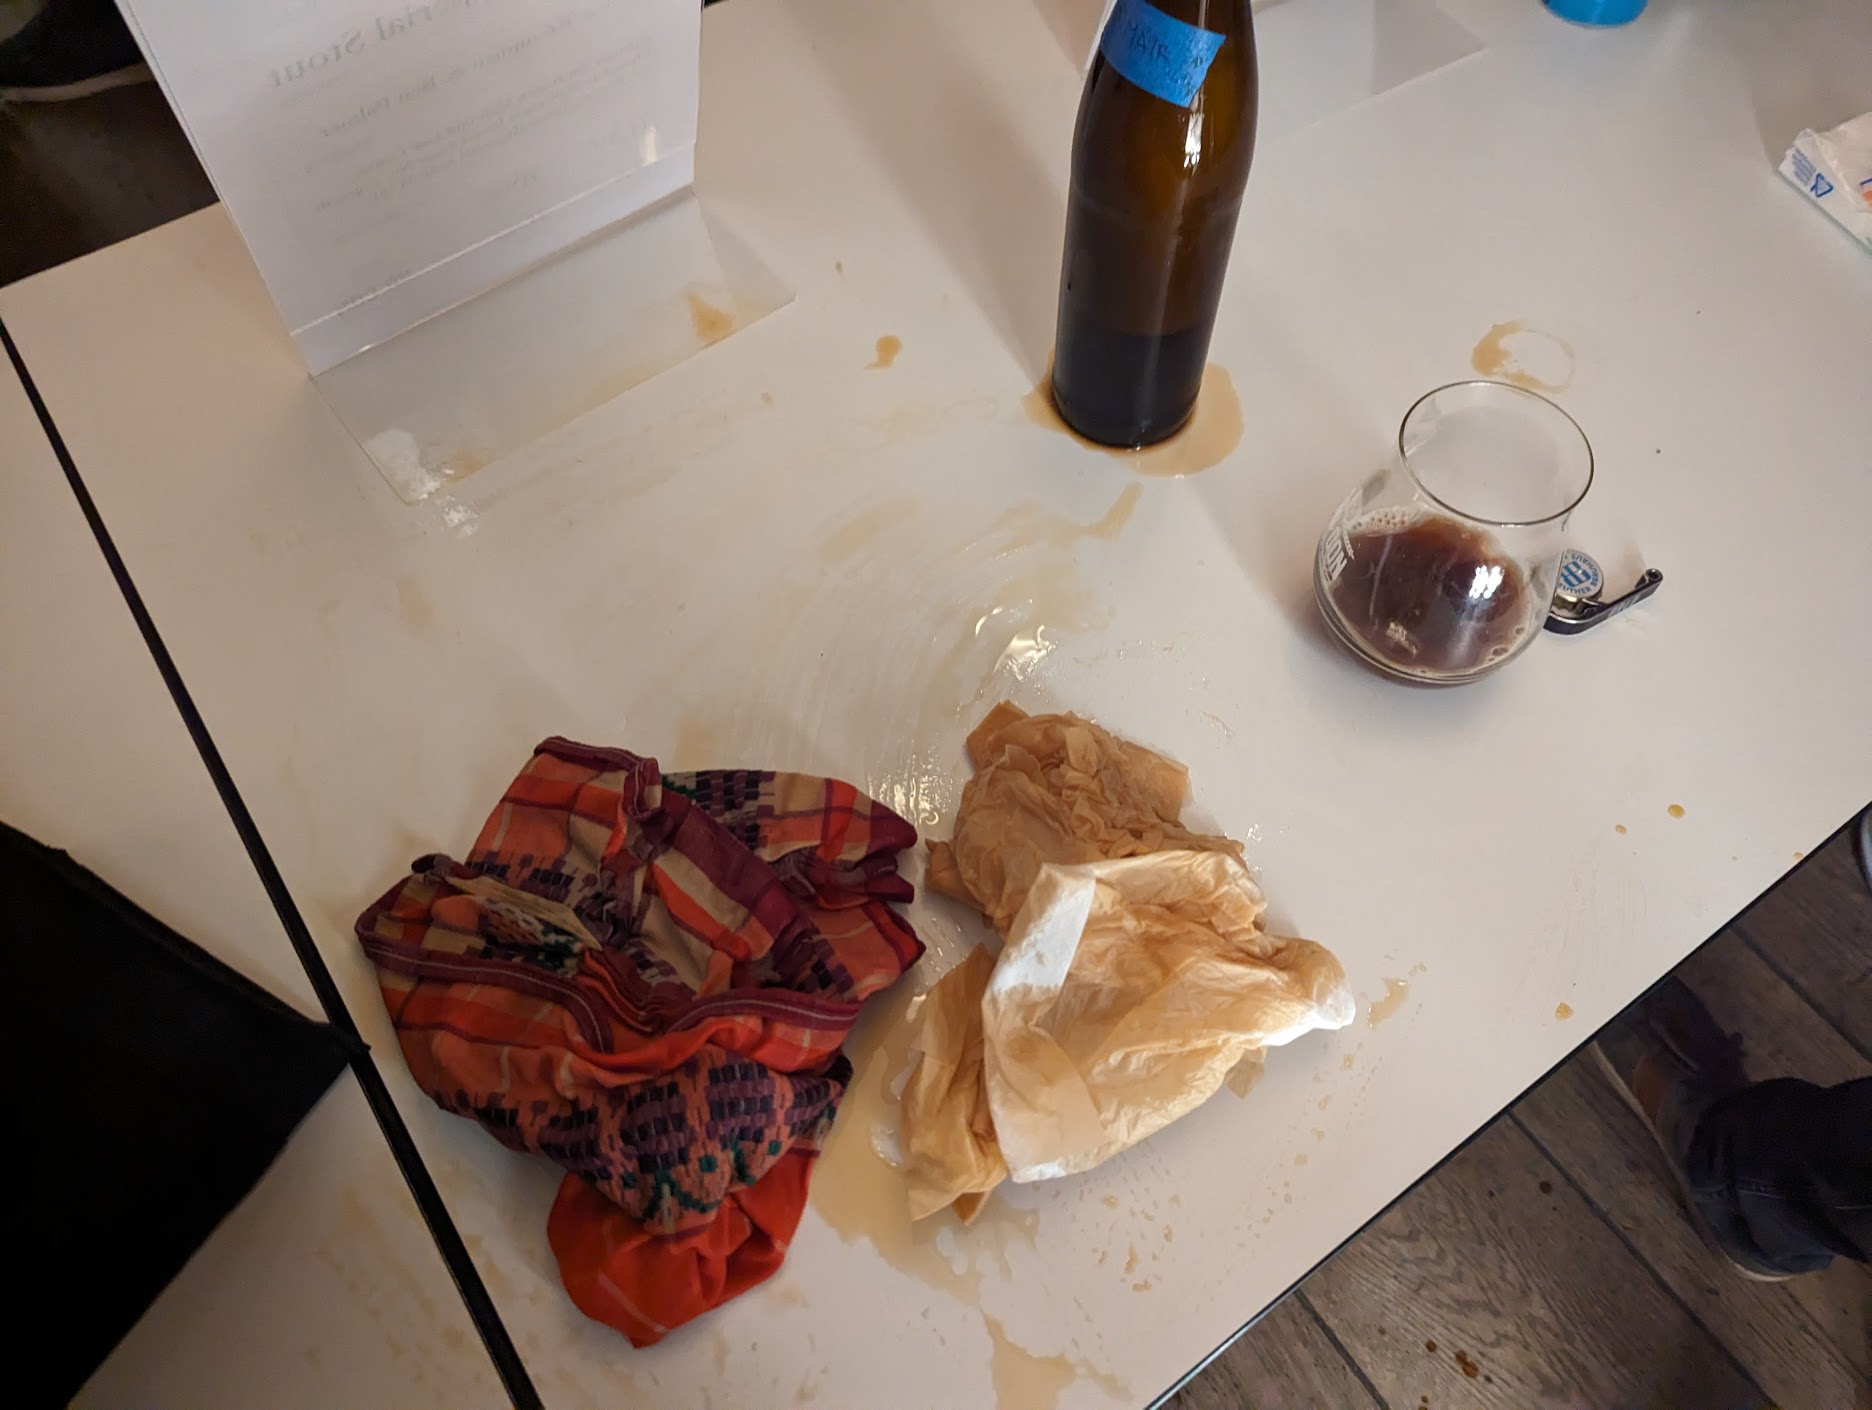
My talk went well, and even though I had practiced my presentation and timed it, in the end I spent 10 more minutes than planned waffling about the history of Vienna Lager and how to brew it. The Q&A session was good but relatively short, and the feedback afterwards was that people really enjoyed my talk.
Selfie with the audience
After my session, the Polish Homebrewers Association presented Baltic Porter, with a good overview over the history of why Porter became popular in Poland in the first place, how it’s defined nowadays (the Polish view on Baltic Porter apparently diverges quite a bit from the BJCP style guidelines) and how to brew it. Of course we also got to try Baltic Porter, in our case Grand Baltic Porter by Browar Amber. What an incredibly smooth beer, not too much roasted character, but with a hint of sweetness and some sherry-like oxidation character instead.
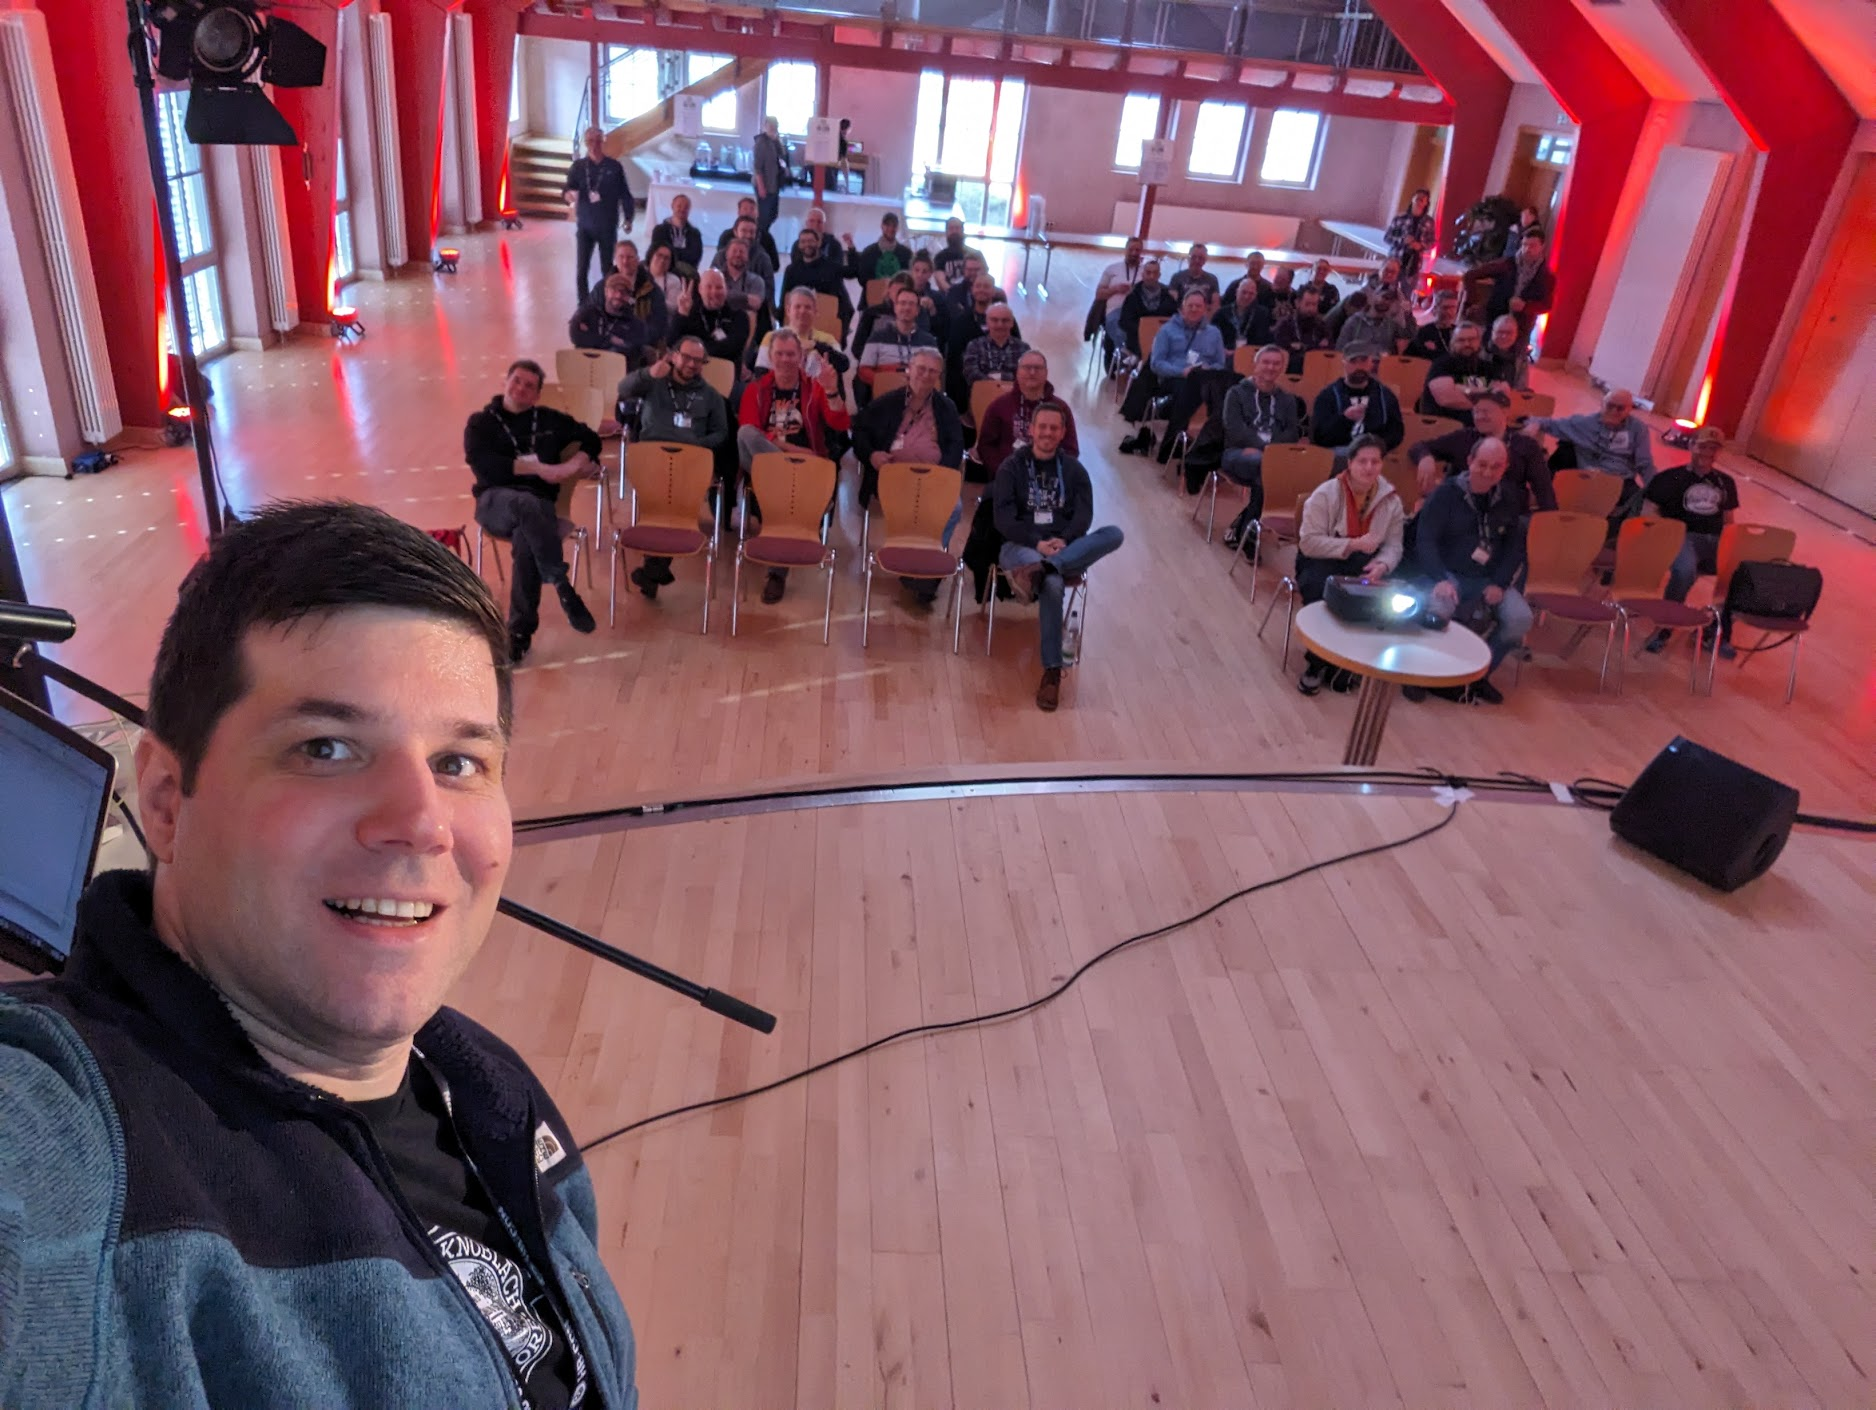
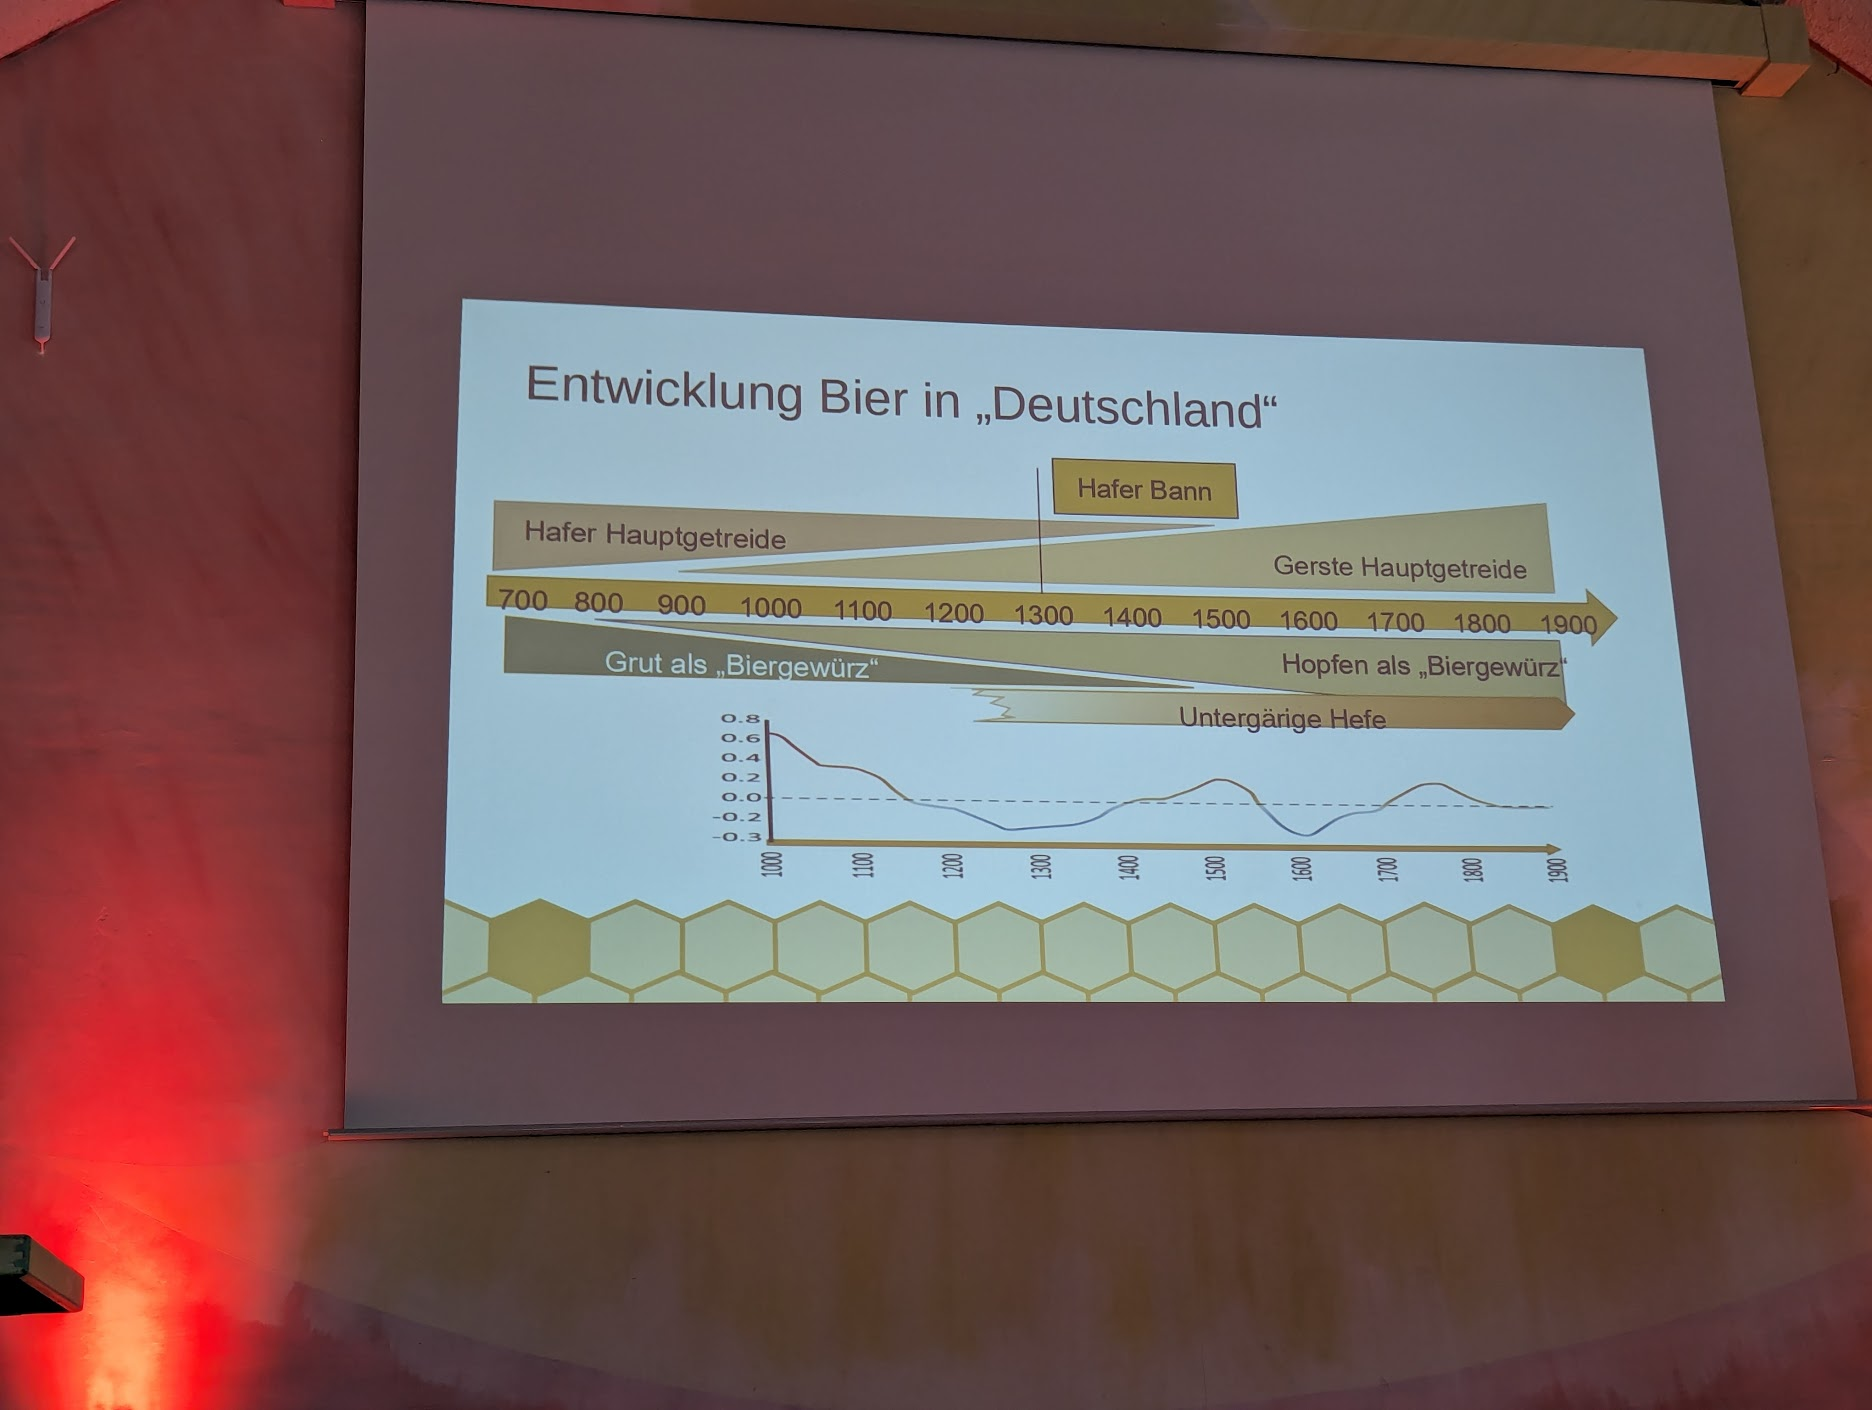
The third and final talk in a row that I attended was Jan Brücklmeier talking about historic small beers in Germany, specifically the kind that was made from the last runnings during brewing (Nachbiere). Of course his presentation was not just strictly about small beer, and he put out some interesting hypotheses about German brewing in general.
How barley replaced oats, hops replaced gruit, and how this correlates with the rise and fall in temperatures at the time
In particular, he thinks that part of beer’s success was due to the first small ice age: wine became harder to grow in the north of Europe, which caused people to switch from wine to beer as the former became a more expensive imported product. At the same time, barley became more prevalent, in particular because it takes fewer warm days (> 5°C) for it to ripen, while oats require slightly warmer temperatures (> 7°C) for about two months longer. At the same time, barley produces a significantly larger yield.
This switch from oats to barley as brewing grains probably also helped with the popularisation of hops over gruit, as hops and oats don’t work nearly as well flavour-wise as hops and barley. Higher amounts of hops allowed beer to be fortified sufficiently to be traded over longer distances, something that was definitely done by the Hansa in the North of Europe. And finally, lower overall temperatures probably also created an environment in which bottom-fermenting yeast would be much more suitable.
Besides a more detailed explanation of specific Nachbier techniques, we also got to try something special: Heinzlein, the original Bamberg Nachbier, as recreated by Heller brewery from Bamberg (which some of you may recognise as the brewery behind Schlenkerla). Normally, this is a bottled beer only, but specifically for this event, Jan Brücklmeier managed to organise a keg of it.
I had had the Heinzlein a few years ago when it was officially released. I thought it was okayish back then, but clearly too astringent and thin. Well, I can gladly say that it seems to have lost most of that astringency, making it so much nicer to drink and actually want to have a second one.
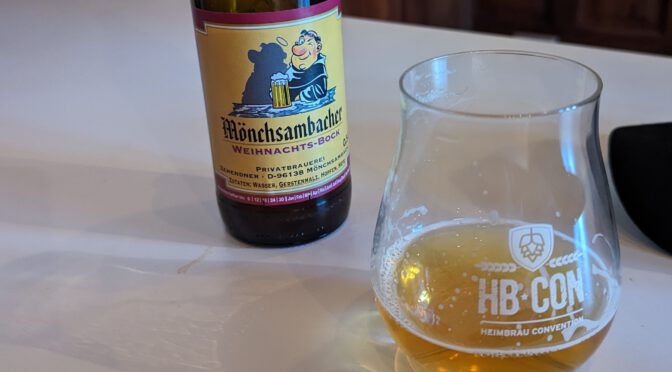
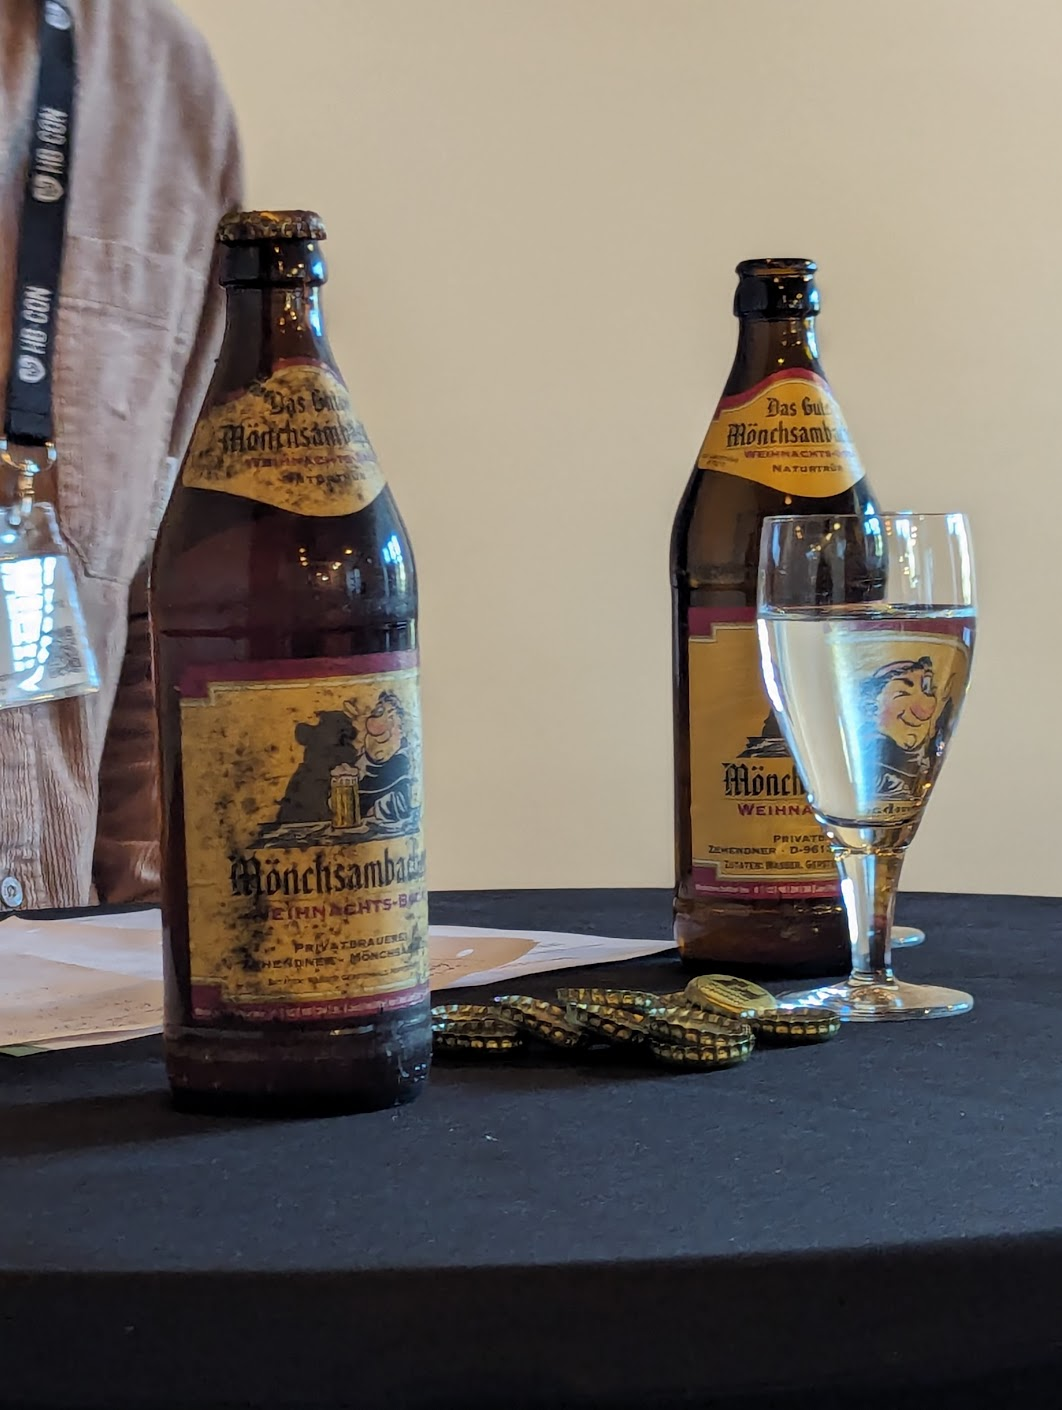
After a lunch break, the highlight of the day awaited me: I was booked in for a seminar with Stefan Zehendner, owner and brewmaster of Mönchsambacher brewery not far away from Bamberg. He guided us through all the details of how we brewed the Mönchsambacher Weihnachts-Bock: the idea and history behind it, all the details about ingredients, whether it was the brewing water, the malt, the hops or the yeast, and of course all the processes, from mashing (it’s a single decoction mash) to fermentation to lagering, followed by a few interesting anecdotes and of course an extensive Q&A.
Two bottles of Mönchsambacher Weihnachts-Bock, one old, one new. The new one is partially hidden behind a water glass, making the monk on the label look mirrored, while also emphasizing the monk’s wink.
Frankly speaking, this was the most amazing and productive session at the whole event. In less than 90 minutes, I learned more than ever before about all the intricacies of brewing an easy-drinking Bock, Franconian style, going into all the details I had never even thought about. I feel like it gave me enough information to be able to brew a fairly good clone version of Mönchsambacher Weihnachts-Bock, or develop my very own recipe if I wanted to. I also gained more insight into the water profile outside of Bamberg, which according to Stefan Zehendner contributes a significant part of the character of his beers.
I intend to write down all the notes I’ve taken into a more easily digestible, separate article that actually makes sense. So watch this space!
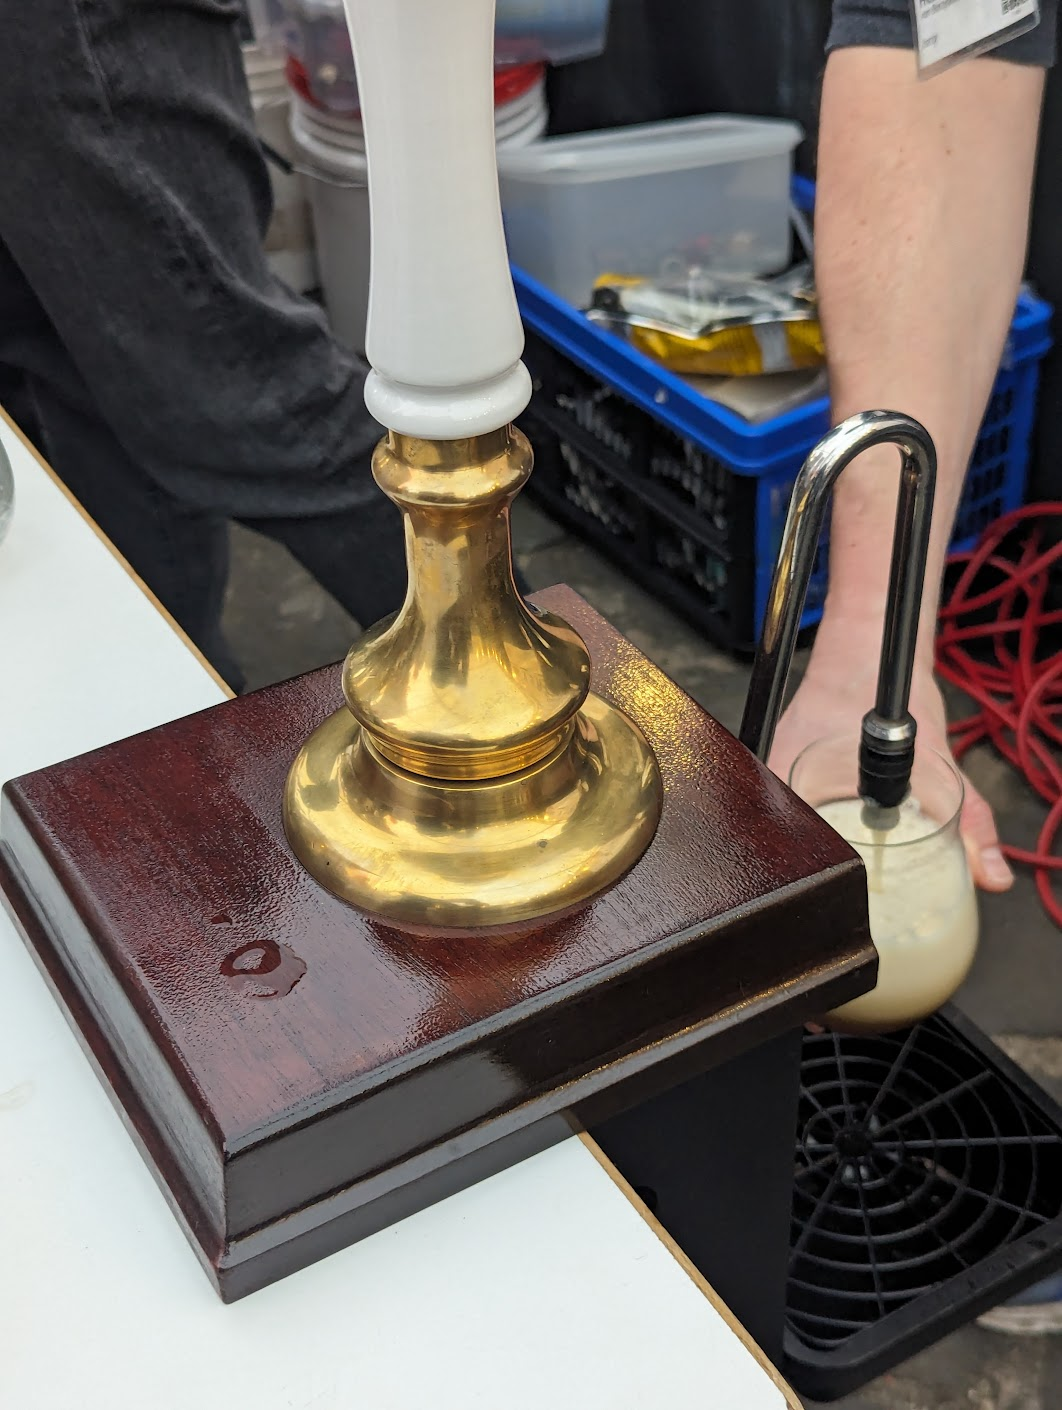
I was then hanging out with friends at the “Meet se Brauverein” (sic!) event, where home-brew clubs from all over Germany could present themselves by — of course — serving beer and talking about what they were doing. One of the clubs served an ESB poured from a beer engine which was quite alright (maybe a bit astringent, but bringing and setting up a beer engine shows the amount of dedication that went into presenting that beer). Another one served (keg) mild and old ale (from bottles), even encouraging people to try a blend of both. Of course I had to try something fun like that, and indeed, the best version was the old ale blended with the mild.
Home-brewed ESB is getting poured from a beer engine into a small tasting glass
After dinner in the completely overrun local Italian restaurant (thanks to the conference; the locals looked properly annoyed, presumably because they weren’t served quickly enough), we then headed to the final event of the Saturday, the home-brewing competition. This competition was done by popular vote, where people who had preregistered for it could present their own beer of any style, and the audience could sample the beers and vote on their favourite. This was a bit underwhelming, as some of the beers I tried were really not good. On the positive side, I had a pretty good Berliner Weisse, of which I had two glasses and for which I eventually voted as my favourite. That was a pattern I noticed: a lot of home-brewers put a lot of focus on hazy IPAs and other beer styles, often with wonky adjuncts, while simple, straightforward, well-brewed classic styles were rather rare.
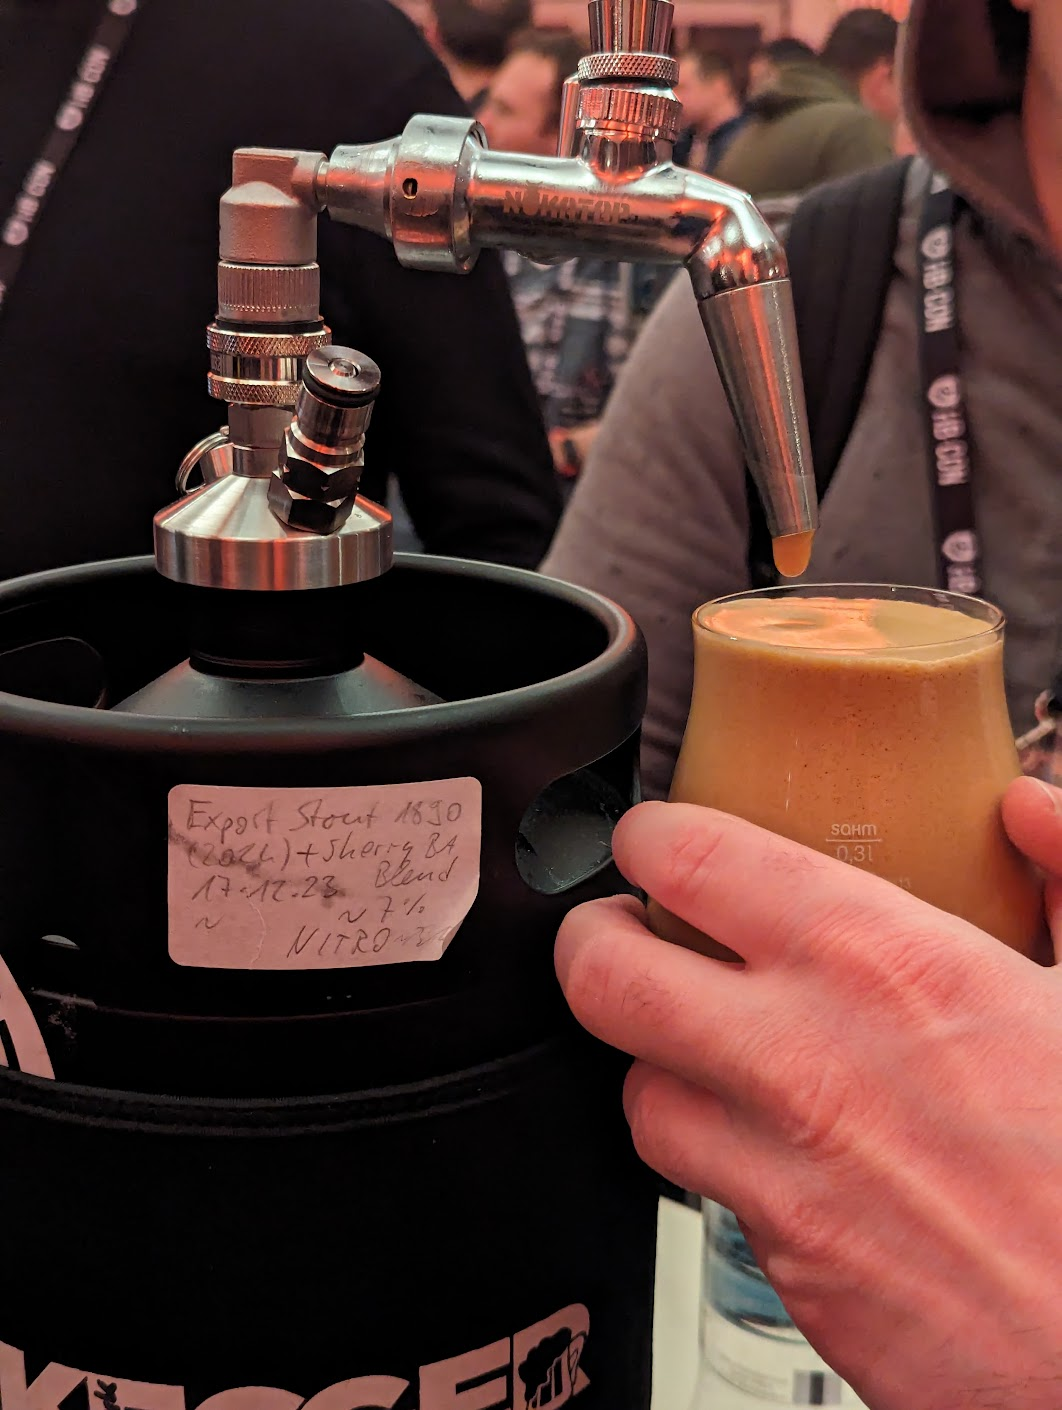
Frank Christian (@humble_beer) entertained us instead by serving a wide range of beers he had brewed himself, like the Truman 1890 Export Stout based on Ron Pattinson’s recipe served on nitro, a saison blended with lambic (if I recall correctly) and then left to age, and various other mixed fermentation and sour styles, all absolutely amazing.
A very small keg with tap, pouring a very foamy Truman Export Stout 1890 that had been blended with a barrel-aged version of the same beer.
I eventually called it a night, went back to my hotel room and went to sleep, so that I could be fit enough to get up for Sunday’s final event, the Weißwurst breakfast and the raffle. This was a wonderful finish to the whole event, everyone getting together for one last time, eating Weißwurst and a pretzel, drinking Hefeweizen (the options were Mönchsambacher Hefeweizen and Gutmann Hefeweizen, I chose the latter) and hoping to win in the raffle (I didn’t win anything, btw).
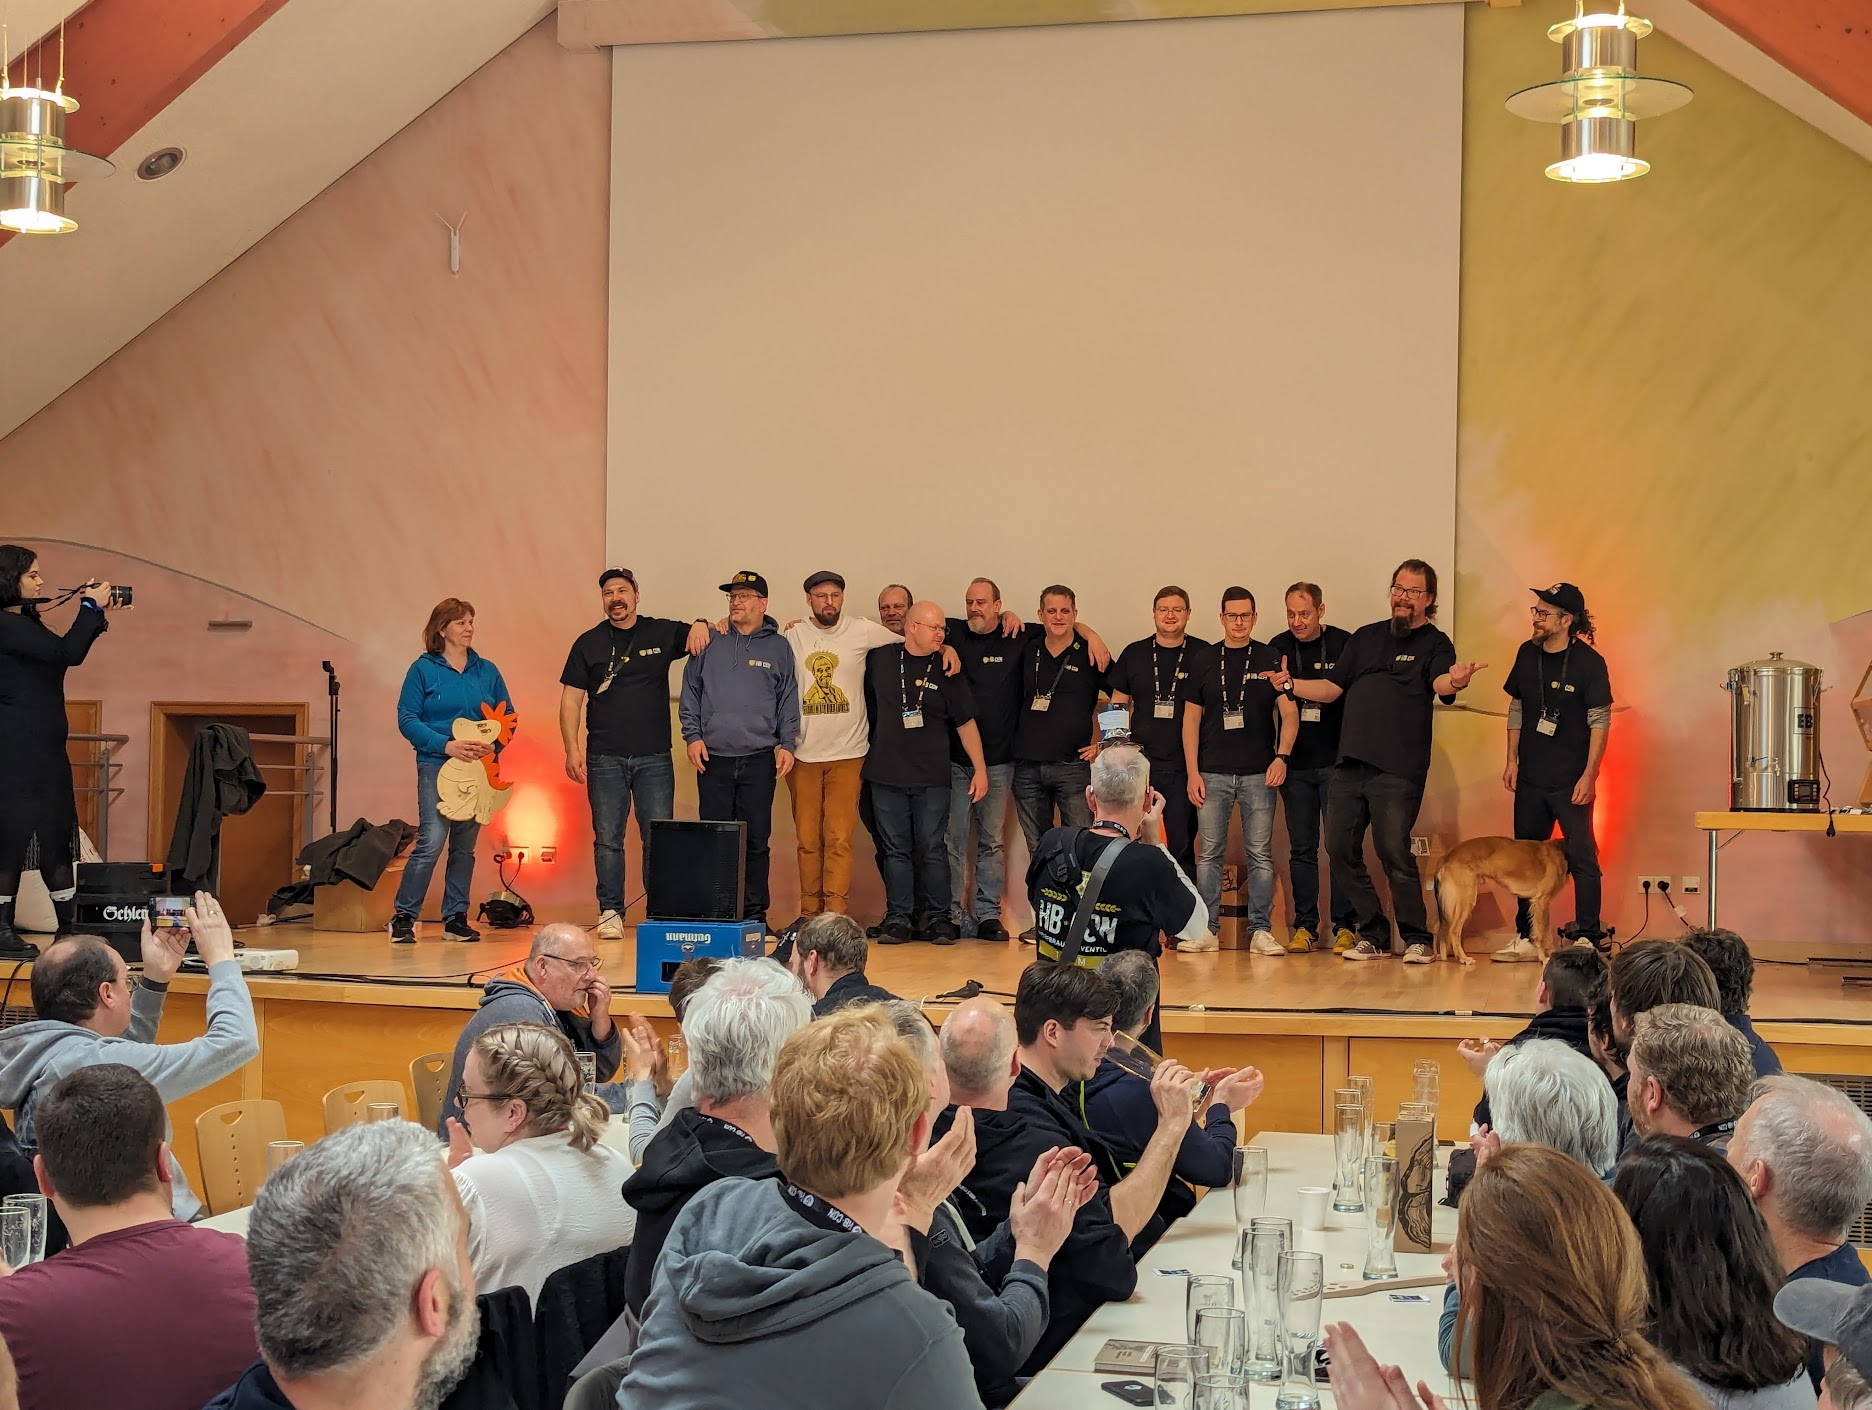
The HBCon organizers getting a big round of applause
Heading back home was a slight problem, but thanks to some friendly chaps at the conference, I got a hitch to the next train station so that I could catch my train. While waiting for my train, I actually ran into other home-brewers who had attended the event and had a bit of a chat. The rest of the journey was uneventful, and all I can say is that Fulda looks incredibly boring.
All in all, going to that event was a great experience. At the same time, if I hadn’t been invited, I’m not sure whether I would take part again on my own. Traveling to what feels like the middle of nowhere Hesse, Germany just took a long time, was stressful, booking a hotel room could potentially be quite pricey, and getting around is hard because public transport coverage is spotty. If traveling and staying there were easier, it would make it easier for me to decide to join in next year, even just as a regular audience member, maybe even a bit better prepared in terms of bringing and serving my own home-brewed beer.
You’ve probably heard the complaint before: craft beer is becoming monotonous, it’s all about IPA, most breweries just brew hazy bois with a few fruited sours and pastry stouts sprinkled in between, and if they feel extra special, a West Coast IPA. This is usually refuted with the argument that brewers just brew what pays the bills, it’s what people want to drink, etc., which is again countered with lamentation that other beer styles are dying out (ok, a bit hyperbolic) because nobody brews them anymore.
This is not a new phenomenon.
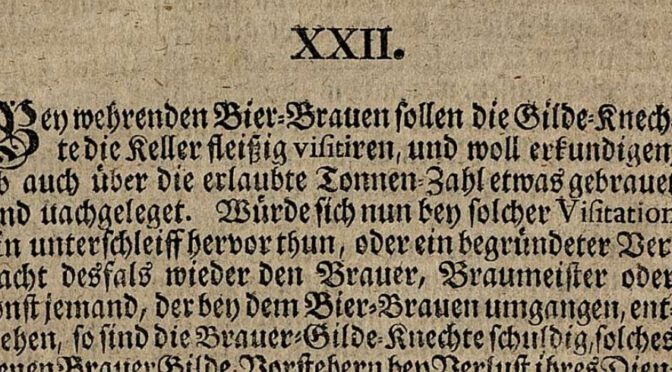
150 to 200 years, German beer and brewing experienced a massive shift. Small breweries were previously mostly brewing relatively small amounts of beer solely for the local market using little to no automation, brewers were organized in guilds, not interested in scaling out their businesses, and sometimes even bound by local law to brew and sell their beer on a rota (Reihebrauen). Then the industrial revolution came and destroyed a lot of these structures.
In some cases it was young brewers with an entrepreneurial spirit taking over from their fathers and looking to expand and grow it using modern technologies, in others it was simply trained brewers backed by money to start entirely new brewing companies with all the latest equipment and scientific knowledge to brew excellent beer.
Bottom-fermented beer became fashionable, and due to how it was produced and stored (at cold temperatures with a yeast that increased the sulphur content of the beer, two factors contributing to a more stable beer) the beer became more suitable for export. Export in this context simply meant shipping it further than what was the common “local” area, but innovations like the railroad made it possible to ship beer quite a bit further, and with the invention of ice waggons, some breweries were even able to establish proper cool chains (a famous example for that is the Dreher brewery in Kleinschwechat near Vienna which shipped ice-chilled lager beer from their brewery to the Paris Expo 1867, one delivery took just 5 days and was kept at a constant 4°C). The beer tasted clean, fresh and properly quenched the thirst of beer drinkers.
People started craving this fashionable beer, so naturally, the market adjusted to it, beer legislation was liberalized, and more brewers had the opportunity to enter the market and brew bottom-fermented beers. At the same time, the old-time breweries where “local beer for local people” had been brewed for hundreds of years, didn’t have the money to upgrade their equipment to brew these new-fangled beer styles, or even to make smoke-free malt like the new lager breweries were doing it.
Within just a few decades, a lot of small, local breweries simply shut down because they couldn’t compete, and local beer styles (German brewing literature at the often spoke of Lokalbiere) simply went extinct because nobody wanted to drink them anymore. A lot of these beers we only know by name these days, a few have been preserved in the form of recipes, though a lot of details like how specific malts were prepared are not so well documented, leaving more questions than answers.
When we look at Germany, which beer styles are prevalent (because craft beer is really just a teeny tiny 1% segment of the whole market) and which of these beer styles are from before the industrial revolution, it becomes apparent how bleak it really is.
To the best of my knowledge, the list is really short: Berliner Weisse, Bavarian Weißbier, Altbier and Kölsch (I like to group them as Rhenish Bitter Beers or Top-Fermented Lager Beers because they are more similar than different though people from Düsseldorf and Cologne may hate me for that), Leipziger Gose, and Bamberger smoked beer, and some of them did not fare too well in the last 70, 80 years and were only just rescued from dying out.
Berliner Weisse was still brewed by a few breweries in both East and West Berlin after World War 2. The biggest shock was probably when Schultheiss stopped brewing their traditional unboiled mixed-fermented version. Berliner Kindl Weisse, a very industrial beer brewed by fermenting a low-alcohol beer normally and blending it with another batch that was just fermented with lactic acid bacteria and then sterile-filtrated, thus became the only available brand on the market. In Berlin, the style was really only rescued by a few craft brewers, such as Andreas Bogk, BrewBaker, Lemke, Schneeeule, Berliner Berg, Vagabund, and others, who specifically intended not to let this piece of beer history die out.
Bavarian Weißbier was already a niche product when it again became permitted for private Bavarian brewers to brew with wheat again, and it only survived because of a relatively small group of connoisseurs, until the 1960s when it suddenly somehow became more fashionable again and thus had its revival.
Altbier and Kölsch were not particularly popular during the interwar period, and really only regained popularity after World War 2: Kölsch as it was marketed as a genuinely local beer, appealing to the hyperlocal patriotism in Cologne, while Düsseldorfer Altbier apparently only regained popularity in the 1960s. Münstersches Altbier, another Altbier style, really only exists in the form of one brewery, Pinkus Müller.
Leipziger Gose was actually functionally extinct from the early 1960s when the last Gose brewery shut its doors until the mid-1980s, and it could only be rebrewed and revived to its original taste because the East German brewers producing it could have it taste-tested by beer drinkers who still remembered it from before the 1960s.
And finally smoked beer. Even in Bamberg, this is kind of a niche product. Of the more than 10 breweries that are still around, only two still make their own smoked malt to brew their very own smoked beer, Brauerei Heller (Schlenkerla) and Brauerei Spezial. Greifenklau stopped their own kilning operation in the early 1970s, but fortunately is still around. Nowadays, they brew some smoked beer as a seasonal product, but their owning malting and kilning operation is long gone. And Polarbär brewery, which I like to call the fourth Bamberg smoked beer brewery isn’t operational since the 1950s or so.
And yet, none of these beer styles are truly extinct or even remotely in danger of going extinct. Why? Simply put, thanks to craft beer. Starting in the US, but now really all over the world, there are countless beer nerds who truly care about these old beer types, some rebrew them at home, others brew them commercially, making these beers that were definitely at the brink of extinction better known to beer drinkers all around the world.
Yes, there is some truth that IPAs and hazies are taking over, and yes, some breweries certainly struggle with that problem, because it’s what pays the bills. “The customer is king”, and it would not make sense economically to brew a beer that would not be as popular and thus not sell as well. In the end, IPAs keep the other styles afloat, as the money earned through them gives brewers some freedom to also try out other styles. Styles that used to extremely local to just small regions of Germany have now gained worldwide fame. Even 50 years ago, this probably would have been mostly unthinkable.
A few years back, I wrote about the demise of Upper Austrian hop growing. At the time, I was wondering what variety these local hops were. With the annexation of the Bohemian hop growing regions, the Upper Austrian hops all got uprooted, and only after World War 2, new hop of different varieties were planted. My research into Styrian hops about 3 weeks ago motivated me to also look into Upper Austrian hops in the same way, looking at what newspapers wrote about them.
In 1863, about 6000 Zentner of hops (1 Zentner = 100 kg) were grown in the Upper Austrian districts of Aigen, Haslach, Lembach, Neufelden and Rohrbach, all located in the Western part of Mühlviertel. That particular article is very insightful about what hops were grown: it mentions both “green” and “red” hops, referring to green bine and red bine hops. The quality of the green bine hops was allegedly very good, with a high amount of lupulin, and comparable to red bine hops from Auscha/Úštěk, while the Upper Autrian red bine hops were between Auscha/Úštěk red bine hops and green bine hops from. It apparently also preserved the beer very well until late into the season, the only complaint was that the prices paid for the hops were very low compared to the quality, especially in relation to the quality and prices paid for Auscha/Úštěk hops.
In an 1868 article, the same issue is being mentioned: Upper Austrian hop growers knew that their product had a good quality, but felt like they didn’t get nearly the right amount of money for it. This article defends the profitability of hop growing even at the prices at the time by calculating quite in detail how much you need to spend on growing hops, and how much revenue you’ll get out of it.
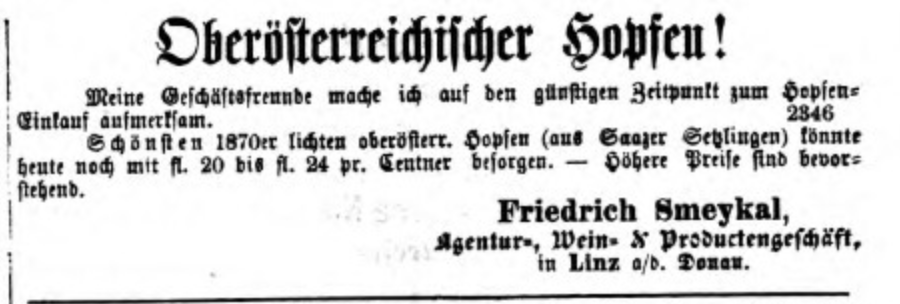
An 1871 ad gives us more insight into what variety at least some of these hops were. A trader from Linz advertised Upper Austrian hops from the 1870 harvest for 20-24 fl. per Zentner, and mentions that it was grown from Saazer seedlings. It is not clear whether this was the case for just this batch of hops, or whether this applied also to most if not all other hops grown in Upper Austria at the time.
An 1871 ad advertising Upper Austrian hops grown from Saazer seedlings.
The same trader, Friedrich Smeykal, reported in 1872 that he sold several hop bales of 1869 and 1870 harvest to a London hop trading house, which required him to prepare and package the hops in a particular way. To demonstrate this, he presented several bales at an exhibition of a local folk festival, as it could keep hops fresh and aromatic for several years. We unfortunately do not actually learn what that particular method was.
As mentioned earlier, the Upper Austrian hop grower were discontent with the prices that they were paid for their hops. An 1869 article claimed that hop growers were only paid 60 fl. for their hops, while at the same time, Upper Austrian hops were traded in Saaz for 90 to 100 fl. This is blamed specifically on Jewish hop traders, who the anonymous author accuses of arranging with each other, thus controlling the prices. The same author suggests that hop growers should form an association to centrally control the sales of Upper Austrian hops, thus having more leverage to dictate prices.
This article was immediately contradicted by an expert who specifically pointed out in a letter to the editor that on the day the article was published, Upper Austrian hops traded at 62 to 64 fl. in Nuremberg, while hops in Neufelden (where Upper Austrian hops were traded wholesale) were sold for up to 70 fl. The editors added a note to the letter, claiming that the author, although only anonymously signed as “an expert”, was a Jewish hop trader.
About a month later, another article was published in a different newspaper, denouncing the initial reports as wrong, not only correcting the wrong price information, but also scalding the use of defamatory, antisemitic language.
Similar to what I described in my previous article about Styrian hops and how they were bought up, repackaged, and resold as “Saazer” hops, reports about similar transactions also surfaced about Upper Austrian hops. Most of these reports are again specifically blaming Jewish hop traders, like this report from 1884 or this article from 1888. One article from 1885 even claims how this relabeling was allegedly discovered in one instance: an Upper Austrian brewer had purchased bales of Saazer hops, and when they opened one of them, they found a knife in it and were surprised to see the name of a local hop grower written on it.
In reality, the situation often wasn’t quite as bad. In January 1873, pretty much all Upper Austrian hops were already sold out in Nuremberg, showing that it must have been a popular product where demand must have outstripped supply. In January 1877, Upper Austrian hops even sold for significantly more (430-460 Mark) in Nuremberg than Saazer city hops (375 Mark), showing that the 1876 harvest must have been of even higher quality than the Saazer hops.
Not everybody only blamed Jewish hop traders, though. In one letter to the editor (published anonymously) from 1884, the anonymous author primarily blamed “Czechization” for local hops getting bought up for cheap by Bohemian hop traders, who then ship it back to Bohemia, “nationalize” it, rebrand it, and sell it back to Austrian brewers under different names instead of their actual geographic origin of Upper Austria resp. Mühlviertel.
All in all, the amounts of hops grown in Upper Austria during the 19th and early 20th century were never particularly large, and with the dominance of Bohemian hops in the Austrian and European hop trade, they never established themselves as a “big name”, while still being able to compete with their relatively small amounts through quality.
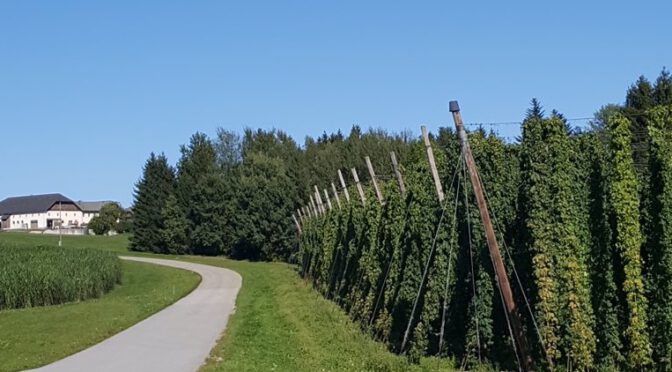
Hop growing in Mühlviertel has fortunately been revived after World War 2, but the original hop varieties are nowhere to be found. Instead, hop growing restarted with the originally English variety Malling Mid-Season, grown in Austria simply as Malling, with more varieties that were added later on. Nowadays, you can even get Upper Austrian “Golding”, which is really Fuggles because it’s Styrian Goldings with an Upper Austrian terroir, as well as other varieties such as Aurora (also brought in from Slovenia), Perle, Tradition, Hersbrücker spät, Saphir, Spalter Select, Tettnanger, Magnum, Taurus, and even more craft-y “flavour hop” varieties such as Cascade, Comet and Sorachi Ace. And unlike back in the day, marketing and direct sales are nowadays also handled by the hop growers themselves. At less than €30 per kg for T90 pellets of last year’s harvest, I’m considering directly buying Malling hops or maybe Cascade hops for a future brew.
In a recent conversation I had with Michel Stenzel of Schlossbrauerei Hundisburg, the topic of Styrian hops (steirischer Hopfen) came up. I didn’t know too much other than that most of the hop growing nowadays of what used to be Styria is happening in Slovenia today, while in Austria, only a small hop growing agriculture in Leutschach has survived (or rather, was reestablished after World War 2, like Upper Austrian hop growing) with as little acreage as 80 ha (for comparison: in Hallertau, the total hop acreage amounts to 17,100 ha).
What is also well-known is that the “classic” hop variety from Slovenia is Styrian Golding, nowadays more commonly marketed as Styrian Savinjski Golding, referring to the Savinja region of Slovenia. Styrian Golding started off as cultivar of Fuggle hops getting planted in the region.
Prior to that, Styria had its own native hop variety, simply known as “Steirischer” (i.e. Styrian). In his 1930 Handbuch der Brauerei und Mälzerei, Prof. Franz Schönfeld listed Steirischer as a descendant of Saazer (žatecký poloraný červeňák) hops, together with Schwetzinger, Tettnanger, Neutomischler (Nowotomyski) and Auschaer Rothopfen (red bine hops from Uštěk). This old variety was eventually replaced with the more disease-resistant Styrian/Savinjski Golding hops, I wrote about this before.
Doing a bit more research (basically just checking old newspapers for mentions of Styrian hops), I came across something interesting: Styrian hops weren’t particularly well known in the 1850s and 1860s. Nevertheless, the hops found buyers: in October 1858, a Graz newspaper reported something previously unheard: bales of local Styrian hops getting sent by train to Bohemia, the #1 hop growing region of the Austrian Empire at the time. In the middle of the 19th century, Styrian hops still had a major reputation issue: the quality was fine, and price-wise Styrian hops sold at roughly the same price as Auschaer hops, but once buyers knew they were Styrian hops, they weren’t interested anymore, even when they were packed in Saaz bags.
That last bit got me interested. Styrian hops in Saaz bags? Yes, that was a thing, apparently. In 1866, Bohemian hop traders came to Styria, bought over 800 bales of hops while outbidding local buyers, repackaged them into Saaz bags they had brought themselves, and shipped the hops back to Bohemia. Quality-wise, the hops were absolutely comparable with Saaz hops, except you needed 40% more hops (7 Pfund instead of 5 for a 40 Eimer batch of beer), indicating a lower alpha acid content.
Once Styrian hops were sold under their own name, they actually fared really well. This happened first in 1875, and the German Hop Association considered it to be the best hop variety right behind Saaz city hops (meaning the Saaz hops were grown on city ground and not somewhere in the surrounding district). Besides its fine qualities, it also went to market earlier than other hop varieties, which was a great advantage and got Styrian hop farmers to achieve some of the highest prices.
The virtual equality of Saaz hops and Styrian hops also shows in 1877 pricing, where Saazer, Spalter and Styrian hops all sold for the same price, though in that year, neither of these varieties were the most expensive ones.
Still, the fact that Bohemian hop traders would repackage Styrian hops and sell it as Saazer hops seems like a dubious business practice. They probably did it because they knew that the quality was perfectly fine, that customers would not be able to smell or taste the difference, but they basically arbitraged by misrepresenting the origin of the hops. Due to the poor (but unwarranted) reputation of Styrian hops, this misrepresentation was material to the price that could be charged for them. In my book, that’s fraud.
Interestingly, this is not even the first time I came across accusations of fraudulent misrepresentation of hops. In his 1818 book Das Bamberger Bier, Johann Seifert claimed that he had witnessed how hops had been bought in Amberg (east of Nuremberg), brought over the border into Bohemia, and then reimported into Bavaria with a Bohemian hop seal on the bales. He was very critical of a supposed superiority of Bohemian hops, and tried to get brewers to use cheaper local hops of the same quality instead of potentially getting defrauded with “Bohemian” hops that were actually grown near Nuremberg.